Resume Fields In The WP Job Portal!
The Custom Resume Fields feature in WP Job Portal allows administrators to create additional fields for resume postings beyond the default fields provided by the system. This feature gives jobseekers the flexibility to collect and display specific information that is important for their recruitment process. Custom fields can be added to the resume submission form and displayed on the resume detail page, making resume listings more informative and tailored to business needs.
The Custom Resume Fields feature improves flexibility and customization within WP Job Portal. Instead of being limited to standard resume information, job seekers can gather industry-specific details and present more accurate resume descriptions.
Lastly, let’s dive into the process of adding custom fields to your resume form to gather more specific information from job seekers and tailor resume postings to your needs.
Resume Fields
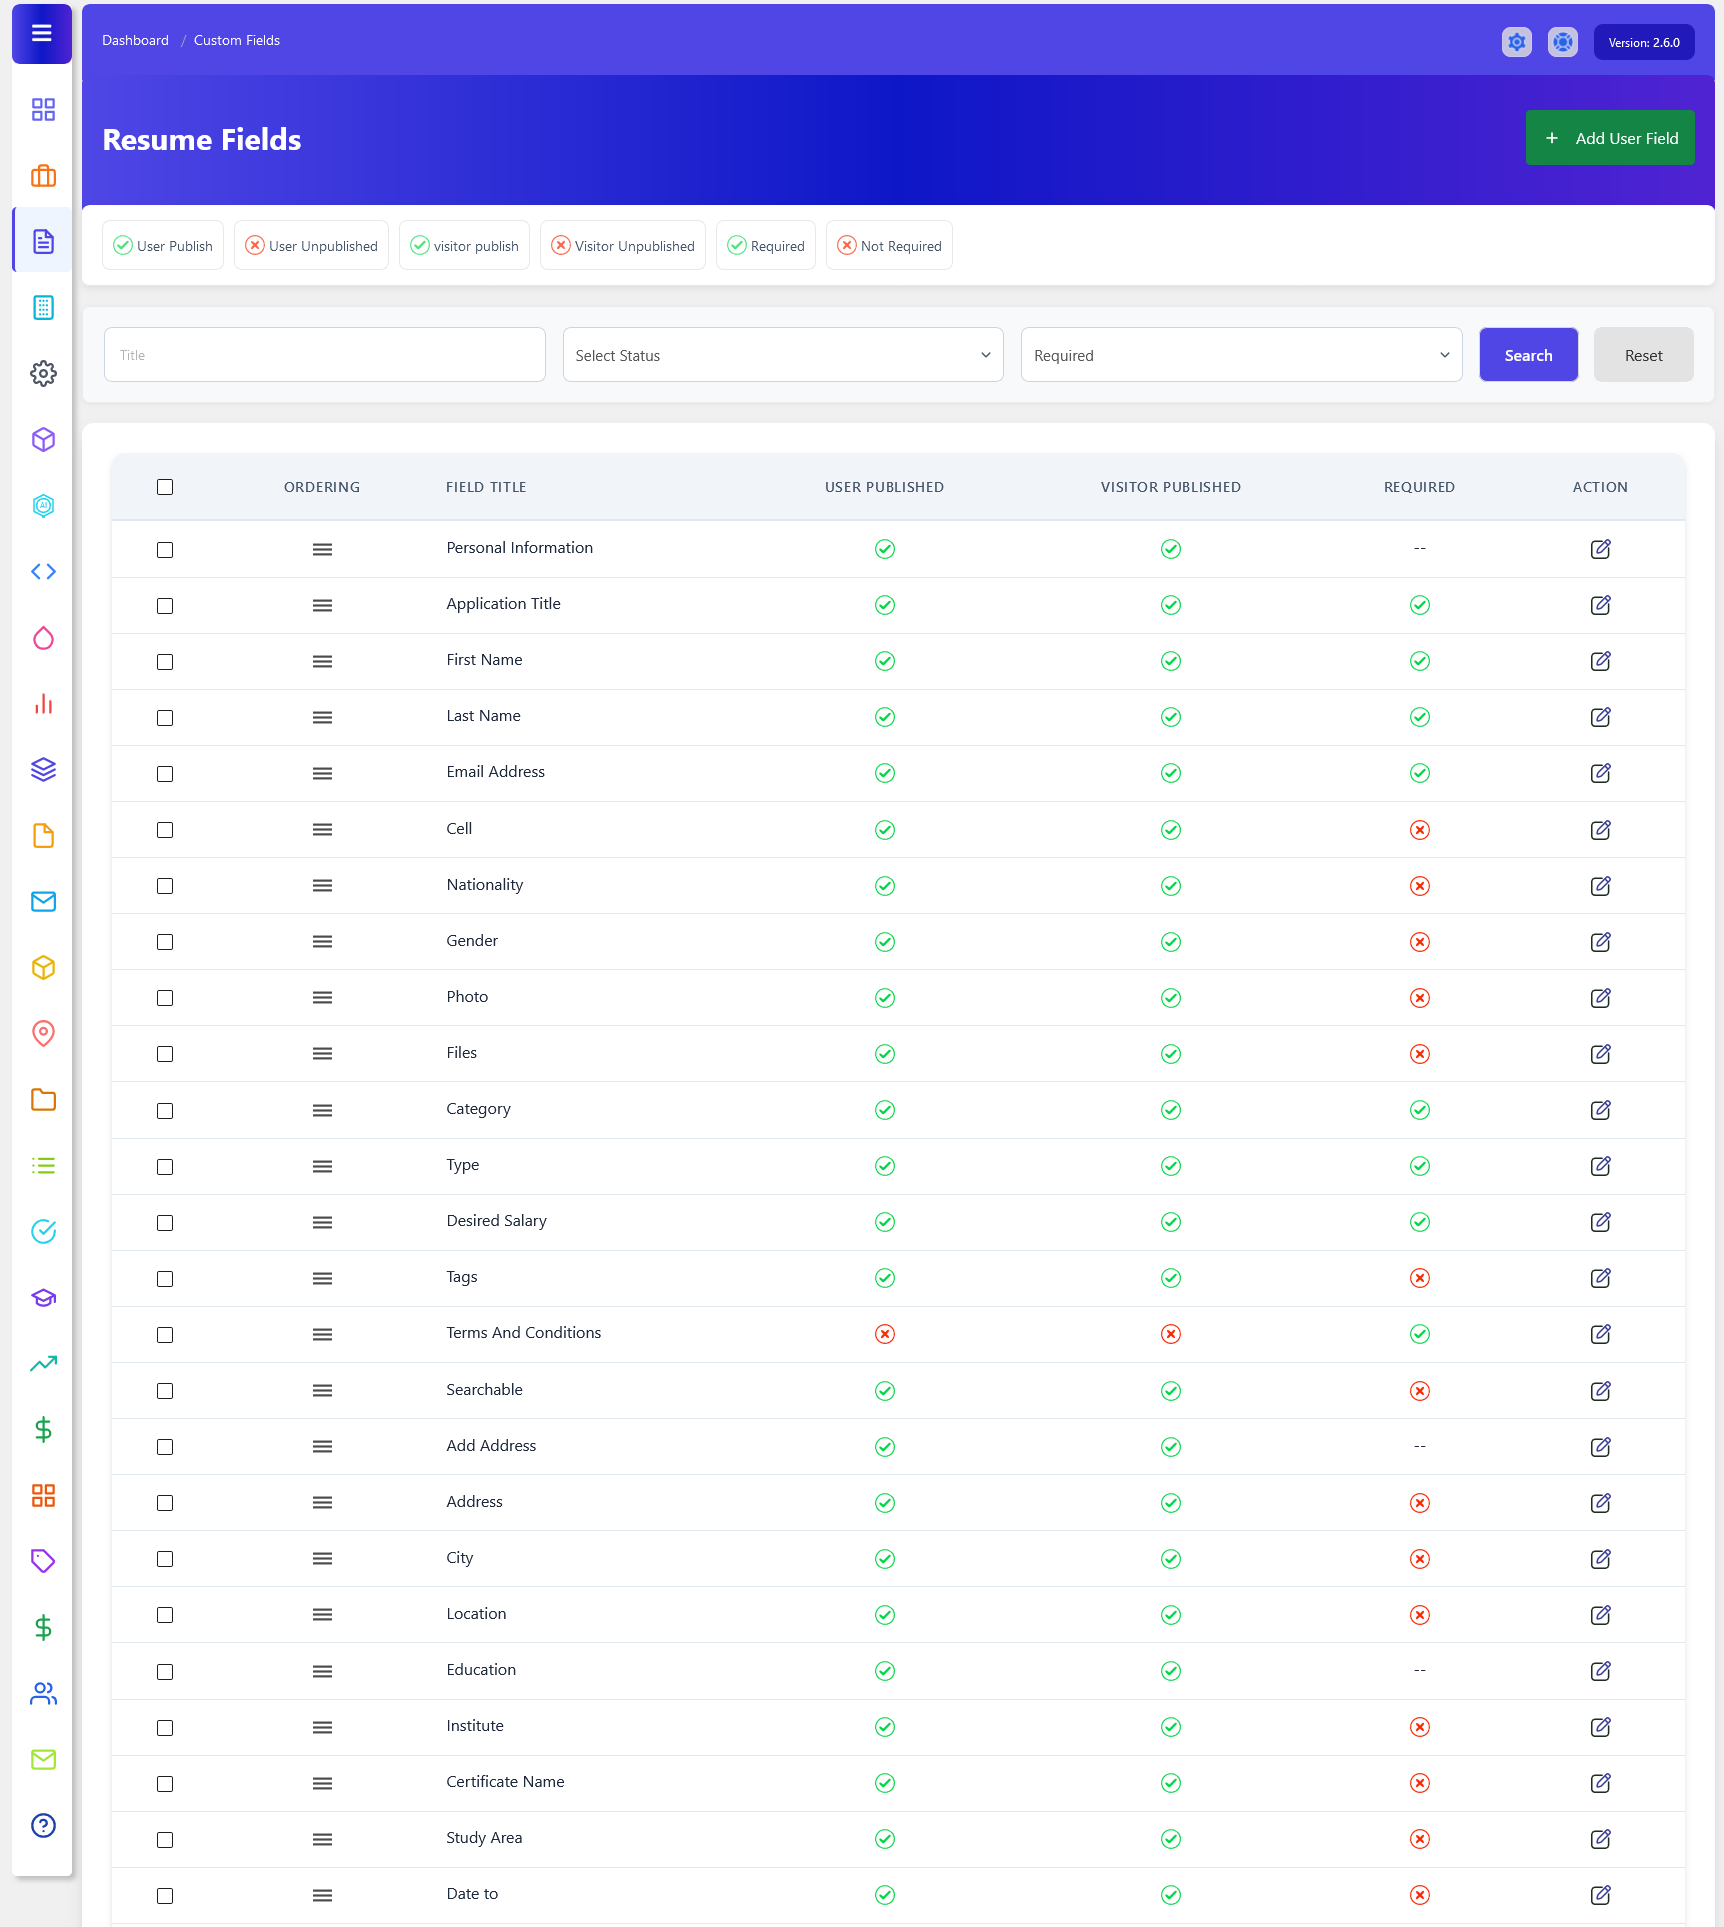
As an administrator, navigate to Admin Dashboard > Dashboard Menu > Resumes > Fields. To add a new field, click “Add User Field” on your field management screen.
The Resume Fields section in WP Job Portal allows administrators to manage the fields that appear on the Add Resume and Edit Job forms. This feature provides complete control over which resume information is displayed, whether a field is required, and who can view it. By customizing resume fields, administrators can tailor the resume posting process to meet the specific requirements of their organization or industry.
Each field in the resume Fields list represents a piece of information that can be collected when creating a resume. Administrators can decide which fields are necessary and how they should behave during resume submission.
- The User Published option determines whether a field is visible to job seekers when they create or edit a resume. If this option is enabled, job seekers can enter information into that field.
- The Visitor Published option controls whether the field is displayed on the public resume detail page for job seekers.
- The Required setting allows administrators to make specific fields mandatory. When a field is marked as required, job seekers must provide a value before they can submit the resume.
- The Edit action enables modifications to the field.
The Add User Field button allows administrators to create completely new custom fields.
Add User Field
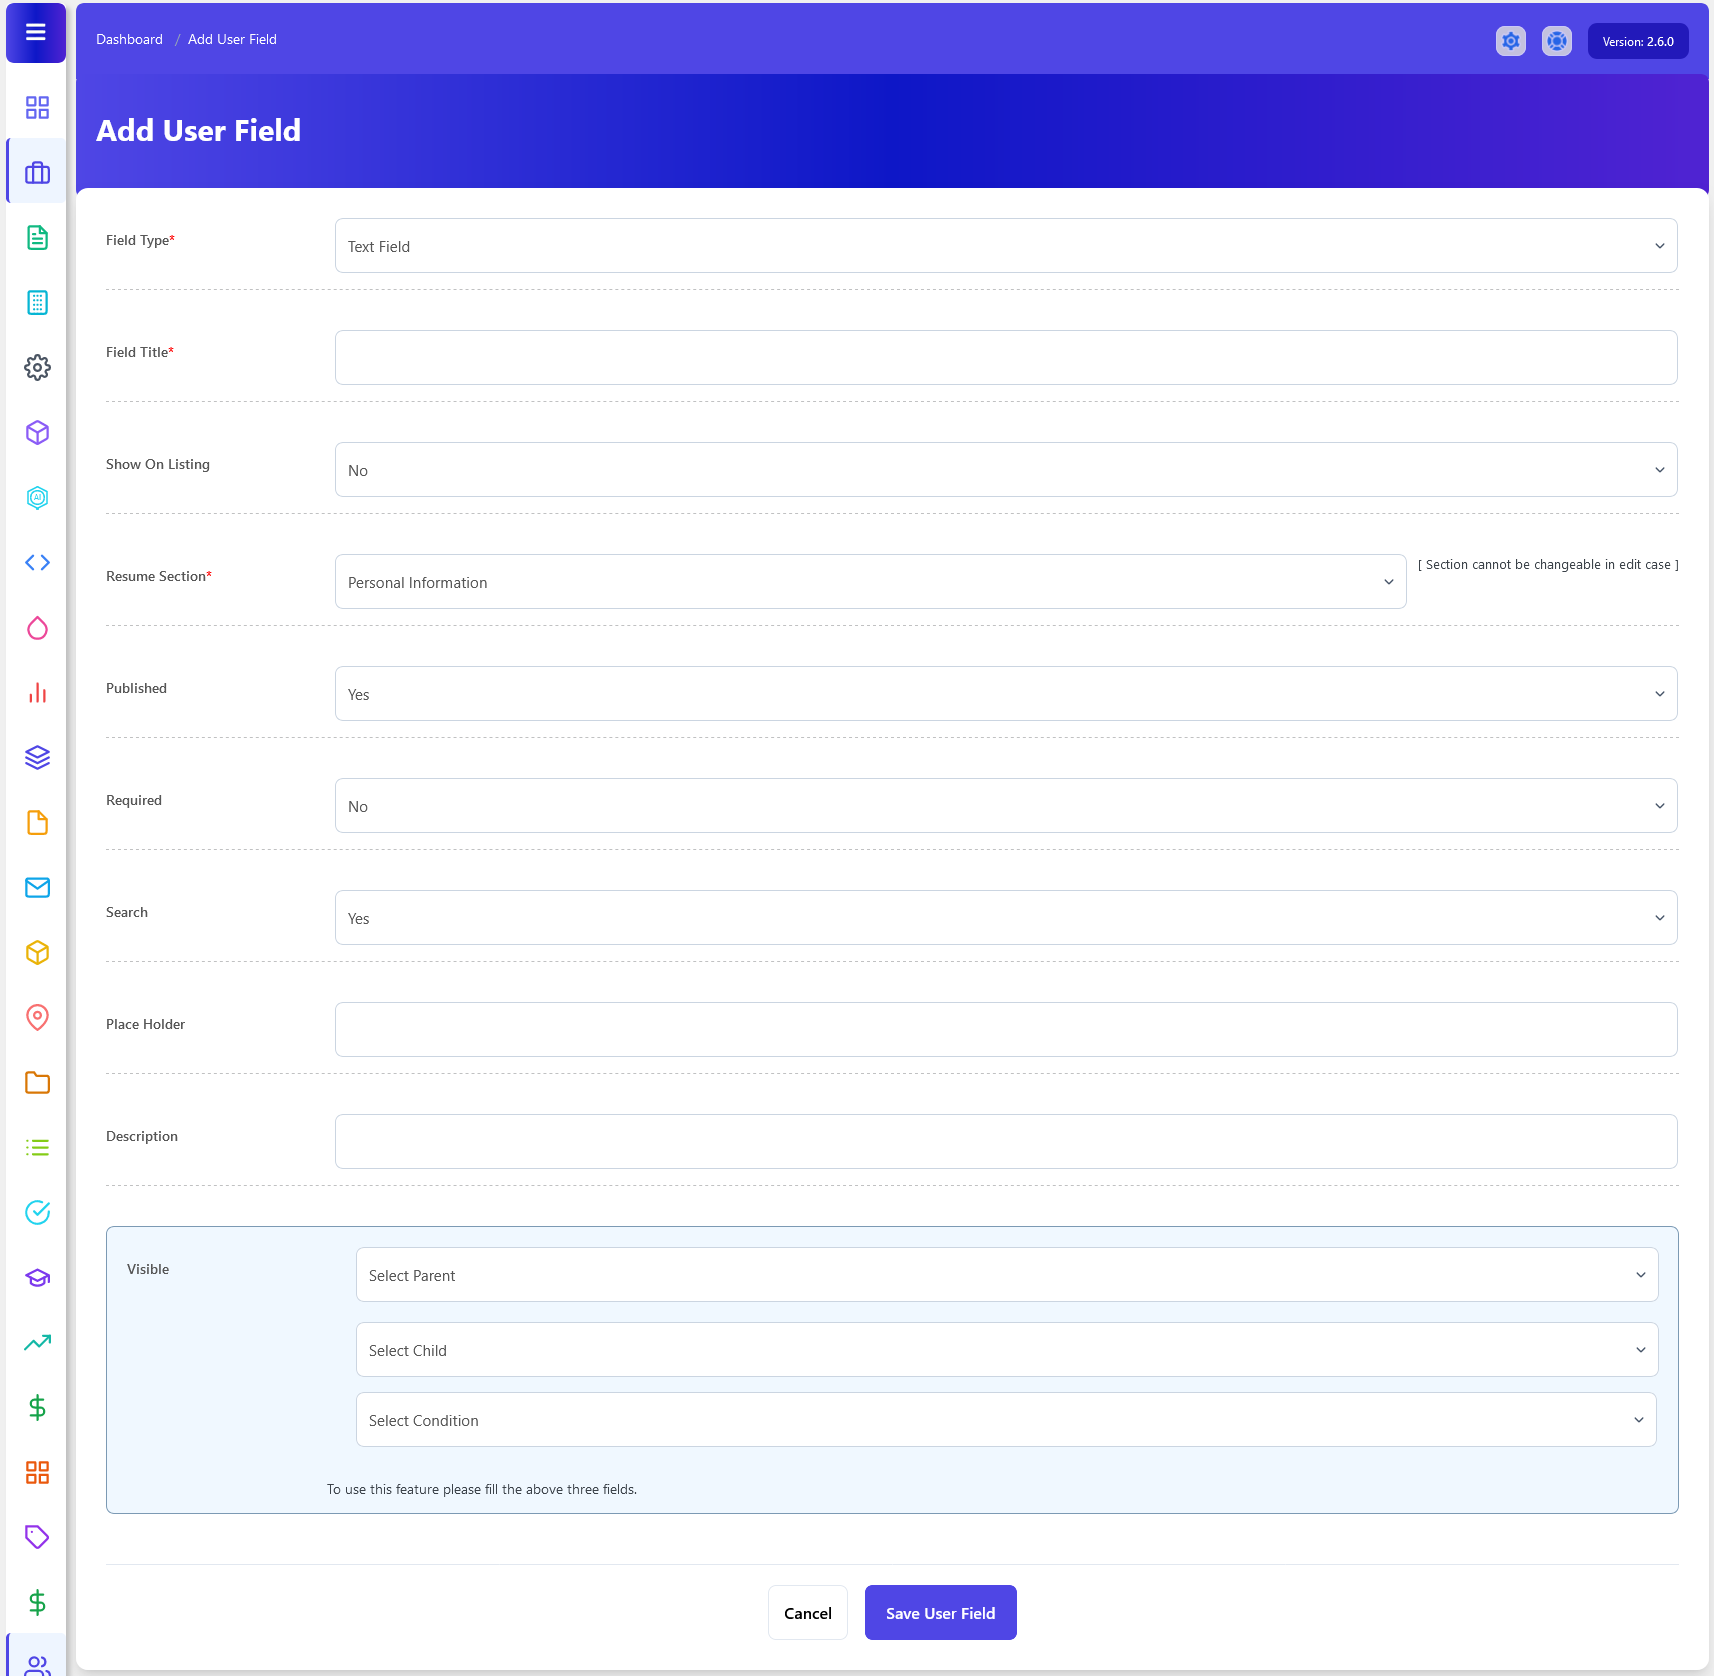
- On this screen, you can start by choosing the field type that suits your requirements. WP Job Portal supports different types of custom fields, including Text Fields, Text Areas, Drop-Down Lists, Checkboxes, Radio Buttons, Date Fields, Email Address, File Upload, and Multiple Selection Fields.
- After selecting the field type, provide a unique name for your field title.
- Furthermore, you have some options related to the field that you can implement for users, such as choosing whether this field should be visible on the resume listing page. If selected “YES”, it will appear alongside the resume details in the resume listing.
- In the Published field, you can also decide whether to display this field on the resume form or not.
- Another important choice is whether to make this field required. Setting it as “required” ensures that a resume can’t be submitted without filling in this field.
- Searchable custom fields can also be used in resume searches, helping employers find opportunities that match specific requirements.
- Once you’ve defined all the field details, simply click the “Save Field” button. Your new field will now be added to the list of fields and will be visible on the resume form.
Visible User Fields

Let’s now add one more field of a different type.
- To add a new one, we’ll begin by making a field selection. In this case, let’s choose a drop-down field.
- After the field selection, provide it with a relevant name.
- Similarly, you can decide whether this field should appear on the resume listing and resume form.
- Setting it as “required” ensures that a resume can’t be created without filling in this field.
- Next, proceed to add the corresponding values for the drop-down field.
- For added personalization, you can set visibility conditions for the field. These conditions depend on three parameters: ‘parent,’ ‘child,’ and the specific condition.
- After setting up parameters related to the field, save the field. The field has been successfully created and will now be available on the resume form.
Fields Ordering
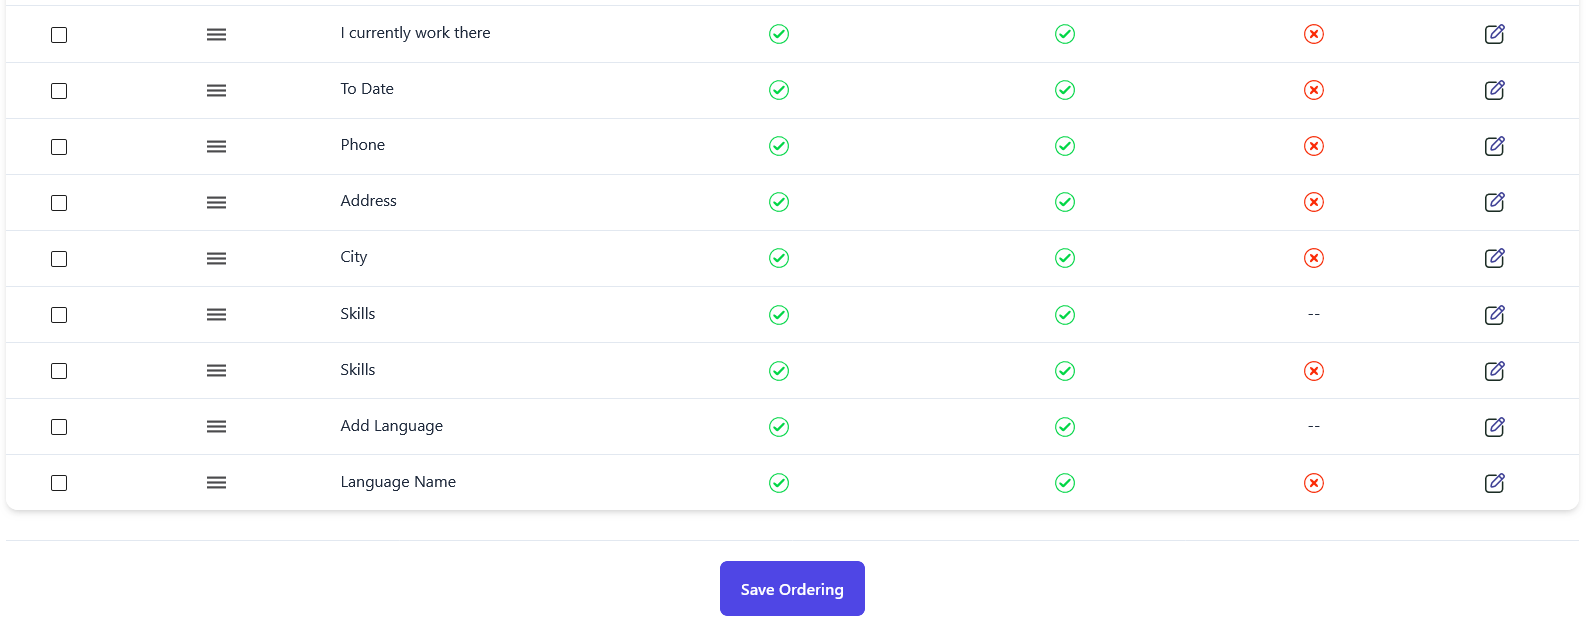
You can also adjust the order of your custom fields on the resume form, deciding where you want to show these fields. Once you change the field order and save it, the fields on the resume form will align with your preferences. And that’s it! By following these comprehensive steps, you can customize your resume forms with additional fields to suit your needs.