Message Approval Queue In The WP Job Portal!
Configure Message Auto Approve

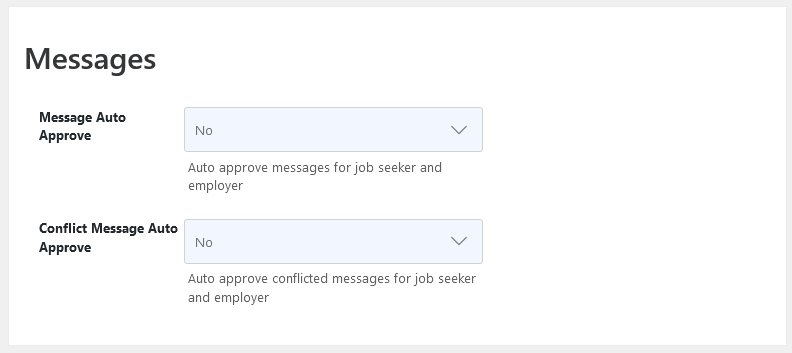
Start by navigating to Admin Dashboard → Dashboard Menu → Configurations → General Settings → Messages. If Messages Auto Approve is set to “YES”, the Messages will be published without administrator approval. However, if it’s set to “NO”, the Messages will require admin approval before publication.
Message – From Employer Side

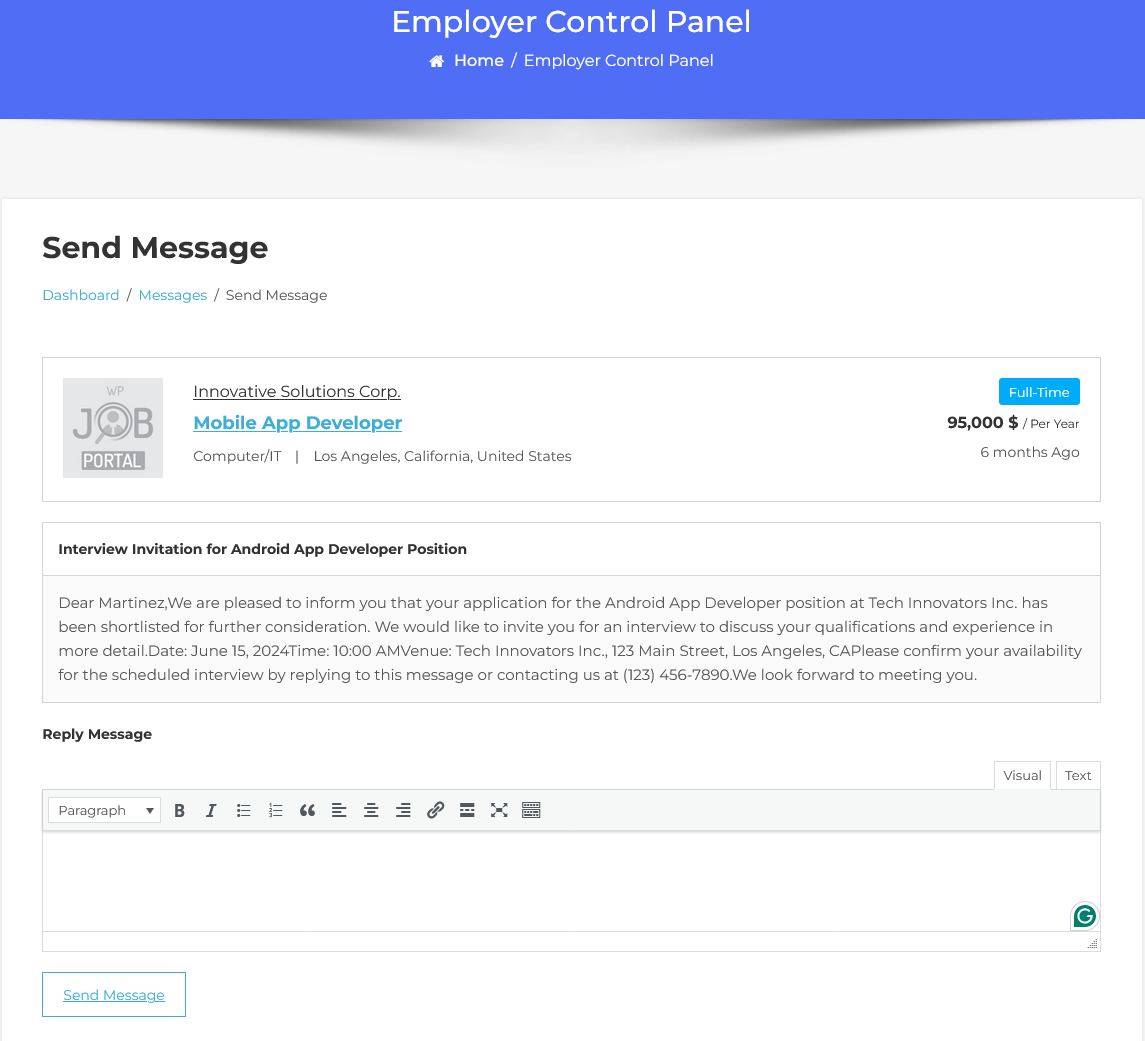
To start, fill out the message form with the necessary details. Once completed, click the Send Message button. The message will then be successfully saved.

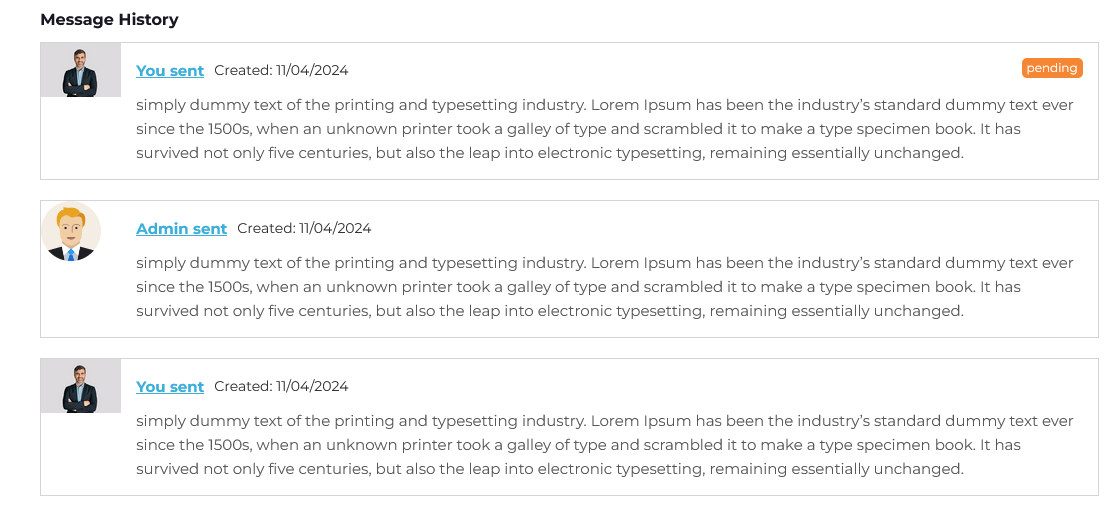
It displays a list of Messages added by the employer, showing details such as the name and status. The message status will appear as “Pending” indicating that it has been created but not yet published. Administrator approval is required to make the message live.
Messages Approval Queue – Admin Side

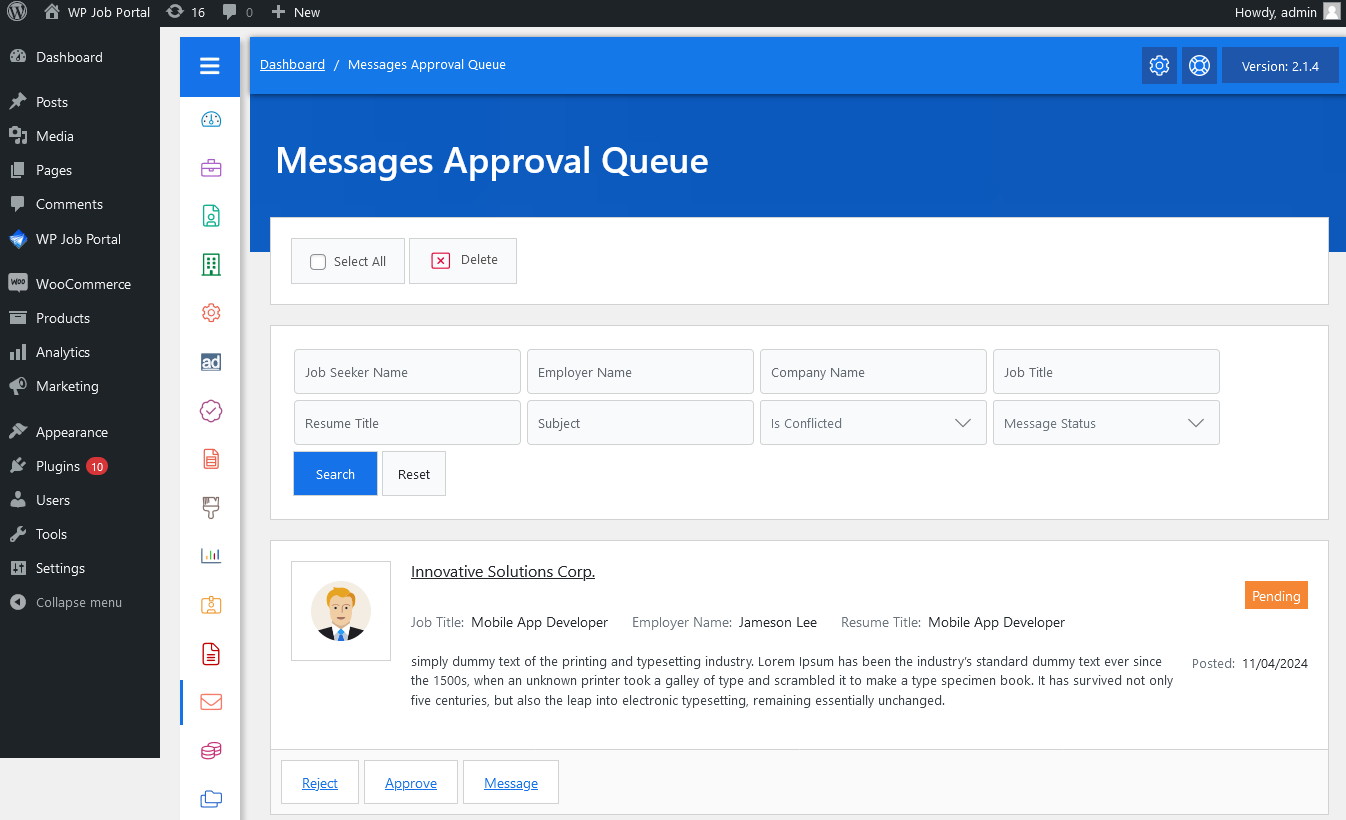
To approve messages, navigate to the Admin Dashboard → Dashboard Menu → Messages → Approval Queue. In the approval queue, you’ll find a list of messages “waiting for approval”. You can search and filter messages based on jobseeker name, employer name, company name, job title, resume title, subject, and message status. There are action buttons to perform actions like approving or rejecting. Admins can approve a message by clicking the “Approve” button, which changes its status to approved and publishes it. If the “Reject” button is clicked, the message is marked as rejected. Multiple messages can be processed simultaneously by selecting them via check boxes and using the action buttons at the top left.


