Cities In The WP Job Portal!
Cities

From your admin dashboard, navigate to the Admin Dashboard–> Dashboard Menu–> States–> Click On Cities. On the cities page, you will find various options that the admin can use to manage the cities.
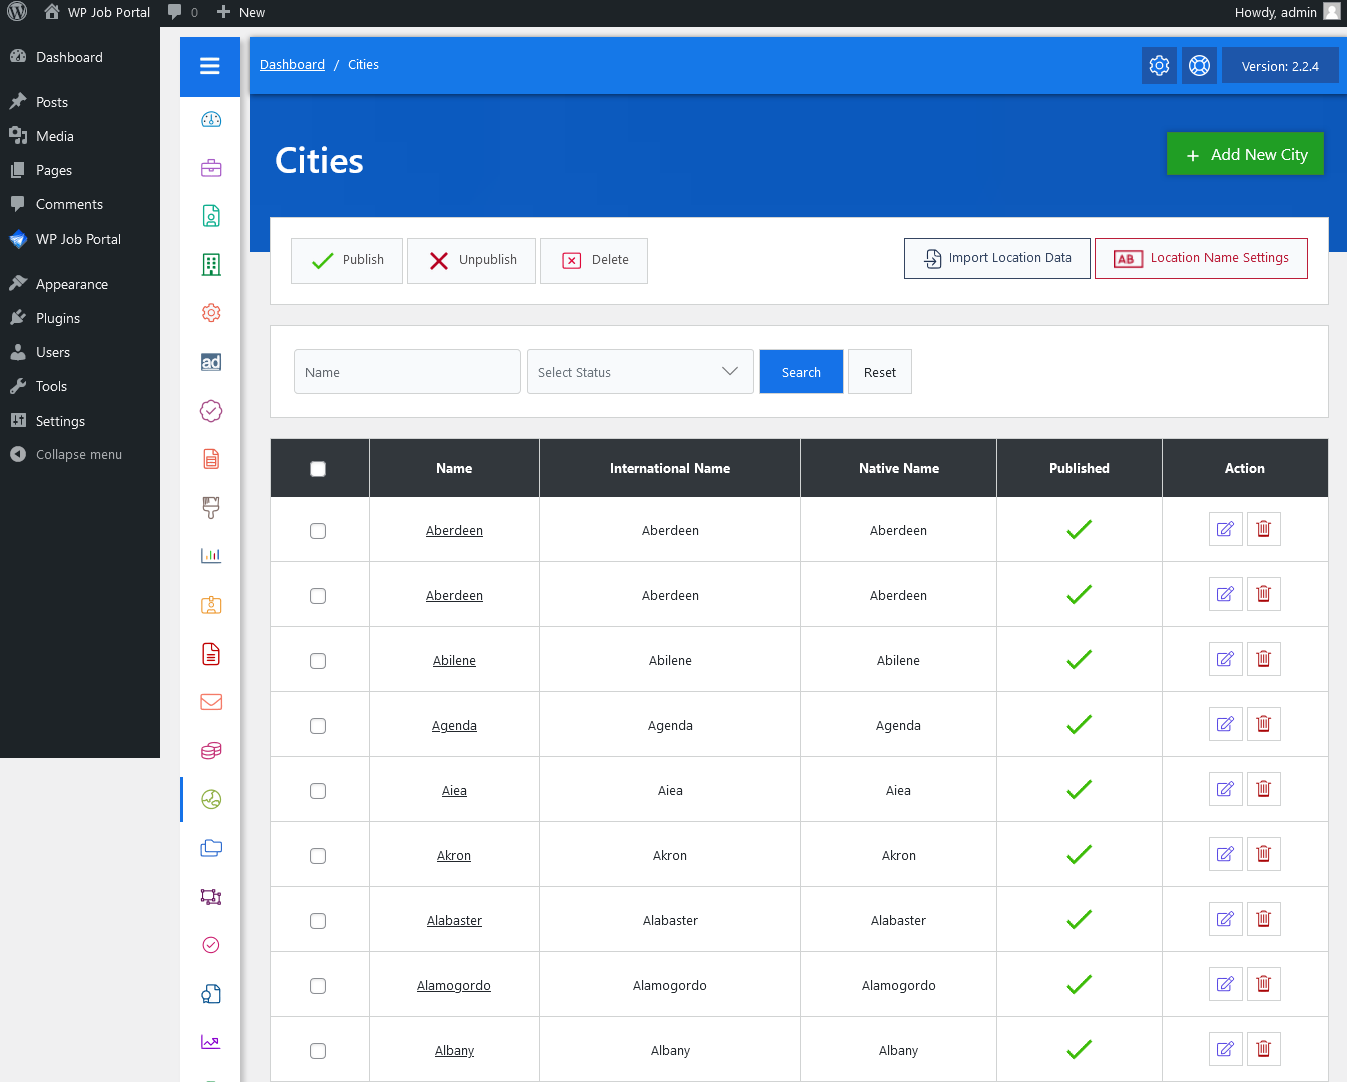
It displays a list of cities added by the admin. Each city has a city, name, international name, native name, city status (e.g., “Status: Published, Unpublished”), and action buttons. There are options to edit and delete the city. Admin can filter records based on name and status (published, unpublished). When the admin uses a filter only records that fulfill his provided criteria are shown on the page. The reset button will disable filter criteria and show all records. At the top left of the page, there are action buttons that can be used for performing different actions on single or multiple (using check boxes) cities at a time. The available buttons are Published, Unpublished, and Deleted.

Represents an individual record. It has a city name, international name, native name status (Published, Unpublished), and actions for the city.
- Name: The name is the text of how the city will appear in the combo box or as the value on (views and listings).
- International Name: The international name means the city will be shown in the English language.
- Native Name: The native name means the city will be shown in their native language.
- Status: The status of the city controls whether that city will appear in auto auto-complete input box of location on forms or not.
Additionally, there’s an option to “Add New City” at the top right of the “City” page.


