How to Setup WP Job Portal!
This article will guide you through setting up the WP Job Portal plugin, covering the installation process, initial setup, and customizing configurations to your job board for your specific needs. So we guide step-by-step the WP Job Portal plugin to meet your needs and requirements.
Installation Process
Installing the WP Job Portal Plugin
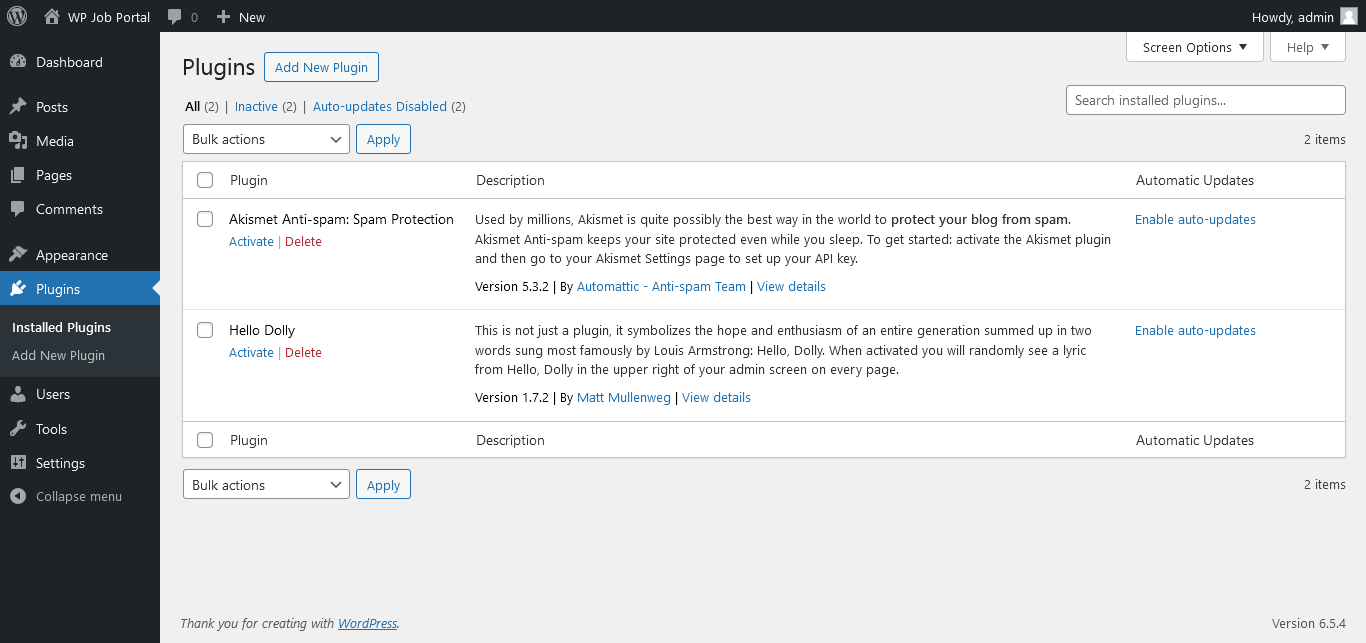
- Log in to your WordPress Dashboard.
- Navigate to the Plugins option in your dashboard menu.
- Click on the Add New button.
- In the search bar, type “WP Job Portal” and press Enter.
- Locate the plugin in the list and click on Install Now.
- Once the installation is complete, click on Activate to enable the plugin.
Your WP Job Portal plugin is now successfully installed and activated!
Initial Setup
Once the plugin is active, it will prompt you for some initial setup configurations.
Quick Start
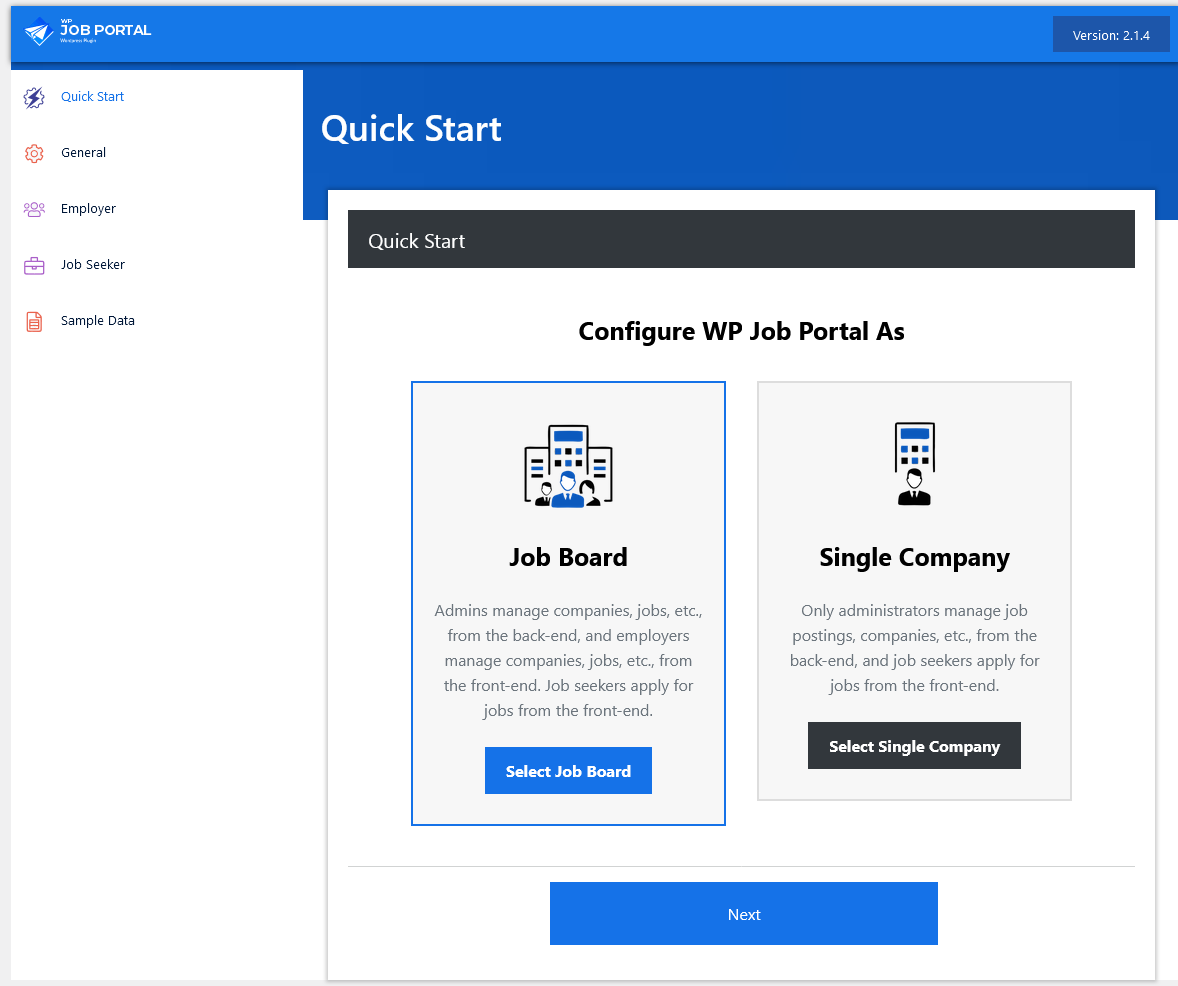
This page will help you decide the structure of your job portal by choosing between two options: a Job Board or a Single Company.
Job Board Setup
- Admins: Manage companies, job postings, and other administrative tasks from the back end.
- Employers: Handle company-related tasks and job postings from the front end.
- Job Seekers: Apply for jobs and manage their resumes from the front end.
- Ideal For: Multi-company job portals with multiple employers posting job vacancies.
Single Company Setup
- Admins: Handle all job postings, company information, and administrative tasks from the back end.
- Job Seekers: Apply for jobs and manage their resumes from the front end.
- Ideal For: Job portals dedicated to a single organization, providing full control over job postings and company information.
After selecting your preferred setup, proceed with the remaining steps to finalize the initial configuration of your WP Job Portal plugin. This will ensure your job portal is customized for an optimal experience for both employers and job seekers.
General Settings Overview for WP Job Portal
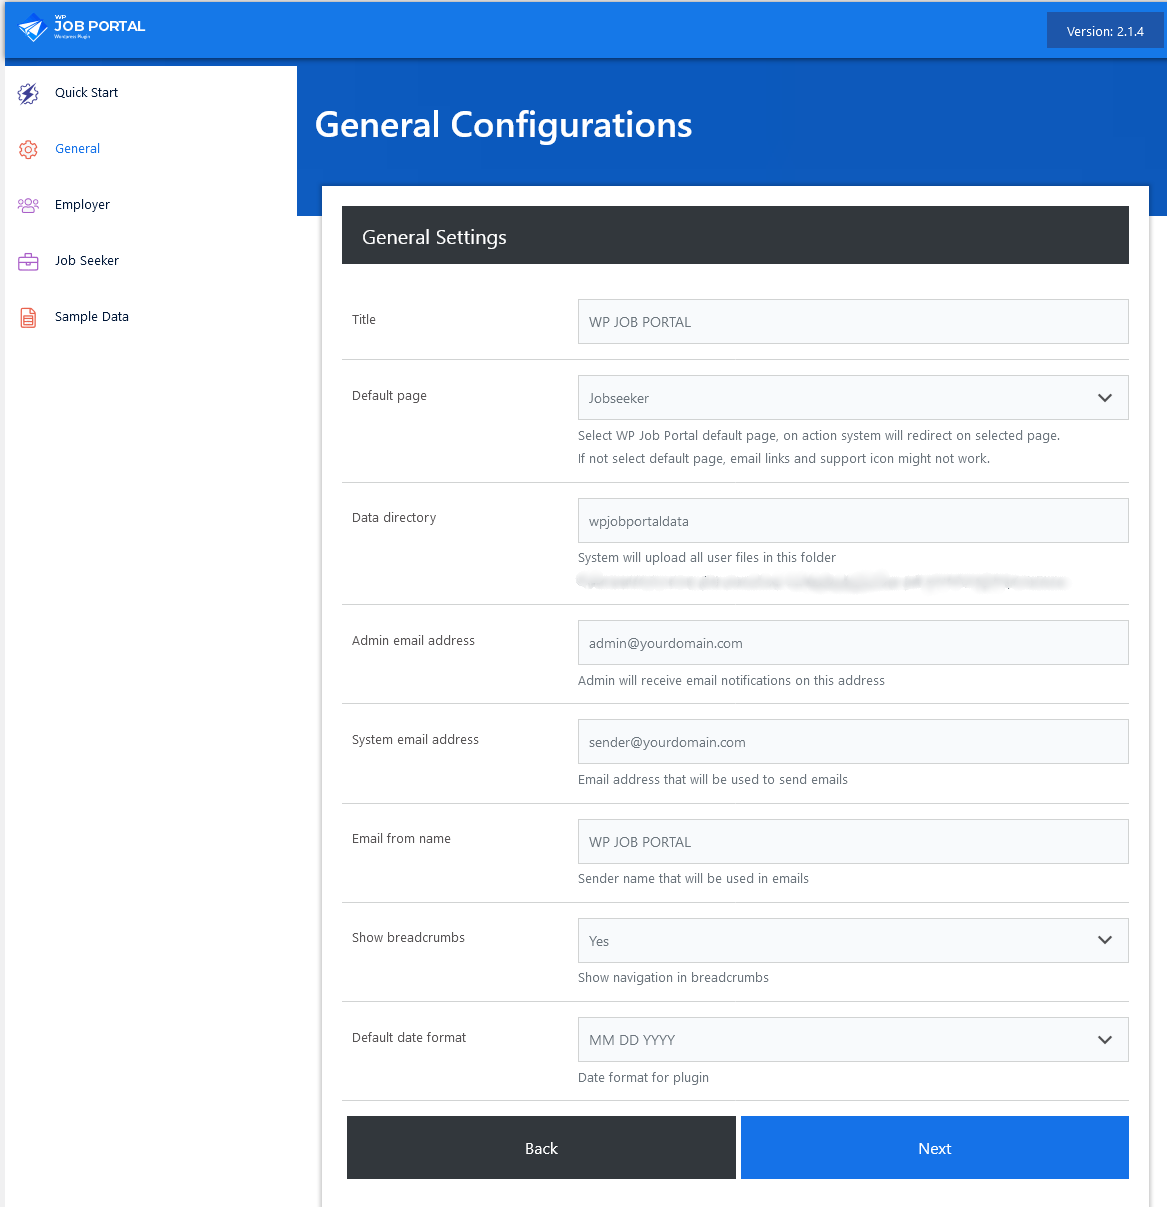
- Site Title: Add your site’s title for identification.
- Default Page: Choose the default page for the WP Job Portal plugin.
- Data Directory: Set a unique directory for storing all user data files.
- Admin Email: Enter your email address for admin notifications.
- System Email: Specify the email address for sending out system emails, including the sender’s name that will appear in those emails.
- Breadcrumbs: Enable navigational breadcrumbs links for better user navigation.
- Date Format: Configure the plugin’s default date format to suit your preferences.
After completing the general settings, proceed to the next configuration step.
Employer Settings Overview for WP Job Portal
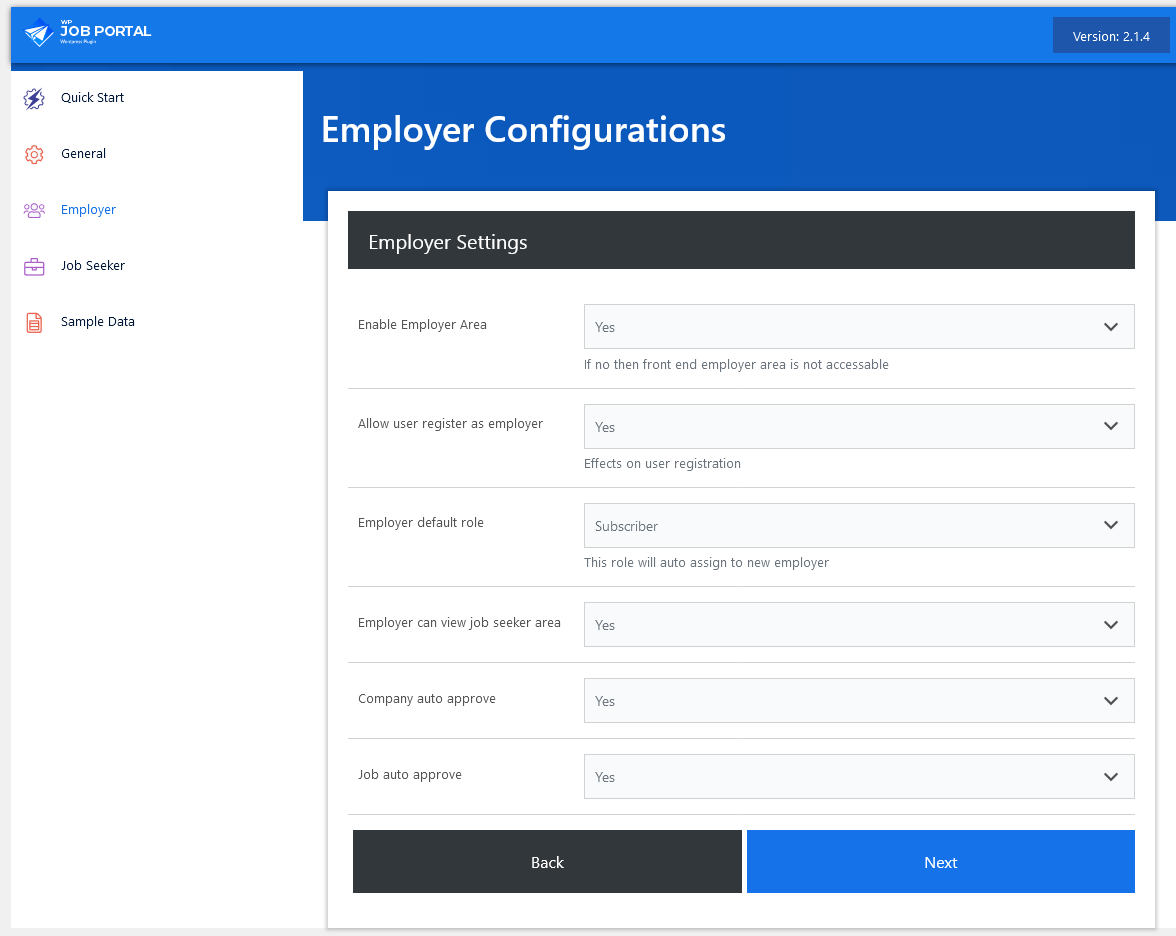
For employers, the options we have here are:
- Enable Employer Area: Toggle to enable or disable the employer area, requiring admin permission for access.
- Allow Employer Registration: Choose ‘Yes’ to permit users to register as employers.
- Default Role for Employers: Set the default role assigned to new employers upon registration.
- View Job Seeker Area: Decide whether employers should have access to the job seeker area.
- Auto-Approval Option: Select whether jobs and companies created by employers require admin approval.
After completing the employer settings, proceed to the next step.
Jobseeker Settings Overview for WP Job Portal
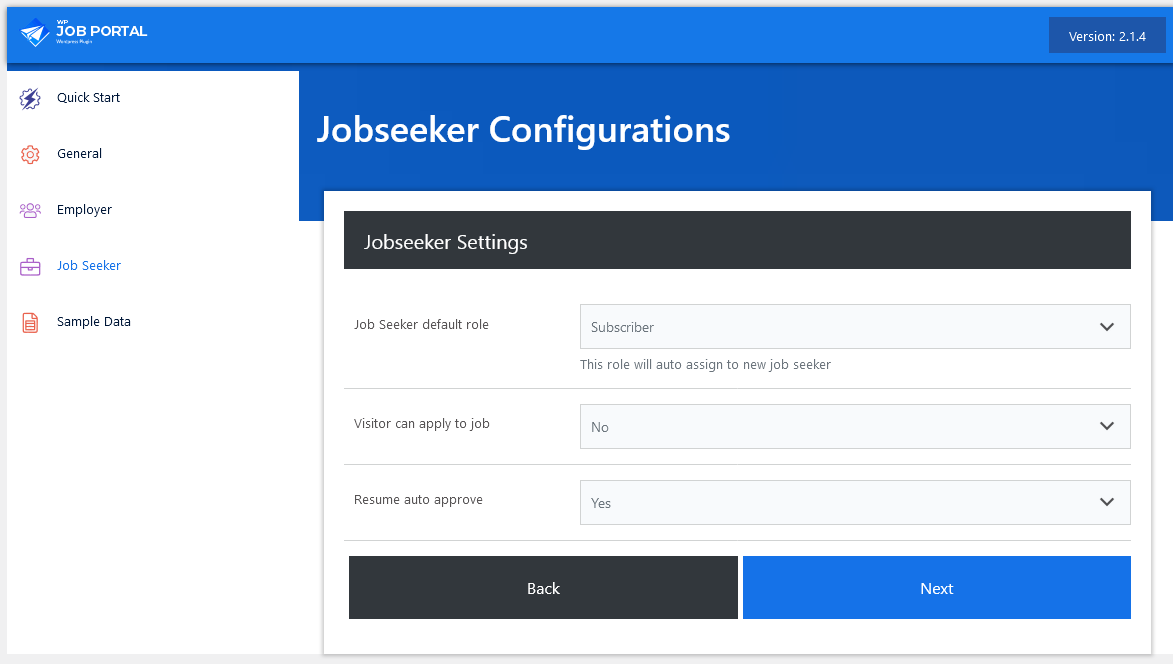
For jobseekers, the options we have here are:
- Default Role for Jobseekers: Set the default role assigned to new jobseeker users upon registration.
- Visitor Application Access: Choose “Yes” or “No” to allow visitors to apply for open positions.
- Position for Search Icon: Select the position for the search icon on the job listing form.
- Resume Approval Requirement: Choose whether newly created resumes require admin approval.
- New Tag Duration: Set the duration for displaying the “New” tag on a job listing.
After configuring these settings, click the “Next” button to proceed.
Inserting Sample Data Settings
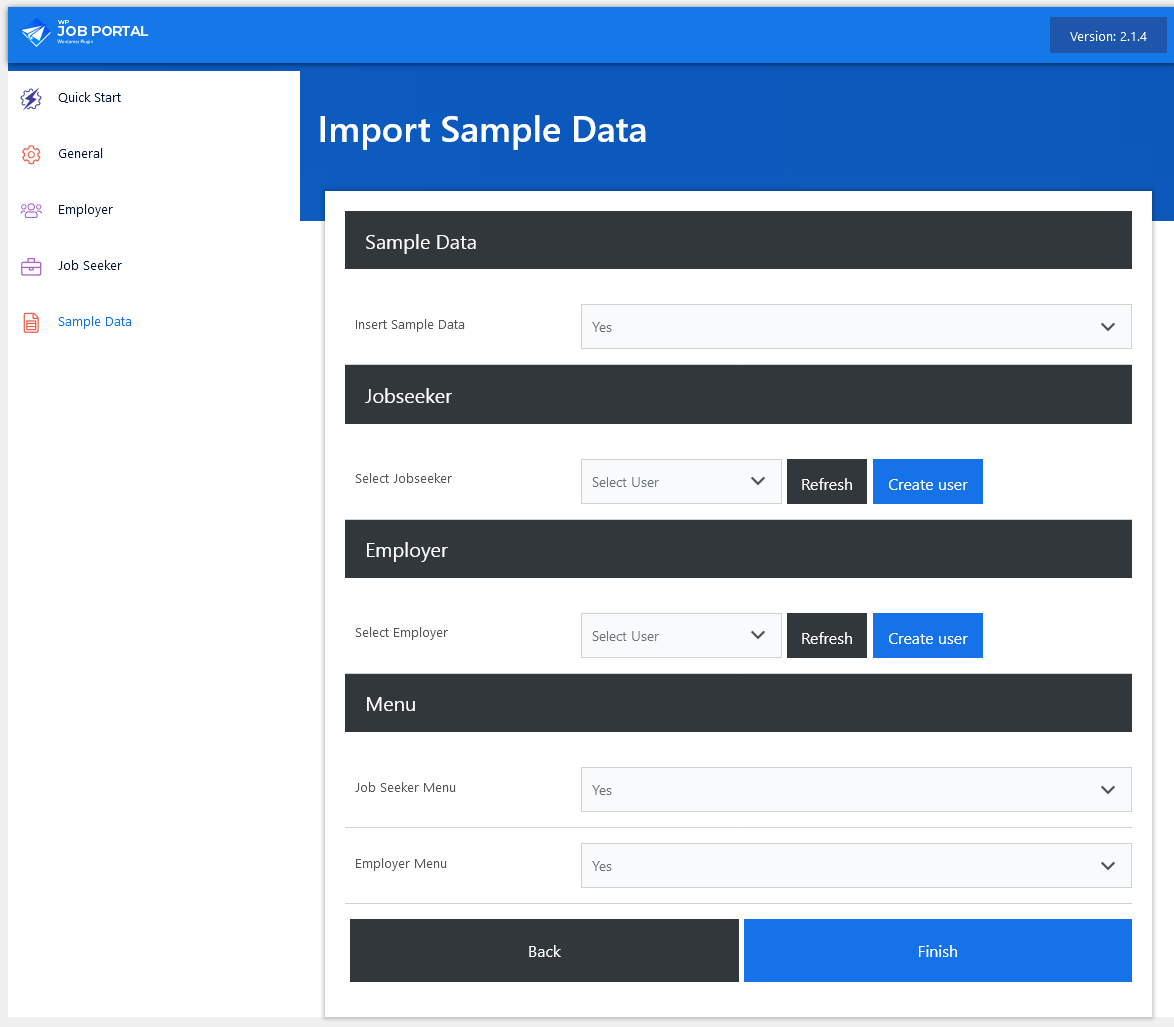
- Enable Sample Data: Choose “Yes” to enable sample data, which provides an overview of how the plugin functions. Choosing “No” will hide user selection options and prevent sample data from appearing on the front end.
- Select Users for Sample Data: If you enabled sample data, select users for jobseeker and employer data from the dropdown menu.
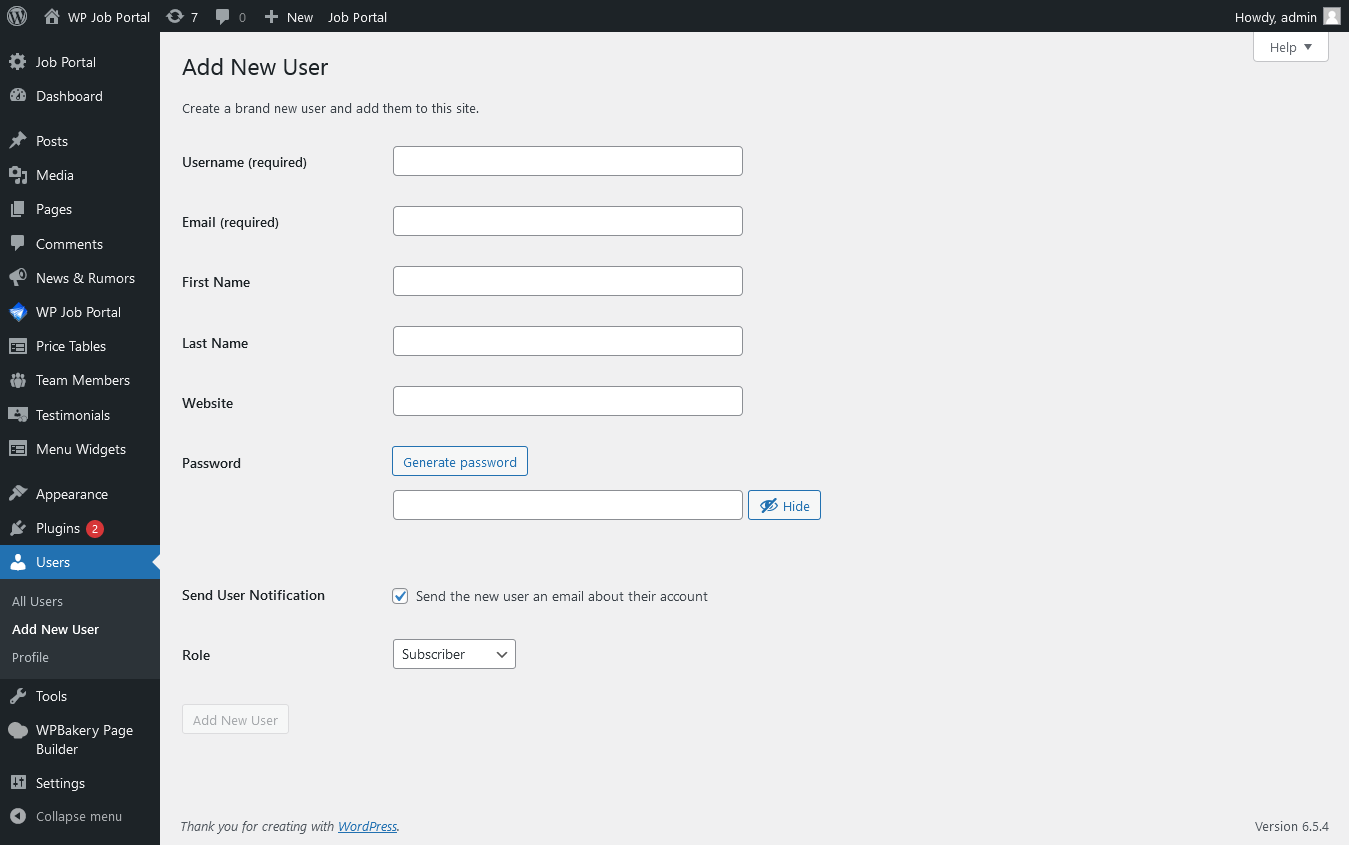
- Create New User (if needed): If no users exist, the admin can create a new user by clicking the “Create New” button. This will direct you to a page where you can input the necessary user details.
After configuring the sample data settings, proceed to finalize the setup.
New User Creation in WP Job Portal
Setting Up The Header Menu
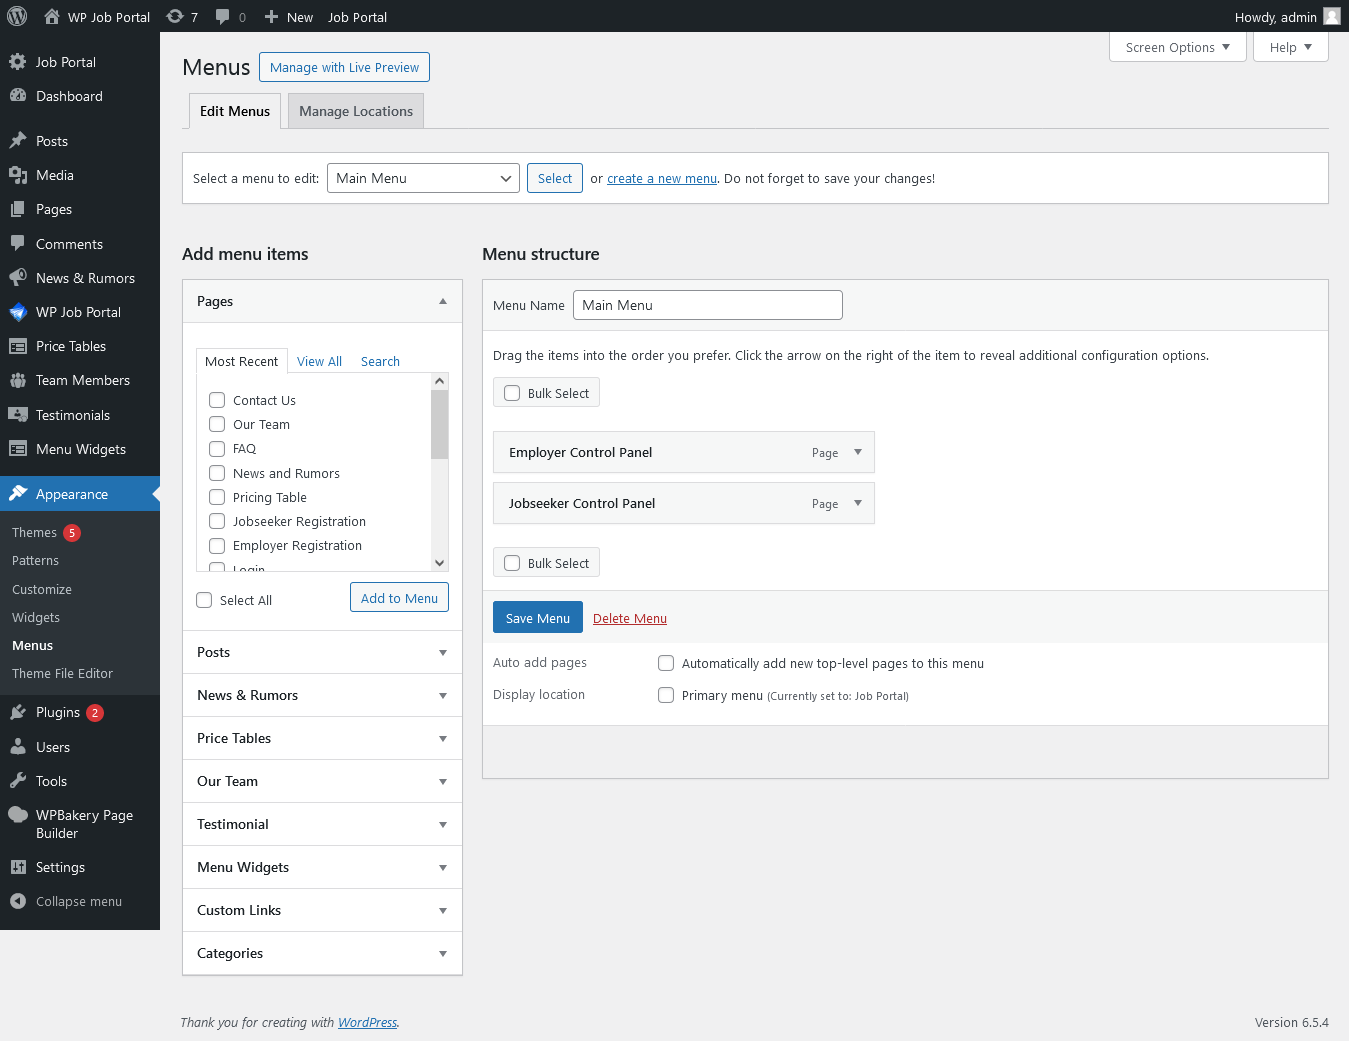
Now set up the header menu on the front end of your website. If you don’t already have a menu, you’ll need to create one first.
-
- Navigate to Menus:
- Go to the Appearance section in your WordPress dashboard.
- Click on Menus.
- Create a New Menu:
- Enter a name for your menu in the provided field.
- Click the “Create Menu” button.
- Add Menu Items:
- Select the pages you want to include in the menu from the list on the left.
- Click “Add to Menu.”
- The selected pages will now appear in the menu structure on the right.
- Set Menu Display Area:
- Assign the menu to the desired display area (usually the header area).
- Save Your Menu:
- Click the “Save Menu” button to apply the changes.
Your WordPress menu will now be added to the header of your website, providing easy navigation for users!
- Navigate to Menus:
Create Page Using Shortcodes
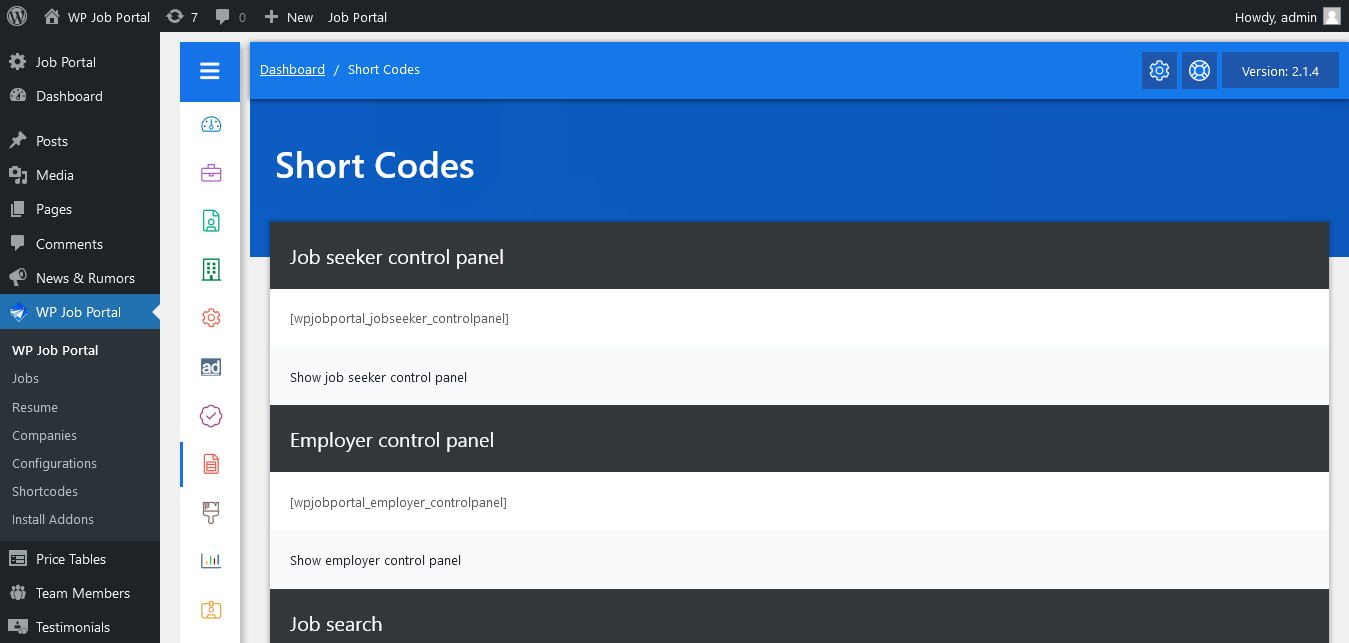
Now, let’s create a page using shortcodes. First, navigate to the admin dashboard and select the “Shortcodes” option. Next, locate the shortcode for the desired page and copy it.
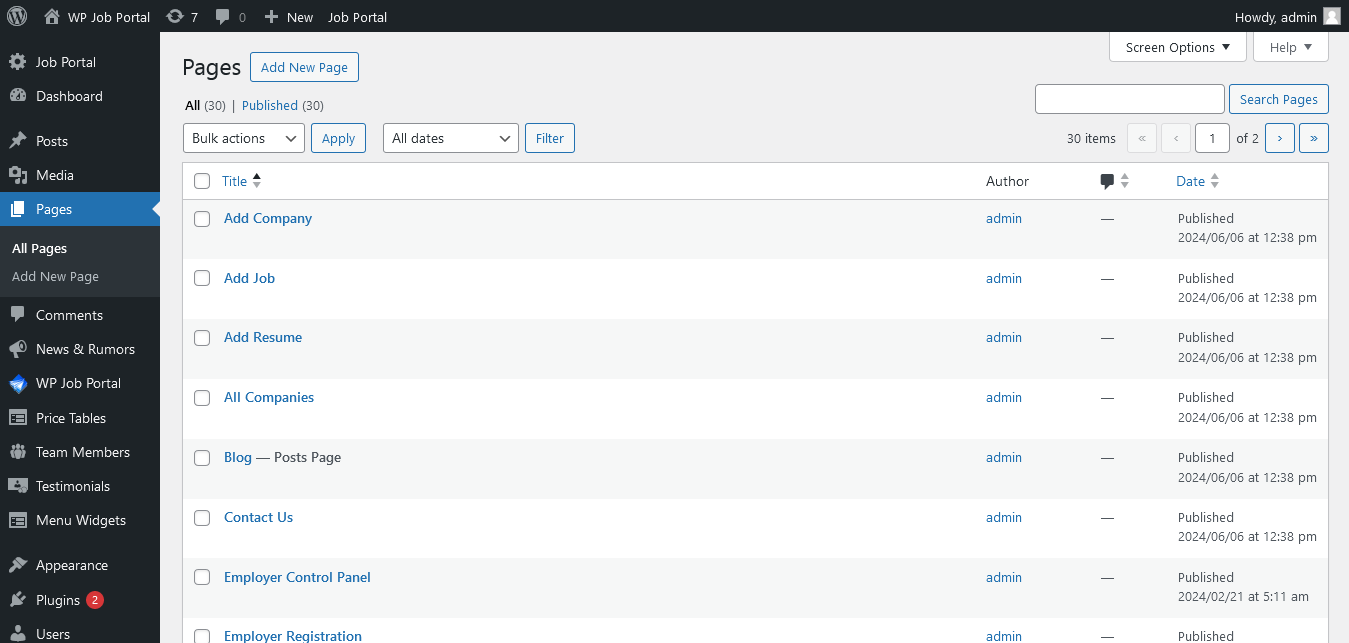
Then, go back to the WordPress dashboard and select the “Pages” option. Click the “Add New” button.
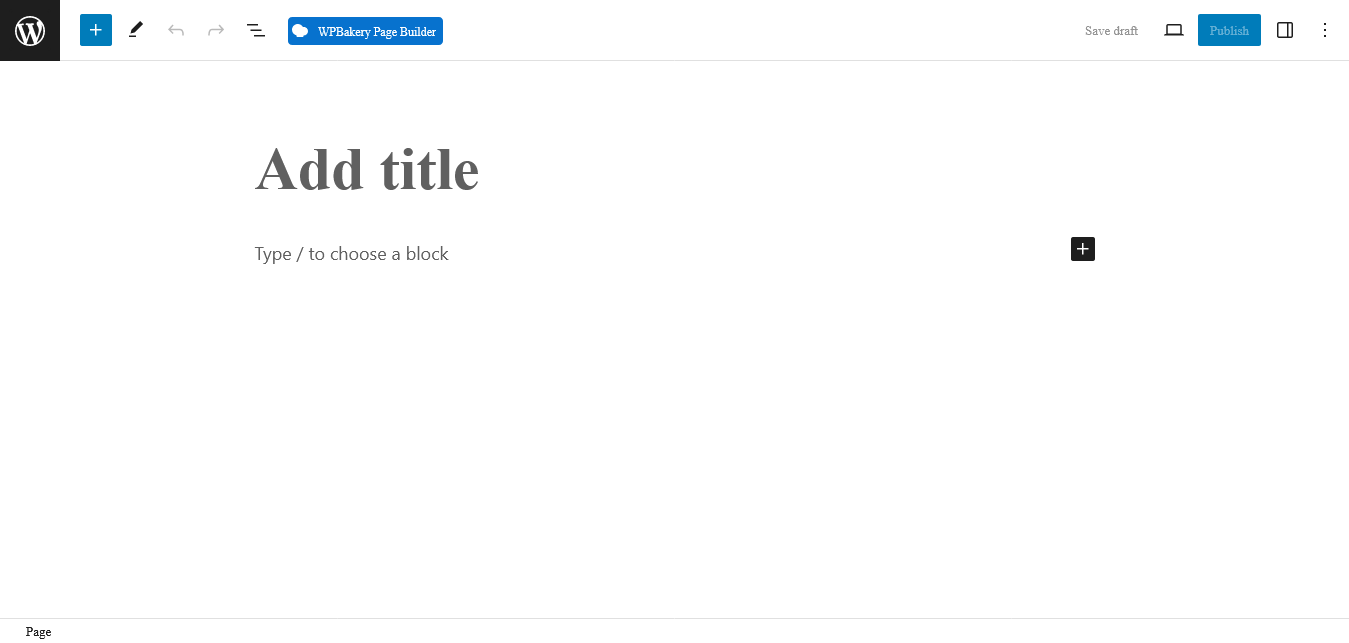
Define the page title, and then paste the shortcode. And publish the page. The newly created page will be added to the pages list.

Now, let’s add this page to the menu by following the same steps.
- Open the menu section, choose the page, and click “Add to Menu.” The page will be added to the menu.
- You can rearrange the order of the pages by dragging and dropping them as desired.
- Then, save the menu. Now, the menu will include the newly added page.
Configurations of the WP Job Portal
General Settings
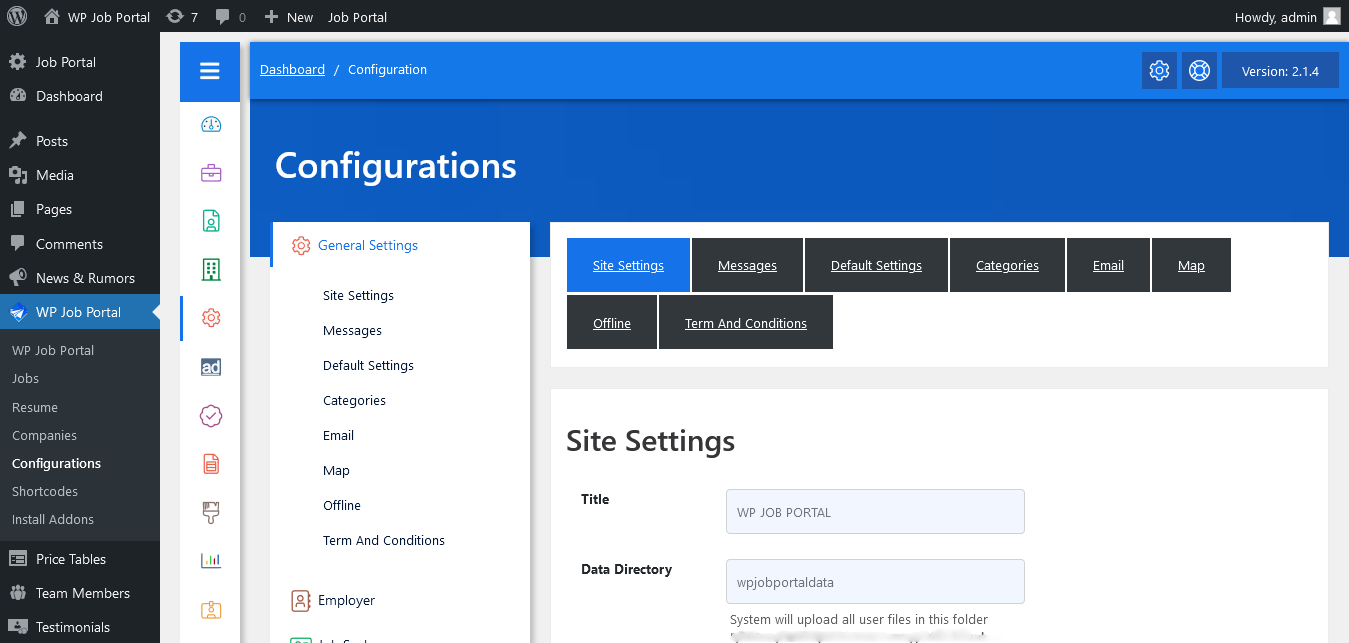
Site Settings
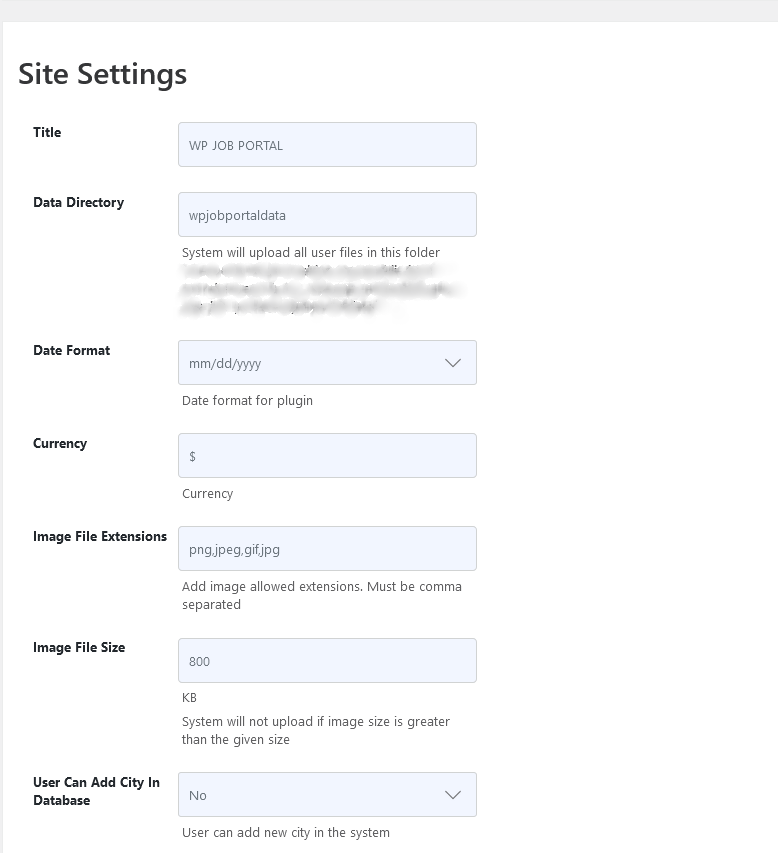
Let’s now dive into the configurations of WP Job Portal, which enable you to customize the plugin according to your specific needs and preferences. First, we’ll focus on the general configurations and will explore how these configurations impact the front end of your site. Under the site settings, you have the flexibility to change the:
Site title and data directory at any time. Show or hide navigational breadcrumbs links. Set the date format. Define the currency. Specify the allowed image file extensions. Set the maximum image file size. Choose the currency symbol position to display it to the left or right of the amount. Adjust the number of job types per row on the ‘job by type’ page.
Default Settings
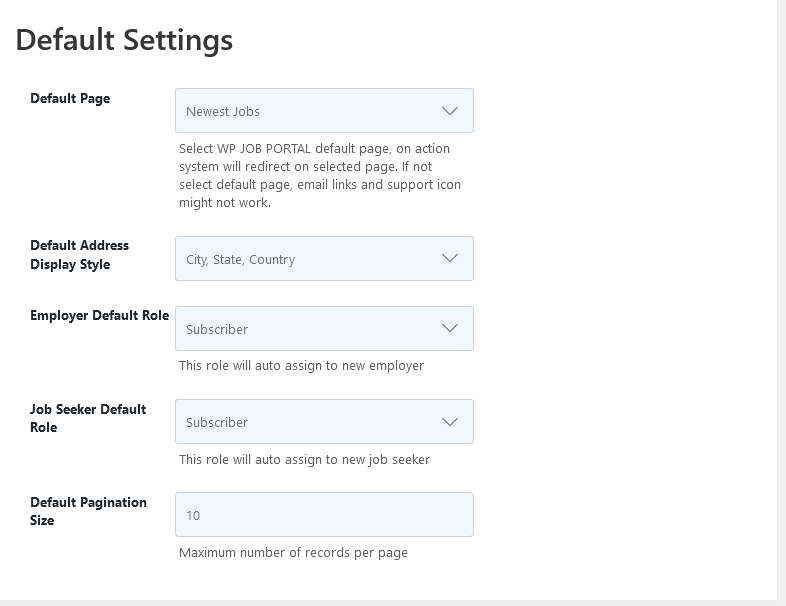
In the default settings section, you can select the default page for WP JOB PORTAL. Upon action, the system will redirect to the selected page. Next, in the default options, you can change the default Address Display Style. You may also customize the employer and jobseeker roles, as well as the default pagination size. After making these changes, save the configurations, and we’ll see the changes on the front end.
Map Settings
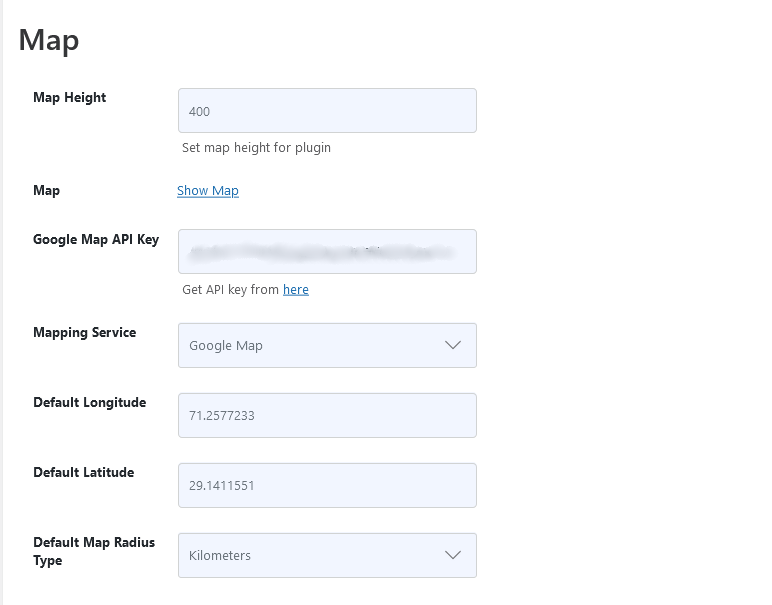
In the map settings, you can fine-tune various aspects such as map height.
Mapping Service selection (Google Map or Street Map), Default Longitude and Latitude configuration, and Default Map Radius Type specification.
Terms And Conditions
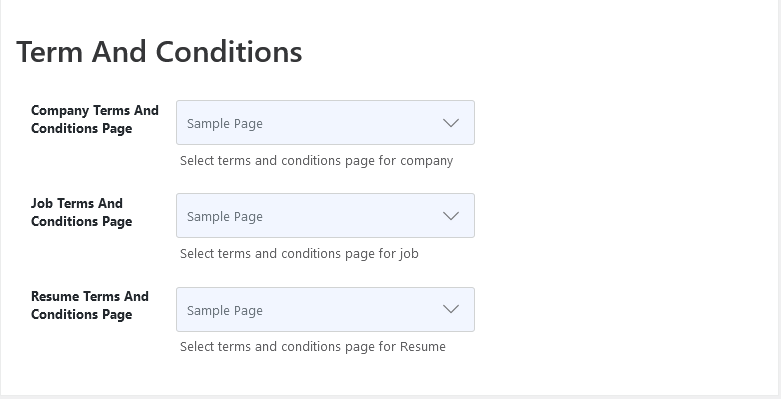
Under the general configurations, you can add terms and conditions pages for companies, jobs, and resumes. If you don’t have a terms and conditions page, you’ll first need to create one.
- To do so, navigate to the WordPress menu and select “Pages.” Click on “Add New Button”
- Enter the page title, such as “Terms and Conditions.”
- Define your rules in detail and publish the page.
Now, to enable this page for users, go back to the terms and conditions settings under the general settings.
Select the terms and conditions page from the dropdown menu for each category, and once done, save the changes. The terms and conditions page is linked to the form through a designated and accessible link.
Employer Configurations
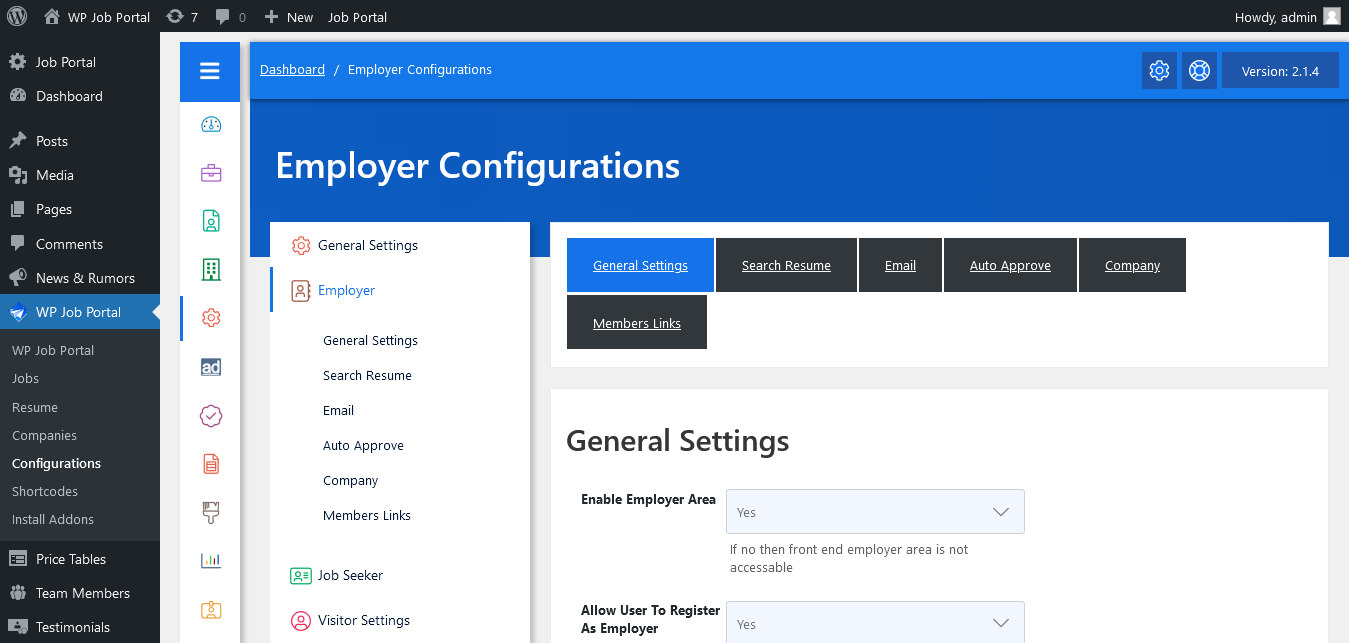
General Settings
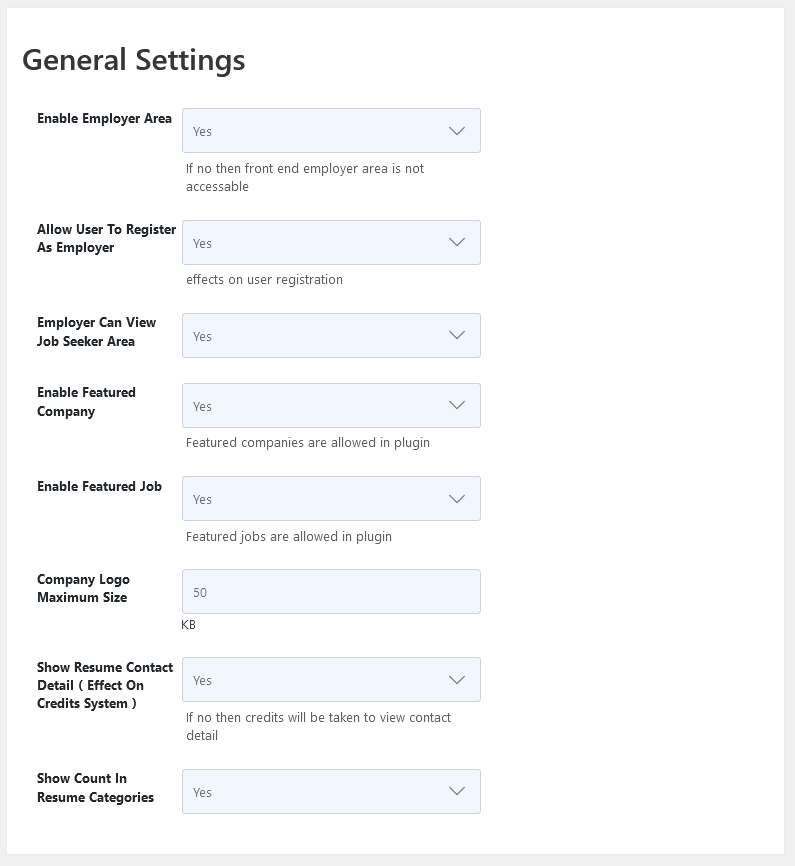
Now, let’s dive into the employer-side configurations. Under the general settings, you have the flexibility to change the:
The administrator has disabled the employer section and prevented employers from accessing the job seeker area, making both the employer and job seeker areas inaccessible. Similarly, the system administrator can easily enable or disable the employer area and grant or restrict access to the job seeker area. Further, among other settings, you can configure the Company Logo Maximum Size and specify whether to show count in resume categories.
Search Resume
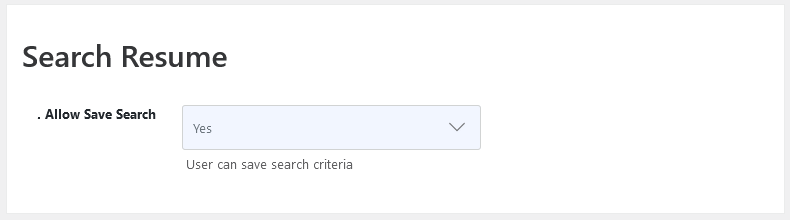
As an administrator, you have the option to enable or disable the ability for employers to save a search of the resumes. Currently, this option is disabled, meaning that employers can search resumes but cannot save their searched results. However, once the admin allows employers to save the searched resumes, the option to save will become available, allowing employers to conveniently save the resumes they have searched for.
Auto Approve
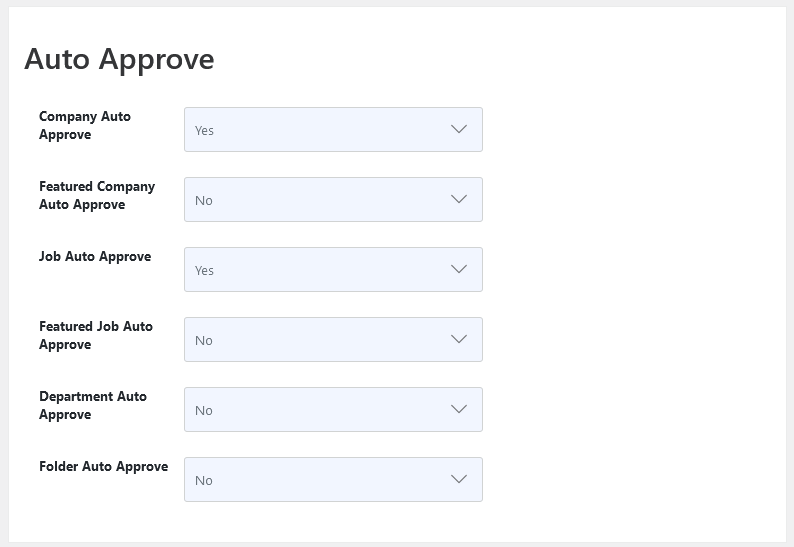
In the Auto-Approve section, the Company Auto Approve option is currently disabled, indicating that when employers create a new company, admin approval is required for it to be published. As a result, even though the company has been created, it will remain unpublished until it receives admin approval. So in the Auto Approve section, Administrators may control the auto-approve functionality for companies, featured company job auto-approve, and more.
Once the auto-approve functionality is enabled and configurations are saved, newly created companies and jobs will automatically go live without requiring the manual approval of the admin. You can see that the company has been created and approved automatically.
Company Settings
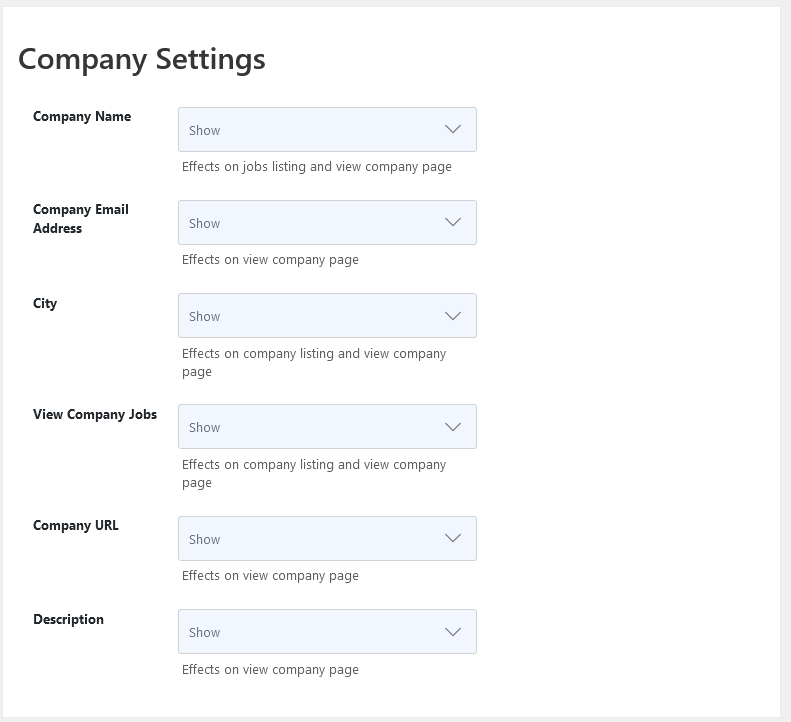
In the Companies Settings section, administrators have the option to show or hide various details, including the company name, company email address on the view company page, city on both the company’s listing and view company page, company jobs, and more. When these options are hidden, the respective details will not be visible on the company view page.
However, once these options are configured to show and saved, these details will be available. On the company’s listing page, the city appears as per the settings. Upon navigating to the view company page, the city, email address, and view all jobs options become visible.
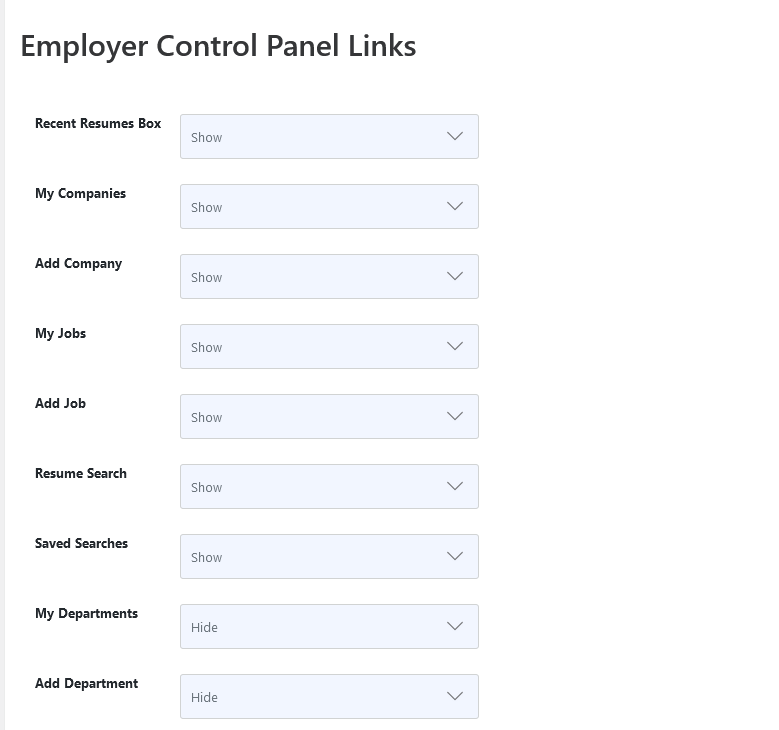
Employer Control Panel Links
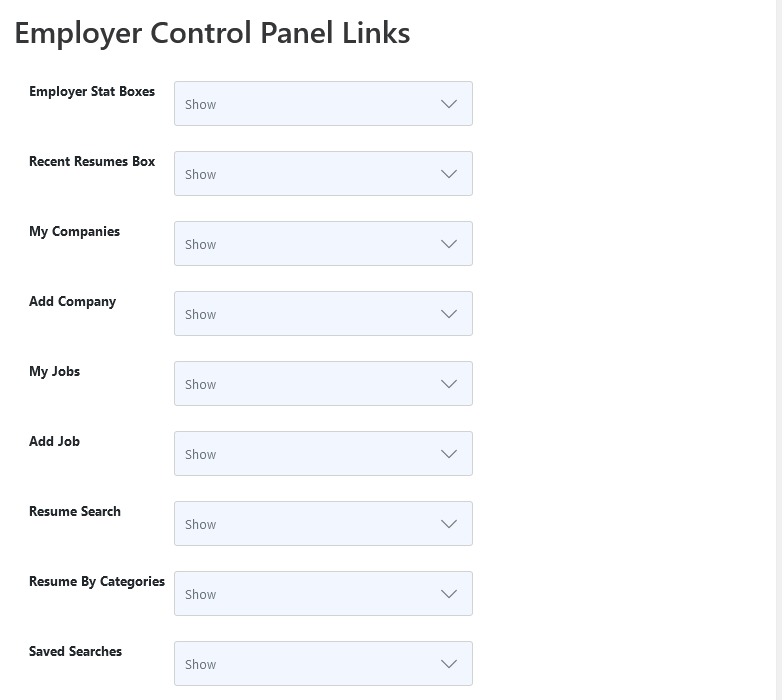
In the Employer Control Panel Links setting within the employer configurations, administrators can determine which navigation options are visible to employers. Options such as the jobs graph, my companies, add a company, my job, add job, resume search, resume by categories, saved searches, messages, invoice, my subscriptions, packages, my department, add department, my folder, add folder and resume RSS can be shown or hidden.
Jobseeker Configurations
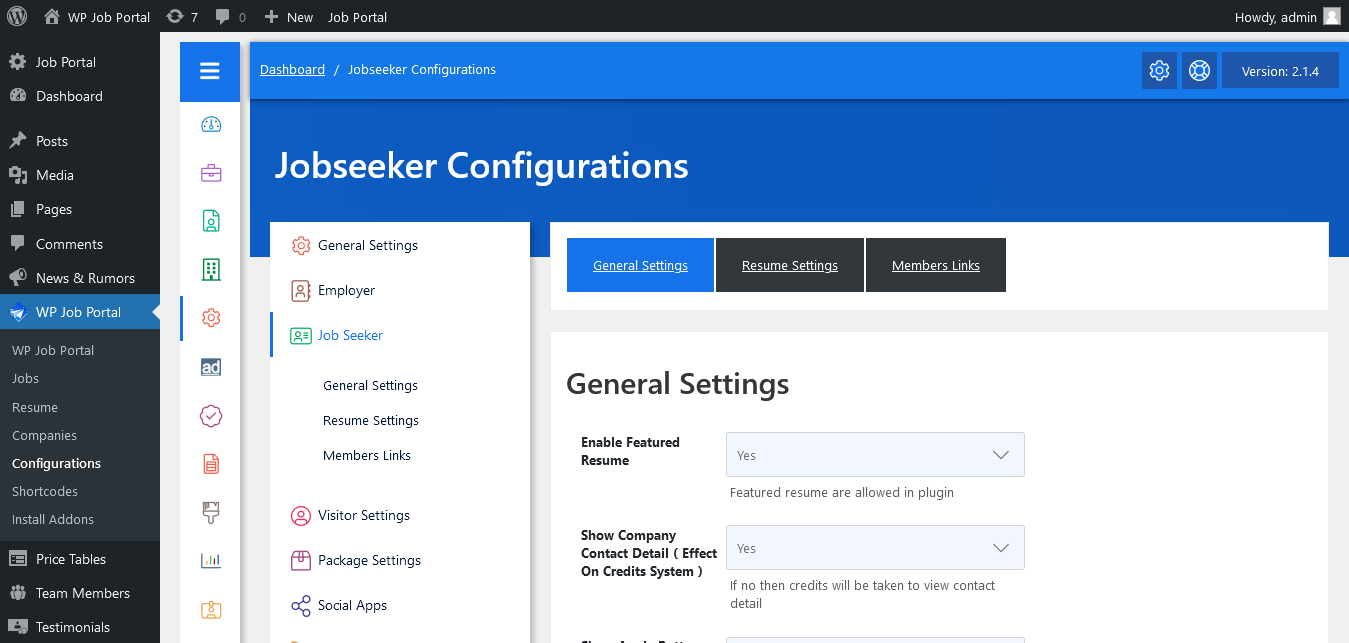
General Settings
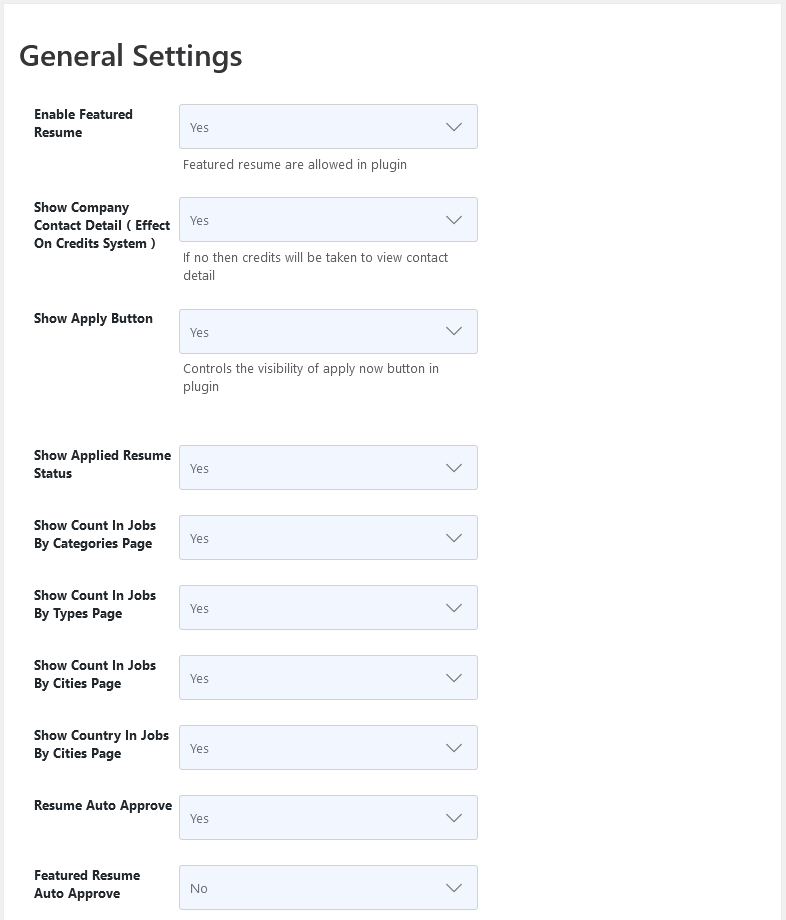
In the job seeker general settings section, the administrator can control various options that impact the job seeker’s experience. They can enable or disable features like “Enable Featured Resume” and “Show Apply Button” for the newest jobs.
Additionally, the administrator can configure various settings related to job listings under the general settings, such as enabling or disabling “Show Count In Jobs By Cities Page”, “Show Count In Jobs by Categories page”, “Show Count In Jobs By Types Page” and “Show Country In Jobs By Cities Page.” Other settings include options like “Resume Auto Approve,” “Featured Resume Auto Approve,” “Job Short List,” “Job Alert Auto Approve,” and “Tell A Friend.”
Once configured save the configuration and these options will be available for jobseekers accordingly.
Resume Settings
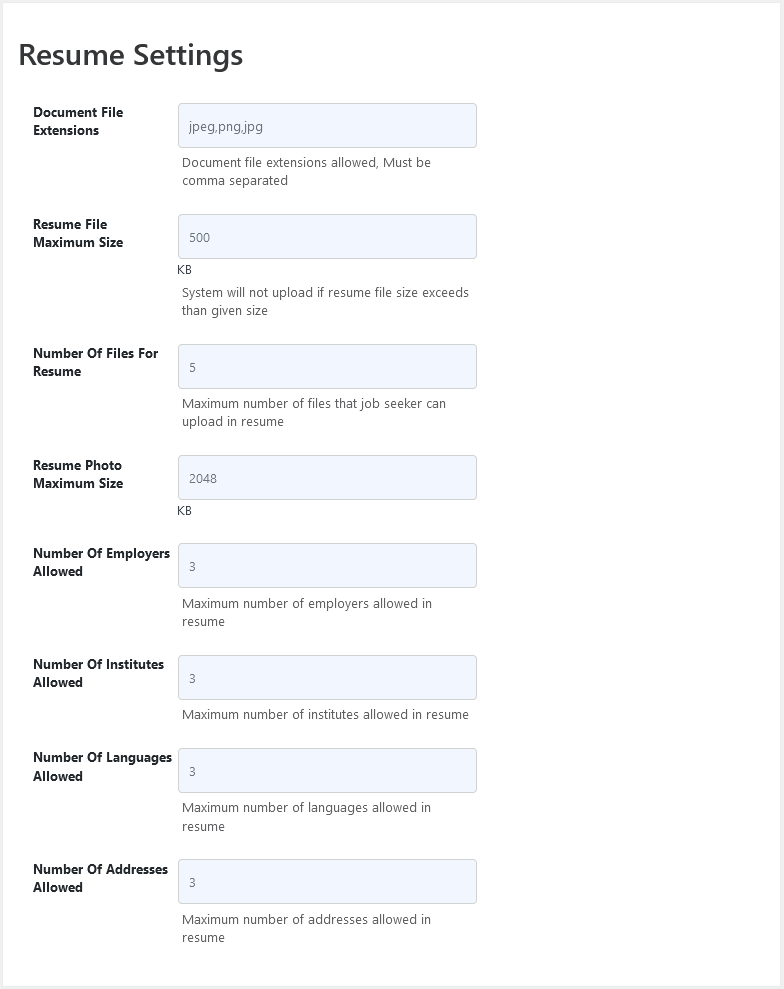
Administrators can fine-tune settings related to resumes, including defining Document File Extensions, setting the maximum size for resume files, specifying the number of files job seekers can upload in a resume, setting the maximum size for resume photos, determining the maximum number of employers and institutes allowed in a resume, specifying the maximum number of languages allowed, and setting the maximum number of addresses allowed in a resume.
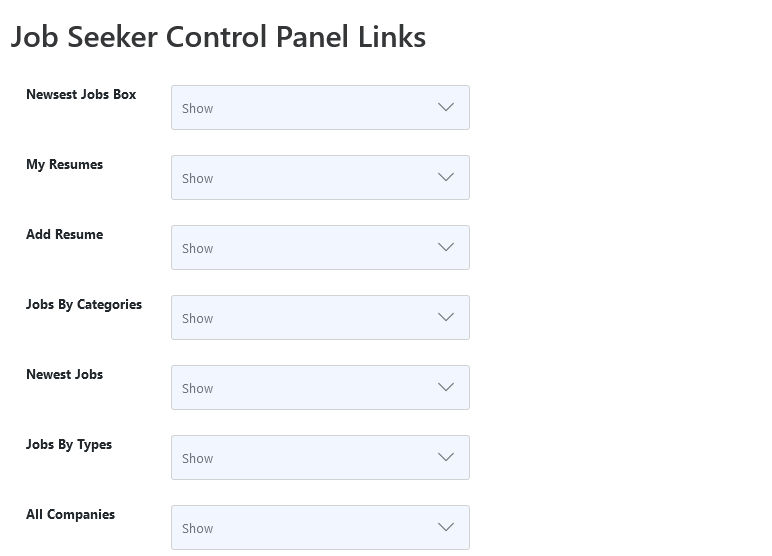
Job Seeker Control Panel Links
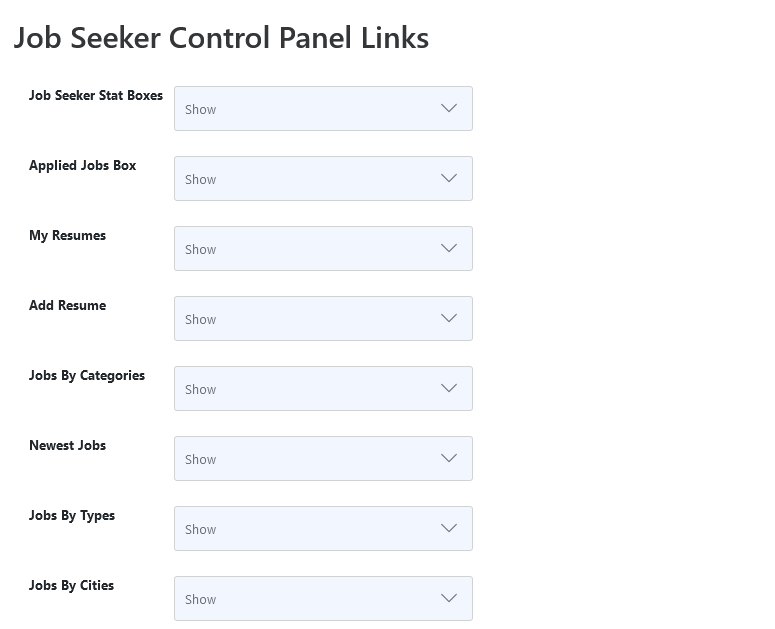
In the job seeker-related configurations, administrators can show or hide Job Seeker Control Panel Links to ensure which navigation options will be visible on their dashboard menu.
Once the settings have been configured, save the changes, and the options will become available as expected. Only the options that are set to be shown are visible in the jobseeker’s dashboard menu.
Visitor Configurations
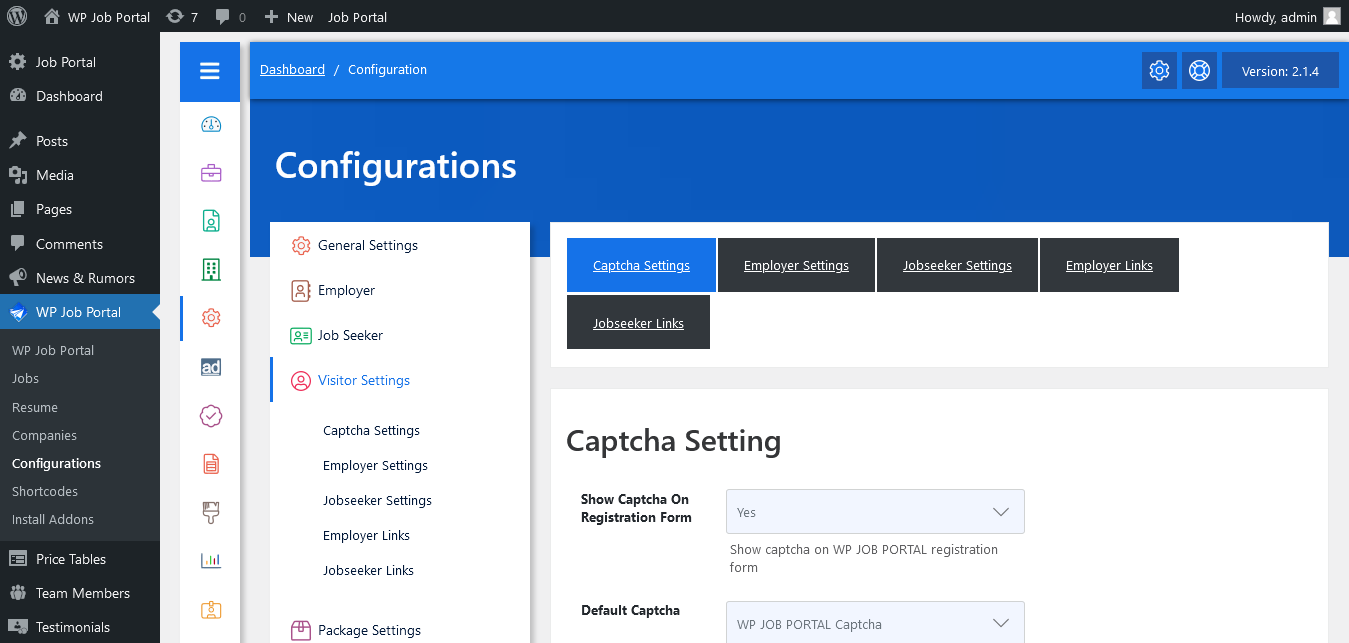
Captcha Setting
Now let’s dive into the visitors-related configurations:
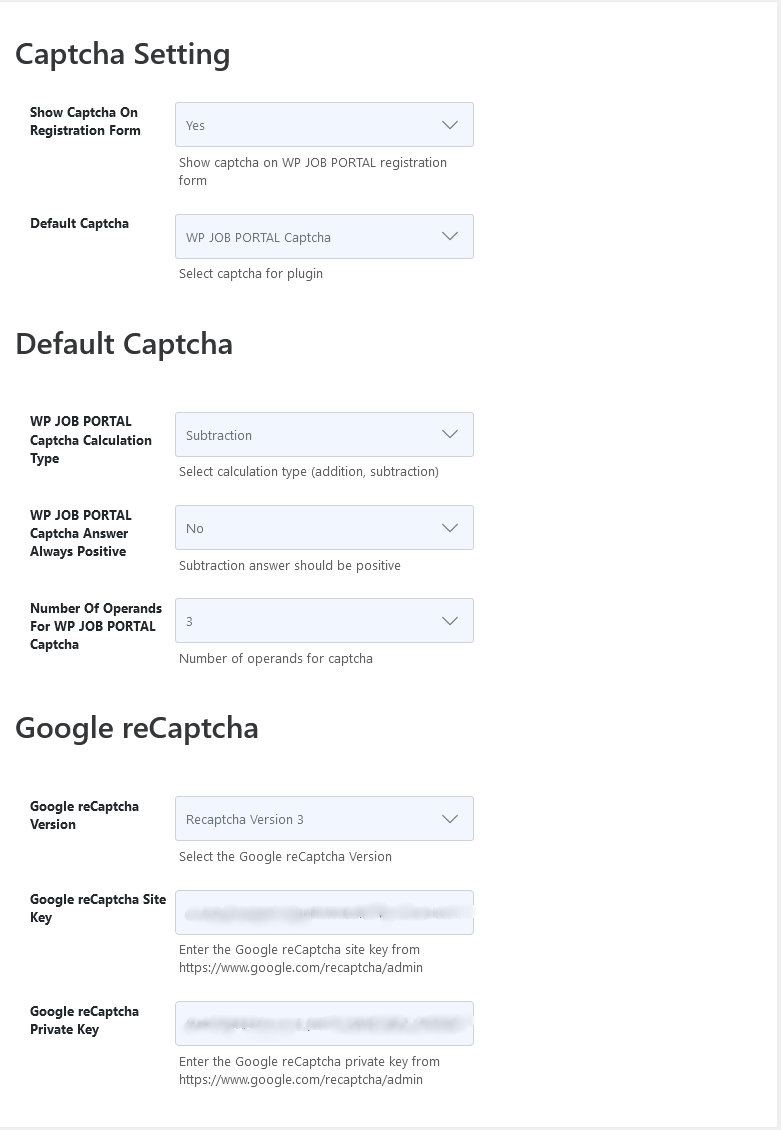
Once on this page, you’ll find options related to Captcha settings that you can implement on your site. You can begin by choosing whether to display a Captcha on the registration form or not. Next, select the Captcha type, either Google reCaptcha or WP Job Portal Captcha. You can also customize the Captcha calculation type, choosing between addition or subtraction. Additionally, consider settings like positive answers upon Captcha subtraction and set the number of operands for the Captcha.
Once you’ve configured these settings, remember to save them for the plugin’s Captcha. The Captcha is now operational on the registration form, with the specified number of operands.
Job Posting Options
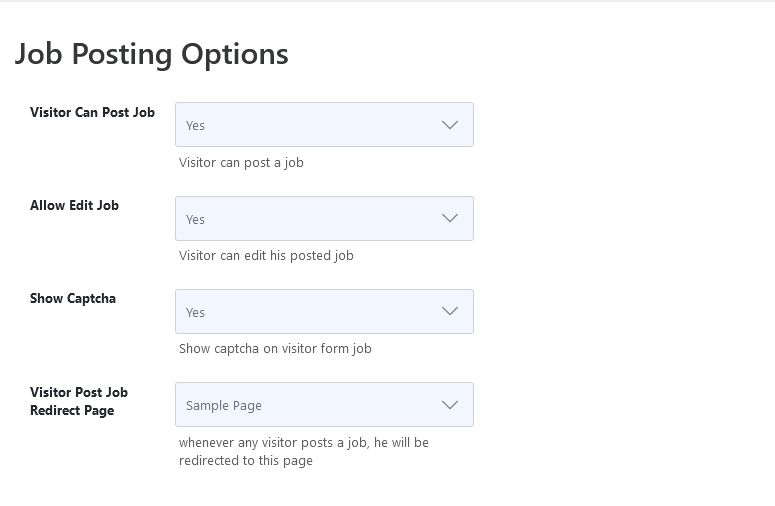
Furthermore, In the Visitors’ Configurations, administrators can tailor the Job Posting Options for visitors, allowing them to post and edit jobs, as well as setting up Captcha for job submission forms. Once these settings are adjusted, visitors can only carry out the specified actions. The add company form is accessible for visitors, and the Captcha is also operational on the form.
Visitors Can View Employer
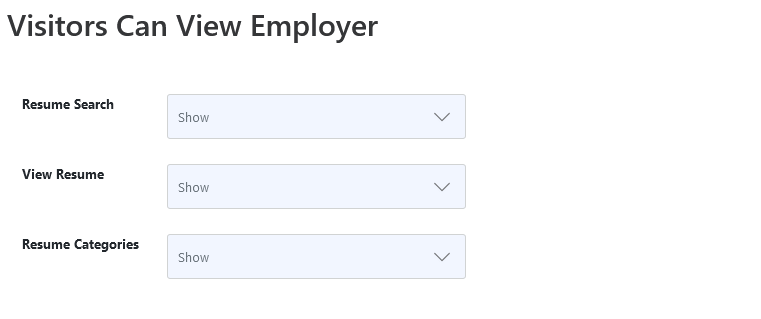
The “Visitors Can View Employer” area includes settings that allow visitors to search for and browse resumes, along with controlling the visibility of the Resume Categories option.
Job Seeker
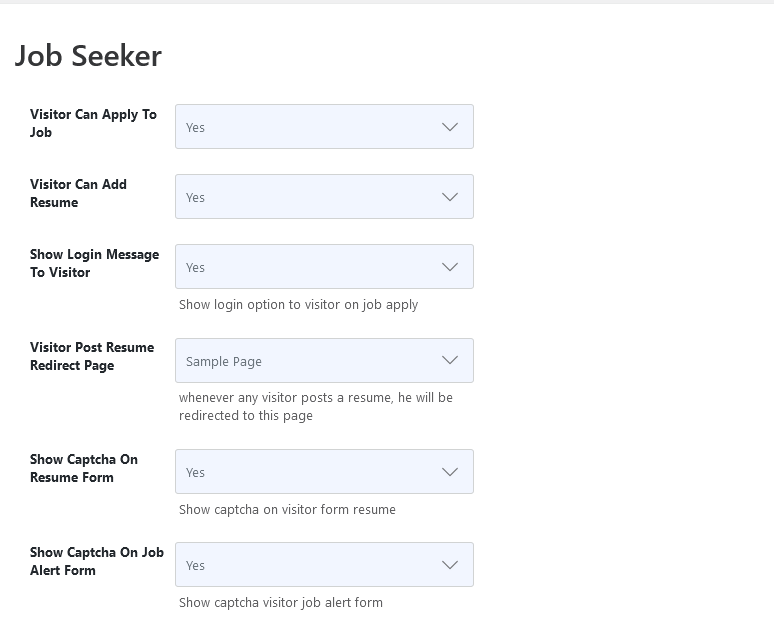
In the “Job Seeker” section, you have access to settings that allow them to apply for jobs, add resumes,
display login messages when applying for jobs, and more.
Visitors Can View Jobseeker
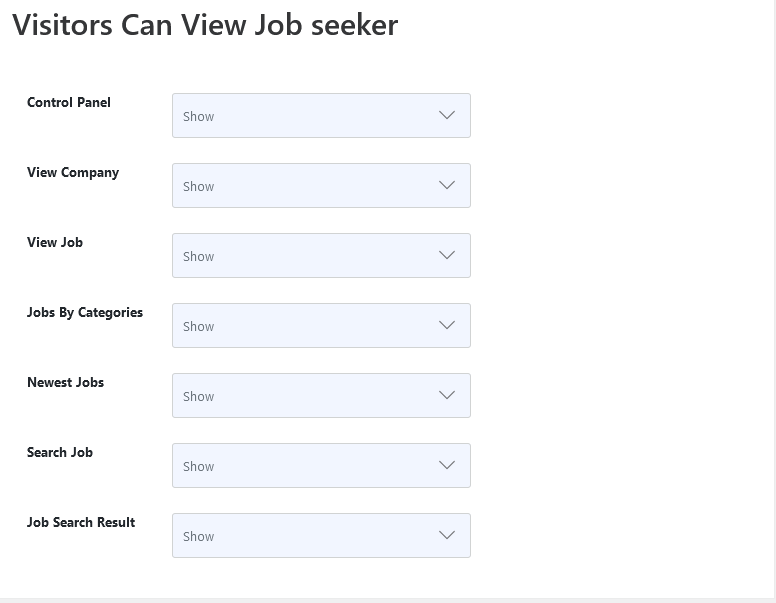
Allow visitors to access the job seeker control panel, view companies, view jobs, view jobs by categories, search jobs, job search results, and more as job seekers.
Employer Control panel

Configure the permissions for visitors acting as employers. This includes enabling or disabling the employer control panel for visitors.
Employer Control Panel Links
Administrators can select which control panel links will be visible on the visitor’s dashboard as an employer, such as jobs graph, my companies, add company, my jobs, add job, applied resumes, resume search, saved searches, my departments, add department and other relevant employer dashboard links.
Jobseeker Control Panel Links
Administrators can choose the control panel links that will be displayed on the visitor’s dashboard when they are logged in as a job seeker. These links may include the active jobs graph, my resumes, add a resume, jobs by categories, newest jobs, jobs by types, all companies, jobs by cities, my cover letters, add a cover letter, job alert, shortlisted jobs, and other job seeker links.
Login And Register Settings
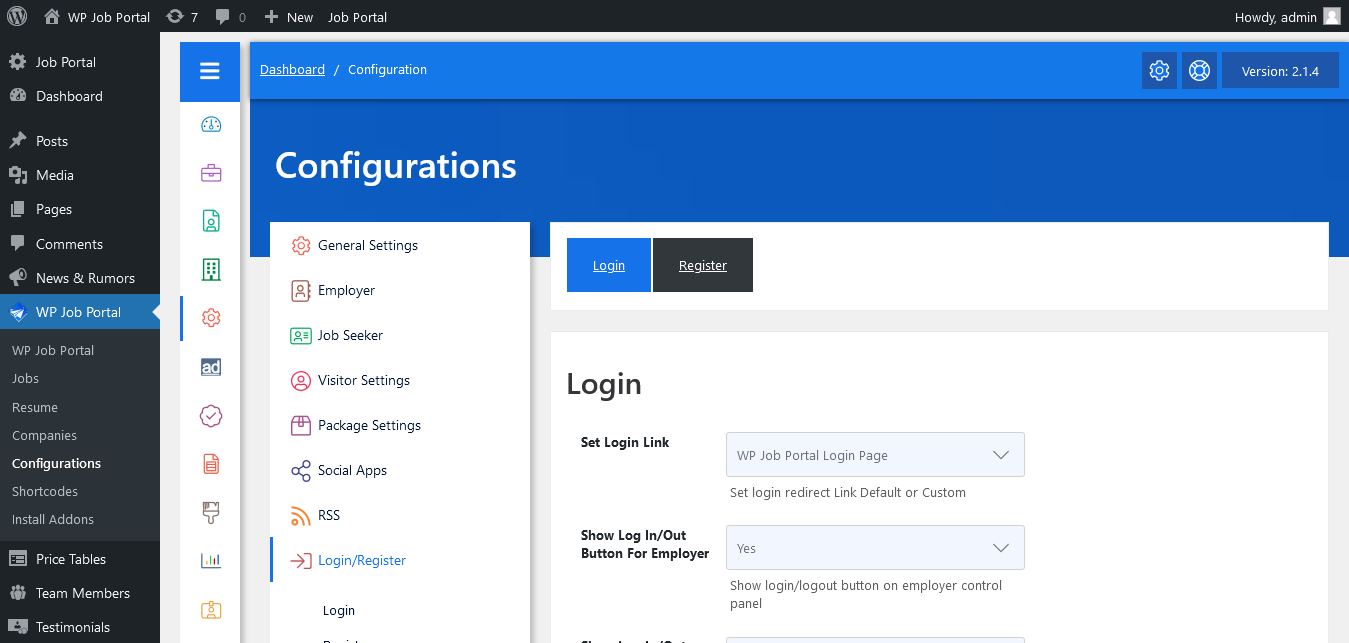
Login Settings
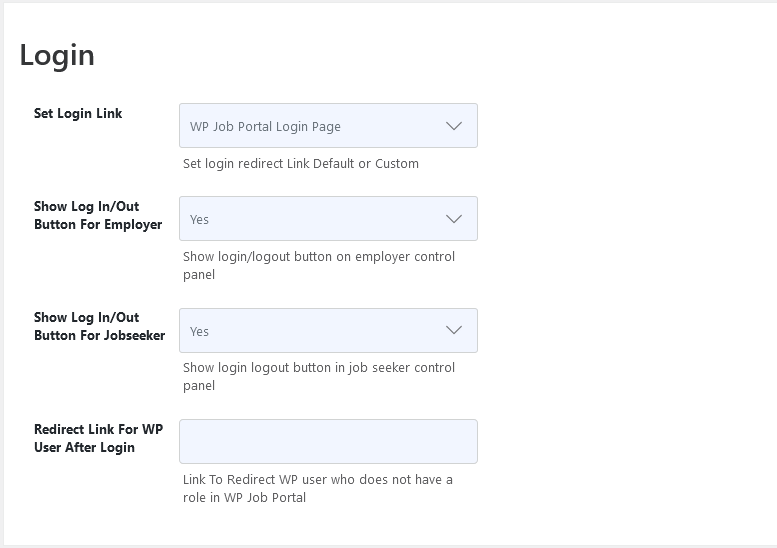
In the “Login Settings” section, the first option is “Set Login Link.” Currently, the default WordPress page is selected for login, which means users will be redirected to the WordPress login page. However, the WP Job Portal offers its login page. Administrators have the option to choose between the default WordPress page, the WP Job Portal login page, or a custom login page if available. Additionally, in the “Login Settings” section, there are options available to show login/logout buttons on the employer and job seeker control panels.
Register Settings
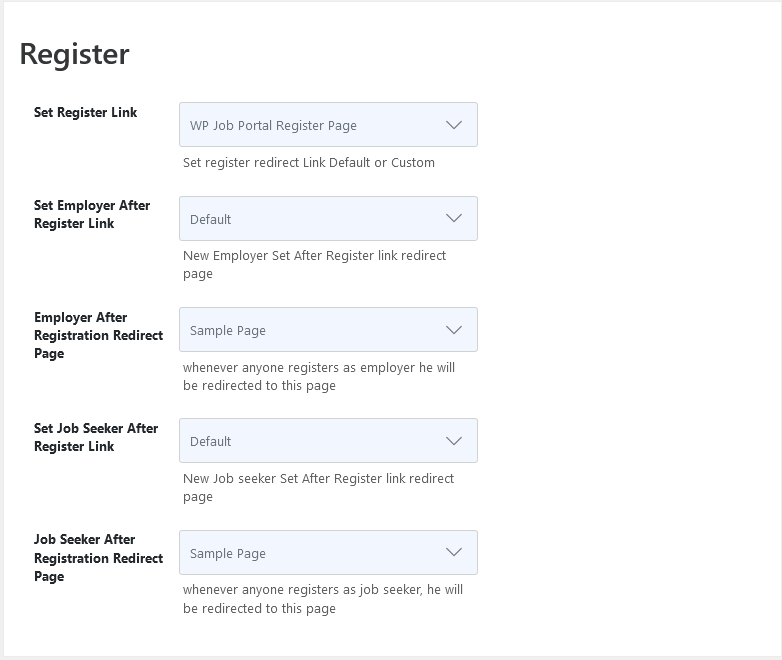
In the register settings area, you can choose whether to use the default register page or a custom one for registration. You can also specify the page where employers will be redirected after registration, either the default page or a custom one. By selecting your preferred default page, new employers will be directed to this page upon registration. Similarly, you can set the after-register link for job seekers. If you opt for a custom page, simply paste its link here and save the configurations.
Managing Slugs in the WP Job Portal
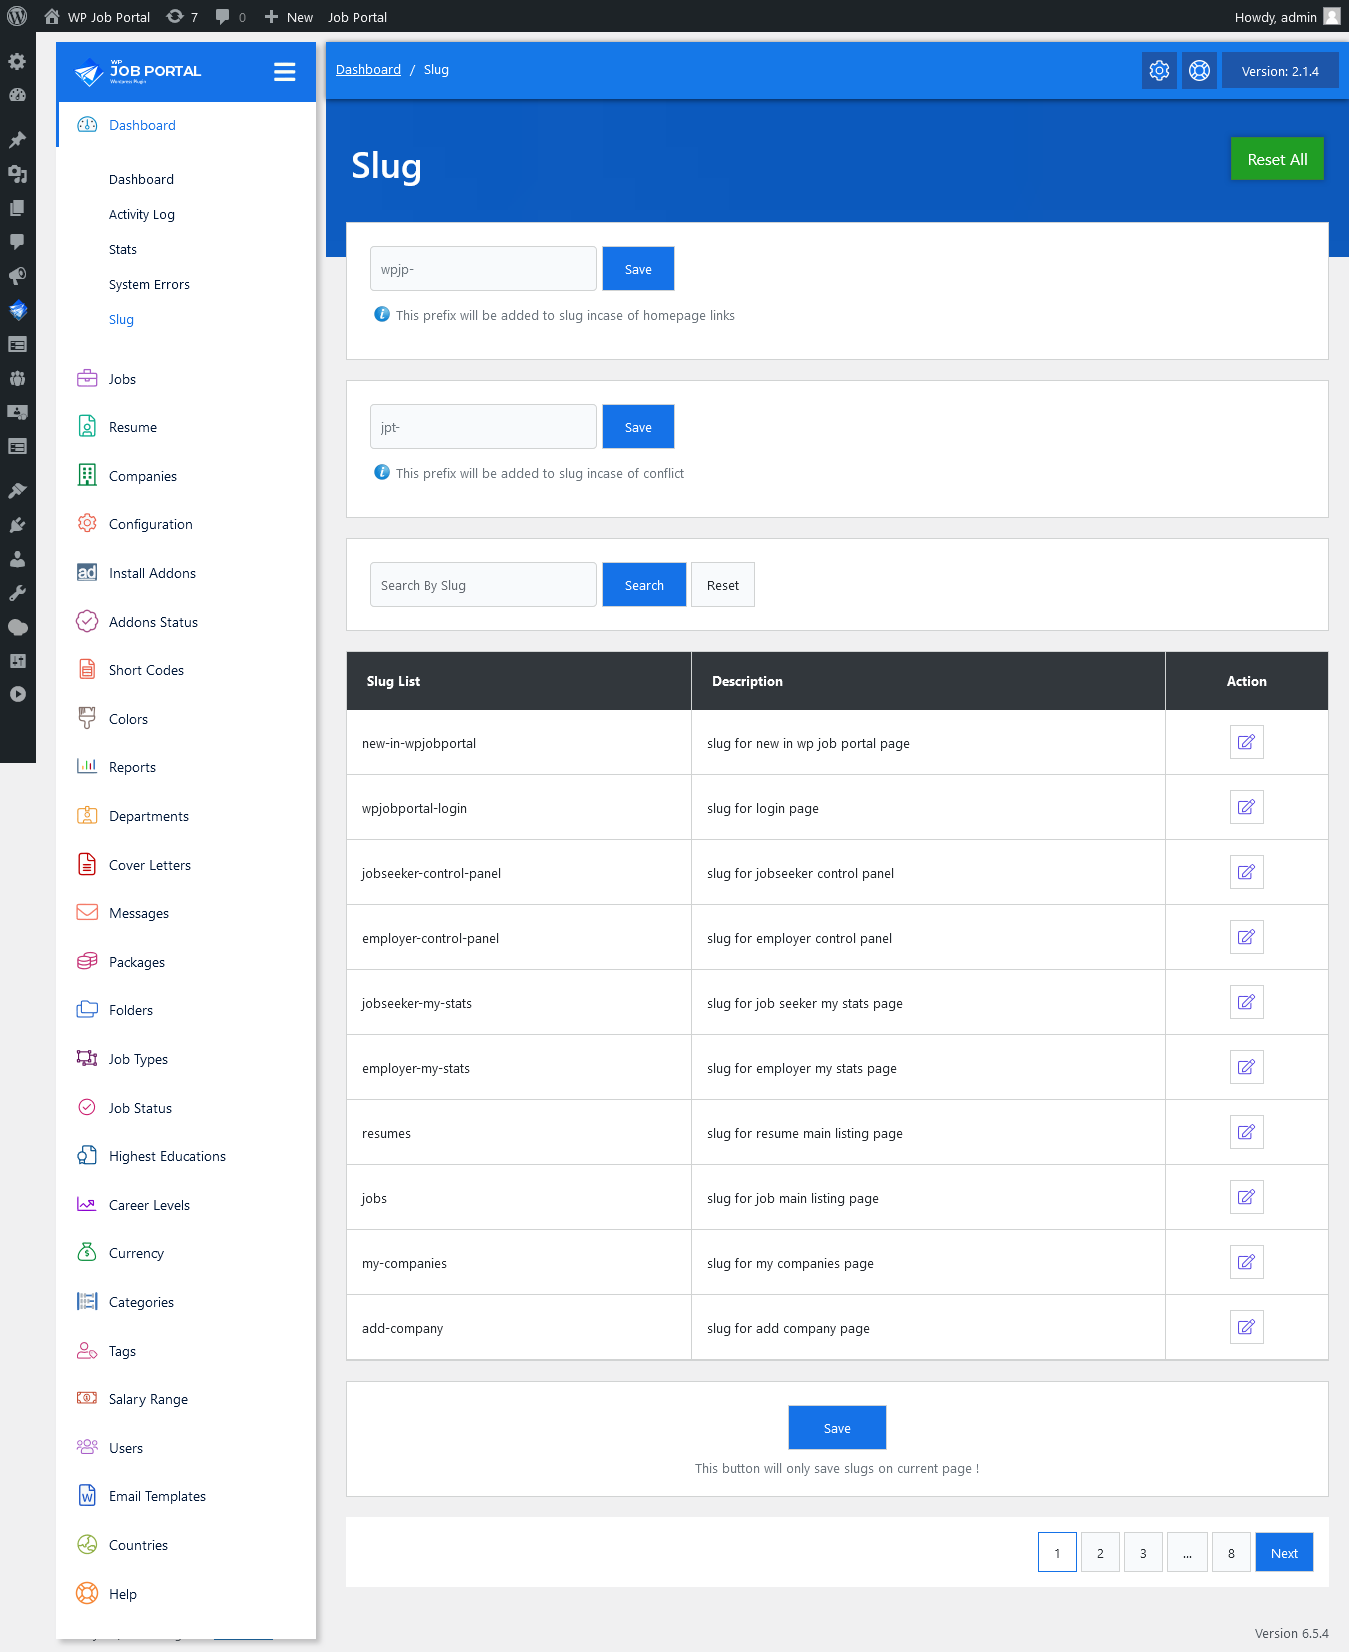
Let’s discuss how to manage slugs in the WP Job Portal. The WP Job Portal provides a proper mechanism for slug management.
- Set a Custom Prefix:
- Navigate to the Settings page in the WP Job Portal.
- Enter your desired prefix for the homepage slug to differentiate it from other pages.
- Click Save Changes to apply the new prefix.
- Resolve Slug Conflicts:
- If you encounter slug conflicts (where two or more pages share the same slug), set a custom prefix to resolve these conflicts automatically.
- Add a Custom Slug for Specific Pages:
- Go to the respective page editor of the page you want to customize.
- In the slug field, manually enter your desired slug for that page.
- Make sure to click Save to apply the changes.
Understanding Slugs
- What is a Slug?
- The slug is the part of the URL that follows the domain name and any subdirectories. It appears after the last slash (/) in the URL.
- Example:
- If your website is
www.example.comand you have a page with the slugjob-listings, the full URL would bewww.example.com/job-listings. - If a prefix like
jobs-is added, the URL will bewww.example.com/jobs-job-listings.
- If your website is
Benefits of Managing Slugs
- Smooth Navigation: Custom slugs make it easier for users to navigate your site.
- Improved User Experience: Well-structured URLs can enhance the user experience and improve SEO.
By effectively managing slugs, you can create a more organized and user-friendly WP Job Portal website.