Manage Custom Fields In The WP Job Portal!
To enhance your job portal by creating and managing custom fields, follow this step-by-step process:
- Open Admin Dashboard: Start by accessing your admin dashboard.
- Navigate to Custom Fields: The WP Job Portal offers dedicated sections for managing custom fields. You’ll find separate field sections for:
- Jobs
- Companies
- Resumes
- User Registration Forms
- Add Custom Fields:
- Select the section you want to customize (e.g., Jobs, Resumes).
- Click on the Add New Field button.
- Fill out the necessary information for the custom field, such as:
- Field Label: The name is displayed to users.
- Field Type: Choose from various types (text, dropdown, checkbox, etc.).
- Required: Specify if the field is mandatory.
- Visibility: Control where the field appears (frontend or backend).
- Save Your Changes: Once you’ve added all your custom fields, click Save Changes to apply them.
- Test Your Custom Fields: Go to the front end of your portal to ensure the new fields are functioning correctly during job posting or application processes.
By following these steps, you can effectively gather specific information, streamline your hiring process, and enhance the overall functionality of your job portal!
Custom Fields For Add Job Form

To manage custom fields for job postings, follow these steps:
- Access Admin Dashboard: Log into your admin dashboard.
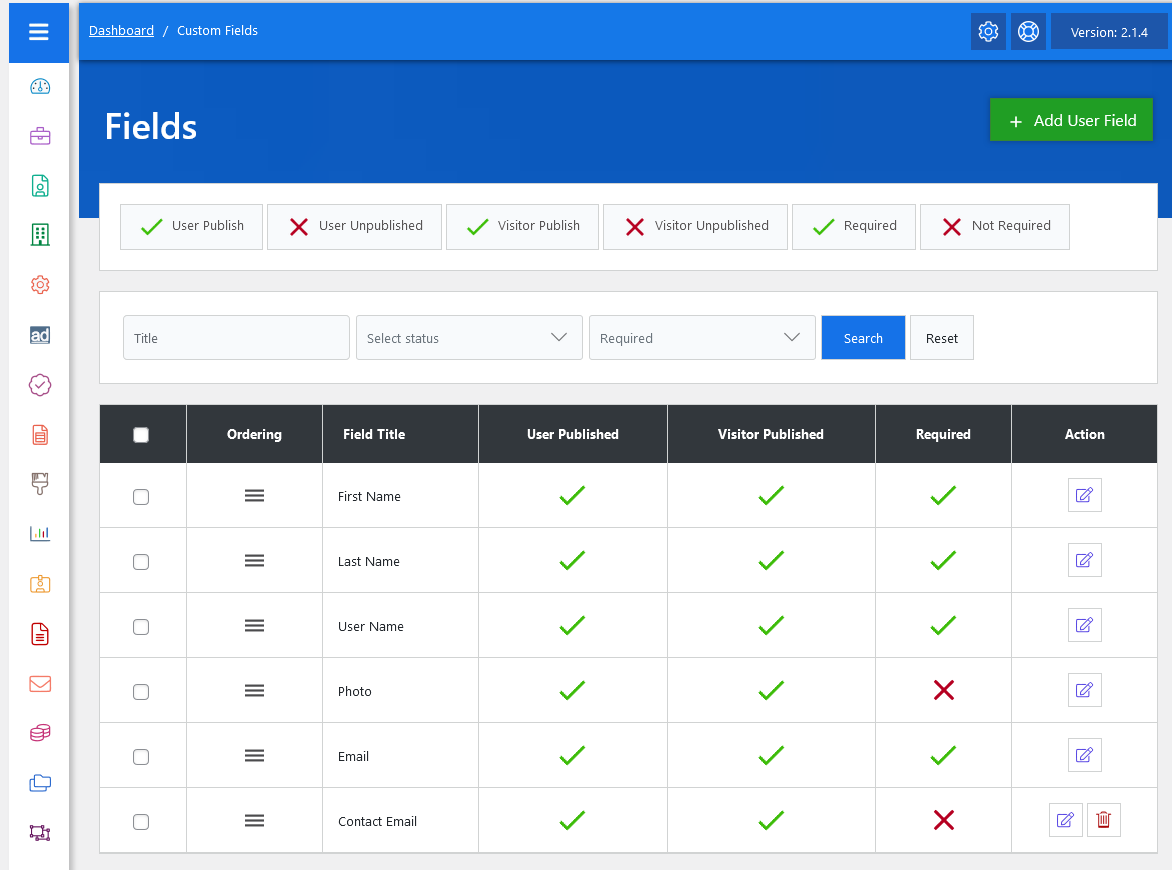
- Navigate to Jobs Section: From the dashboard menu, go to Jobs.
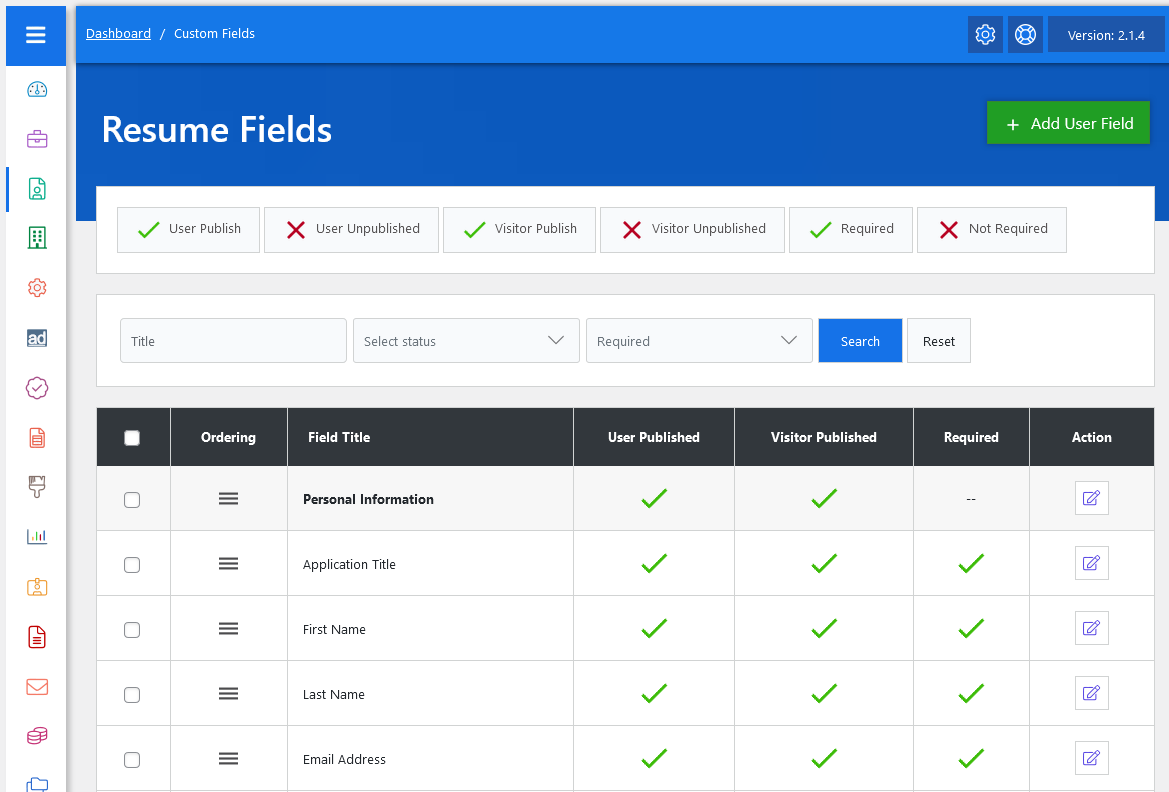
- Click on ‘Fields’: Select the Fields option to manage existing fields and add new ones for job postings.
- Add a New Field:
- Click on the Add User Field button.
- Fill in the details for the new field:
- Field Label: Enter a name for the field that will be displayed to users.
- Field Type: Choose the appropriate field type (text, dropdown, checkbox, etc.).
- Required: Indicate whether this field is mandatory for job postings.
- Visibility: Specify where the field should be visible (frontend or backend).
- Save Changes: Once you have filled in the required details, click the Save Changes button to apply your modifications.
By following these steps, you can effectively customize the job posting fields to gather specific information relevant to your job listings!
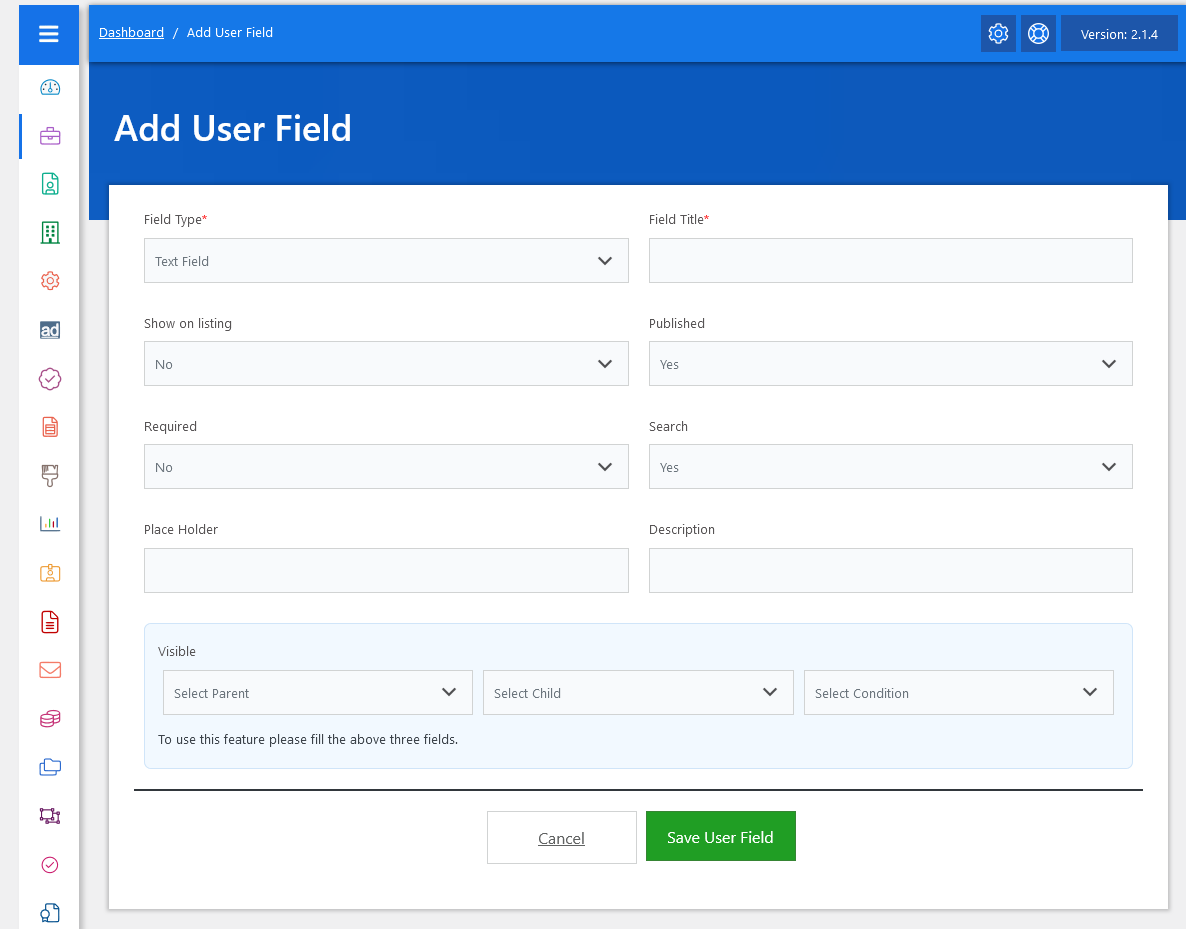
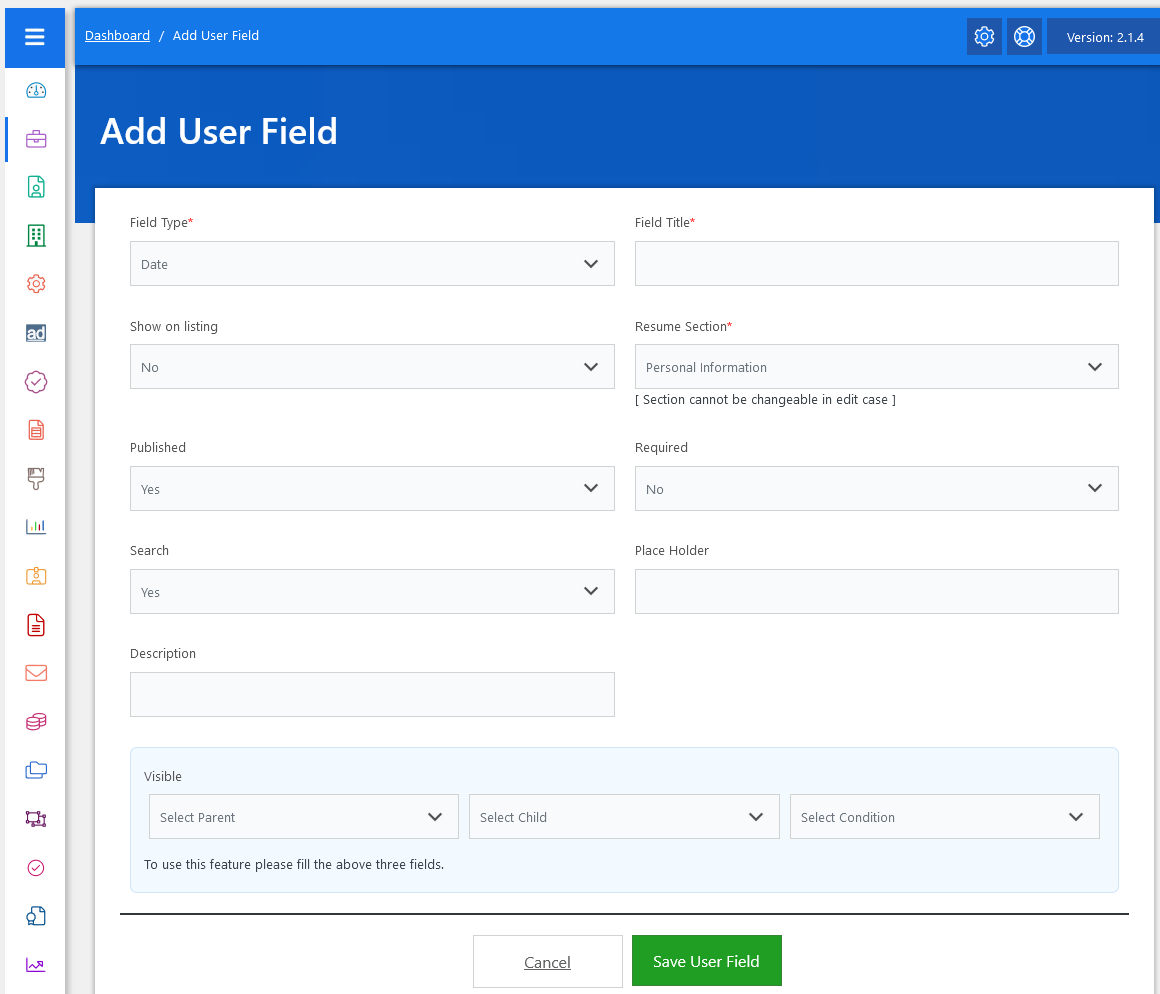
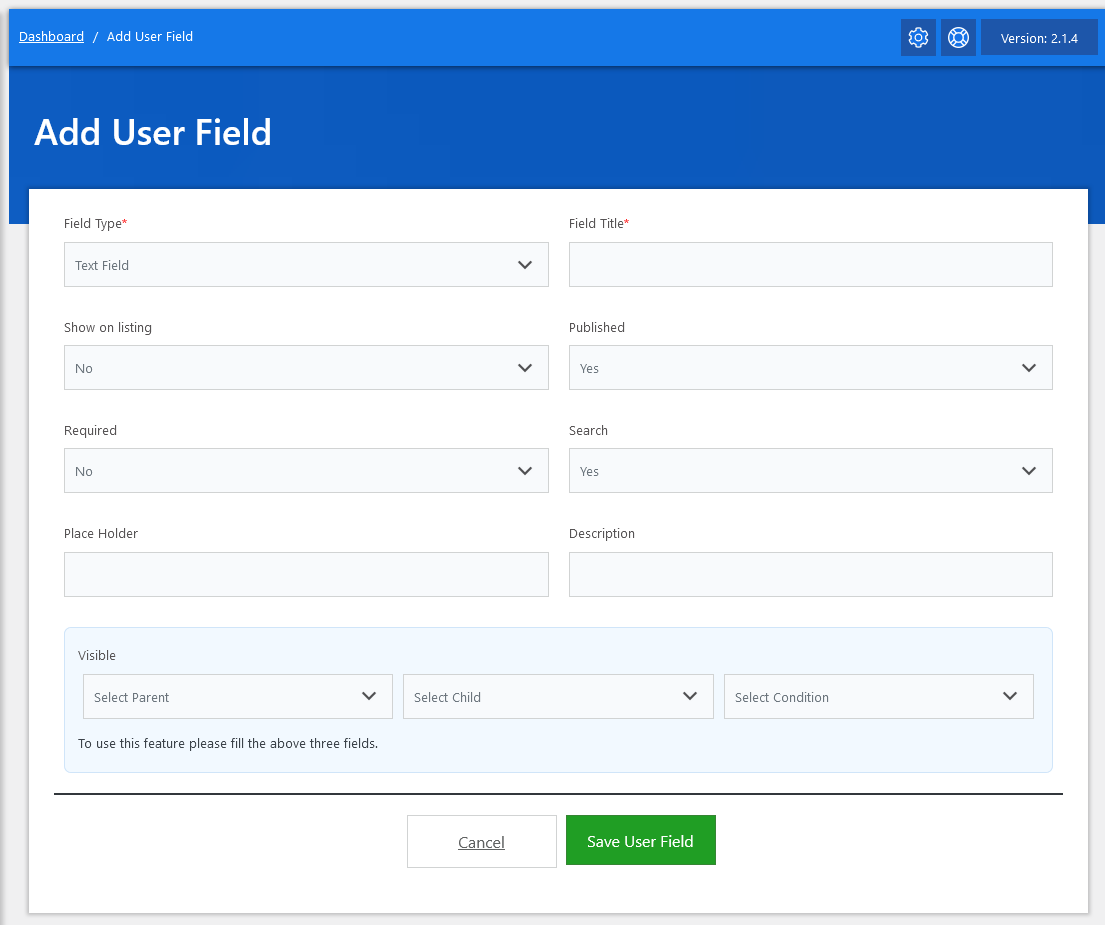
On the Add User Field screen, follow these steps to create a custom field for job postings:
- Select Field Type: Choose the appropriate field type from the options available in the WP Job Portal. Options may include text input, dropdown, checkbox, etc., depending on what information you need to collect.
- Provide a Unique Field Name: Enter a descriptive name for your custom field to indicate its purpose.
- Field Options:
- Visible on Job Listing Page: Choose whether this field should be displayed alongside job details in the job listing.
- Display on Add Job Form: Decide if this field should appear on the job submission form for employers.
- Required Field: Set this option to “Yes” if you want to make the field mandatory for job submissions.
- Add for Search: Select “Yes” if you want this field to be searchable, allowing users to filter job searches based on this field.
- Add Placeholder and Description: Provide a placeholder text to guide users on what information to enter, and add a description for further clarification.
- Save Field: After defining all the field details, click the Save Field button to add the new custom field.
Your custom field will now be part of the job submission process, enhancing your job portal’s functionality and allowing for more specific data collection!
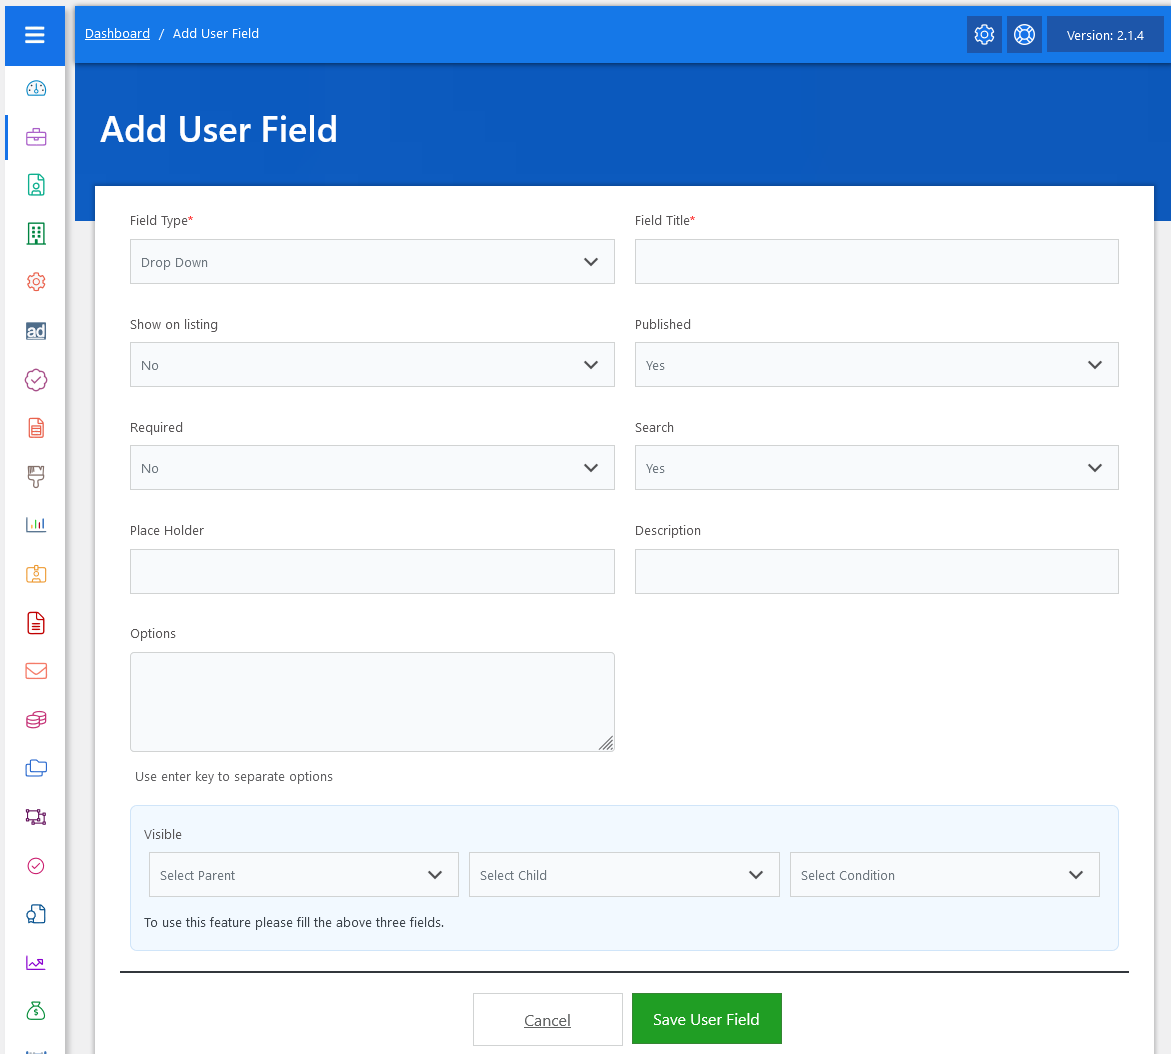
To add a dropdown type field to your job form, follow these steps:
- Navigate to Job Fields Management: From the job fields management screen, click on the Add User Field button.
- Select Field Type: Choose Dropdown as the field type.
- Provide Field Name: Enter a relevant name for the dropdown field to indicate its purpose.
- Field Options:
- Visible on the Job Listing Page: Decide if this field should appear alongside job details in the job listing.
- Display on Add Job Form: Choose whether this field should be included in the job submission form for employers.
- Required Field: Set this field as Required if you want it to be mandatory for job submissions.
- Add for Search: Select Yes to include this field in job search criteria, allowing users to filter jobs based on this option.
- Add Placeholder and Description: Provide a placeholder text that guides users on what to select, and add a description to clarify the purpose of the dropdown field.
- Add Options for Dropdown: Enter the options that will be available in the dropdown menu. Make sure each option is relevant and clearly defined.
- Save Field: Once you have configured all settings and added the options, click the Save Field button.
Your new dropdown field is now successfully created and will be visible on the job form, complete with the options you specified!
Visible Fields
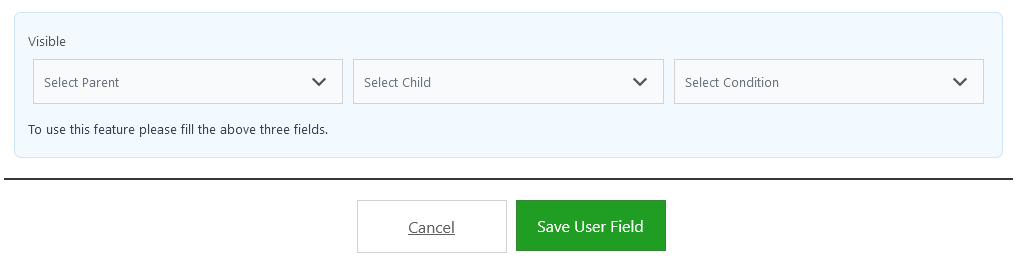
To add a child field with visibility conditions linked to a parent field, follow these steps:
- Access Job Fields Management: Start by navigating to the job fields management screen.
- Add a Child Field:
- Click on the Add User Field button.
- Choose Multi-Select as the field type for the child field.
- Provide a relevant name for the child field.
- Field Options:
- Visible on the Job Listing Page: Decide if this field should appear alongside job details in the job listing.
- Display on Add Job Form: Choose whether this field should be included in the job submission form for employers.
- Required Field: Set this field as Required if you want it to be mandatory for job submissions.
- Add for Search: Select Yes if you want this field to be searchable.
- Add Options for Multi-Select: Enter the options that will be available in the multi-select menu. Ensure each option is relevant.
- Set Up Visibility Conditions:
- Parent Field: In the visibility condition settings, select the previously added dropdown field as the parent field.
- Child Field: Choose one of the values from the dropdown field that will determine the visibility of the multi-select field.
- Condition: Set the condition to “equal”. This means the multi-select field will only be visible on the job form when the parent field is set to “YES”.
- Save Field: After configuring the visibility condition and ensuring everything is set up correctly, click the Save Field button.
Your new multi-select field has now been successfully created and will appear on the job form based on the specified visibility condition related to the parent dropdown field!
Custom Fields At Job Form-Employer Side
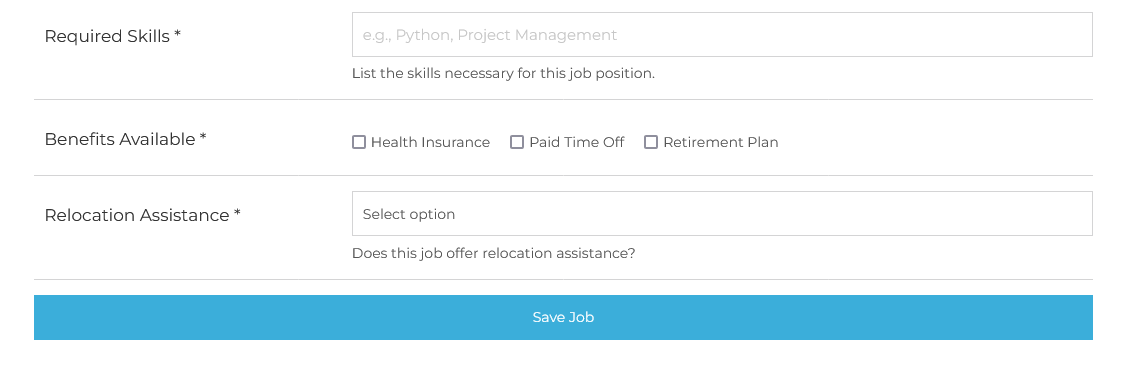
To view the new custom fields on the job form, follow these steps:
- Access Employer Dashboard: Log in to the employer dashboard.
- Add a New Job: Click on the Add Job button.
- View Custom Fields: On the job form page, you will see the newly added custom fields displayed.
- Note: The child fields will not be visible unless the parent field conditions are met. For instance, if the parent dropdown field is set to “YES,” only then will the associated child fields appear.
By following these steps, you can ensure that the custom fields are integrated properly into the job submission process!
Job Search Form-Jobseeker Side

To view the custom fields on the job search form, follow these steps:
- Access Job Seeker Dashboard: Log in to the Job Seeker dashboard.
- Open Job Search Form: Navigate to the job search form.
- View Custom Fields: Here, you will see the custom fields available for job search based on the “Search” settings.
- Note: Child fields will not appear on the job search form, only the parent fields or those fields that are set to be visible for search.
This setup allows job seekers to find jobs based on specific criteria established by the custom fields, enhancing their search experience!
Custom Fields For Add Resume Form
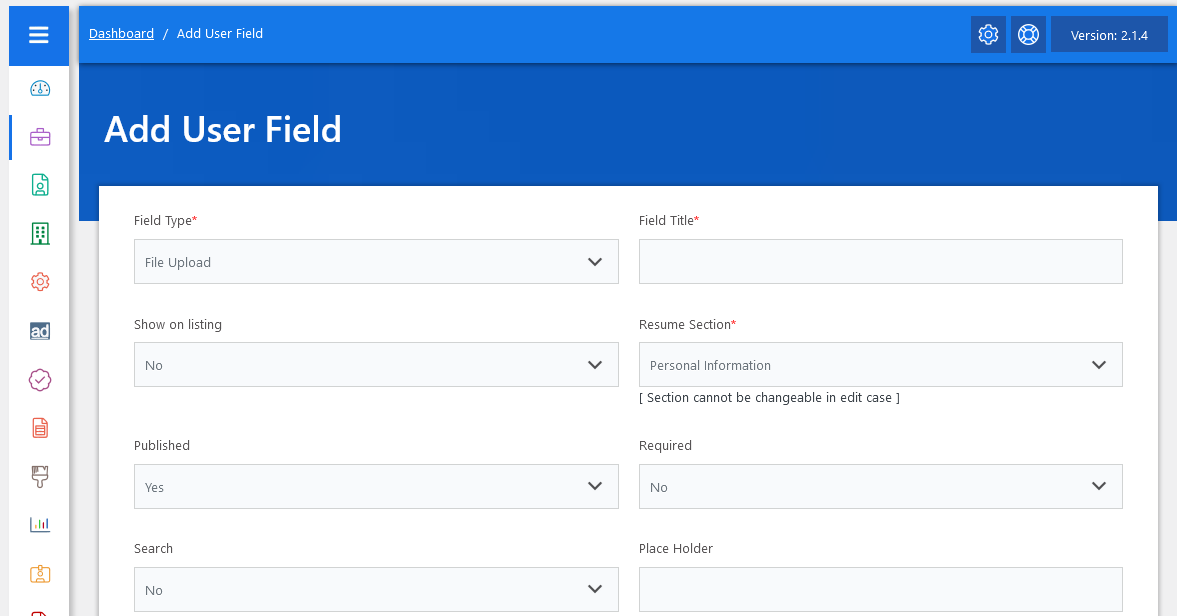
To add an upload field for resumes, follow these steps:
- Add User Field:
- Click on the “Add User Field” button again.
- Select Field Type:
- Choose “Upload” as the field type.
- Provide Field Name:
- Enter an appropriate name for the field, such as “Portfolio.”
- Resume Section Selection:
- Note that the resume section selection is disabled for upload fields, as they are always placed under the Personal Info section by default.
- Save the Field:
- Click the “Save Field” button to finalize your changes.
Your new “Portfolio” upload field has now been successfully created and will automatically appear under the Personal Info section of the resume form.
Custom Fields At Resume Form-Jobseeker Side
To view the newly added fields on the resume form, follow these steps:
- Navigate to the Job Seeker Dashboard:
- Go to the job seeker’s dashboard.
- Click on “Add Resume”:
- Click the “Add Resume” button.
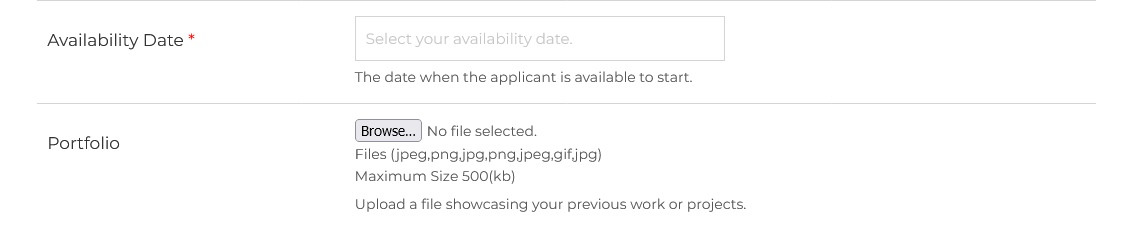
- View New Fields:
- Here, you will see the newly integrated fields in the form:
- “Availability Date”: Allows users to specify their start date.
- “Portfolio”: Enables users to upload relevant documents or portfolios.
- Here, you will see the newly integrated fields in the form:
These additions enhance the resume form, allowing job seekers to provide more comprehensive information.
Custom Fields Under The Resume Section

To add a field under a different section on the resume form using the WP Job Portal plugin, follow these steps:
- Add User Field:
- Click on the “Add User Field” button.
- Select Field Type:
- Choose “Radio Button” as the field type from the list.
- Provide Field Name:
- Enter a relevant name for the field (e.g., “Skill Level”).
- Set Resume Section:
- In the “Resume Section” setting, select “Skills” to specify where this field should appear on the resume form.
- Configure Additional Options:
- Add any related field values for the radio button options (e.g., “Beginner,” “Intermediate,” “Expert”).
- Adjust any additional options as needed (e.g., making it required).
- Save Field:
- Click the “Save Field” button.
Your radio button field has now been successfully created and will appear in the Skills section of the resume form, showcasing the versatility and customization capabilities of the WP Job Portal plugin.
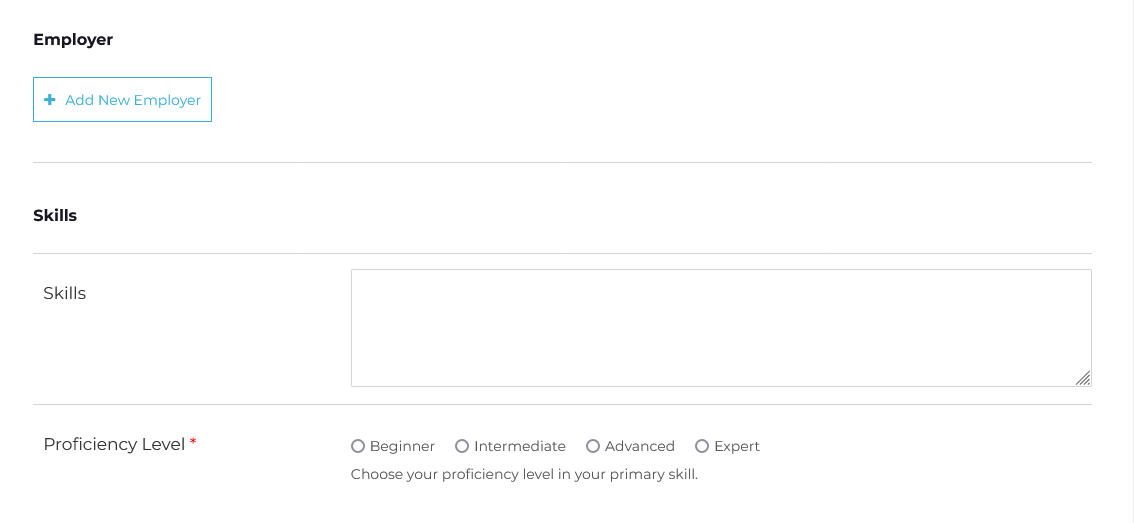
The “Proficiency Level” radio button field has been successfully created and will appear in the specified section on the resume form. Job seekers can now easily indicate their skill levels under the Skills section, enhancing the information available to potential employers and making the hiring process more effective. This customization feature allows for better alignment of resumes with job requirements.
Custom Fields For Add Company Form
Administrators can easily add and manage fields for company profiles, ensuring that all relevant details are accurately captured and presented to employers.
To begin:
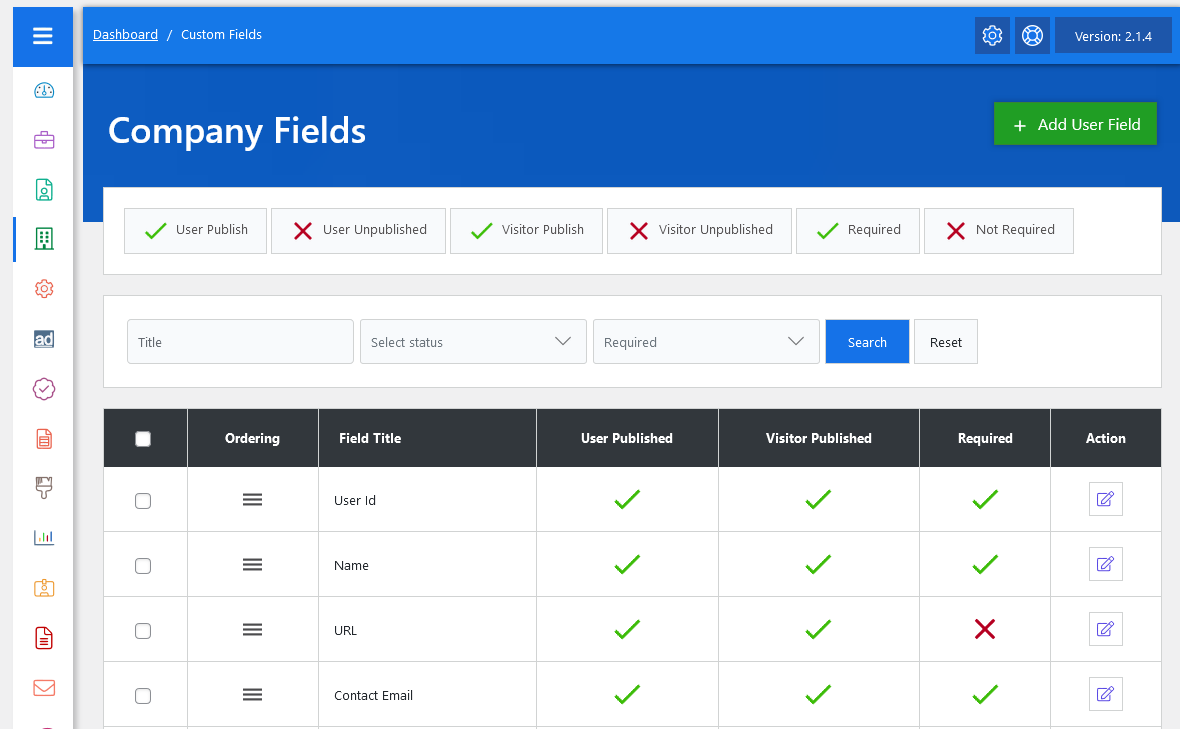
- Navigate to the Admin Dashboard.
- Go to the Dashboard Menu.
- Click on Company.
- Select the ‘Fields’ option.
Here, you can manage existing fields and add new ones to collect specific details about the company. To add a new field, simply click on “Add User Field.” This functionality allows you to customize the company profile form according to your requirements, enhancing the information available for employers.
Custom Fields For User Register Form
After clicking on the “Add Field” button, follow these steps to configure the new field:
- Choose Field Type: Select the appropriate field type from the available options (e.g., text, dropdown, radio button, etc.).
- Provide Field Name: Enter a relevant name for the field that clearly describes its purpose.
- Field Options:
- If applicable, decide whether the field should be required for registration.
- Add a placeholder and description to guide users on what information is needed.
- Specify visibility settings, such as whether the field should appear on the registration form or if it should be included in search criteria.
- Click “Save Field”: Once all the details are configured, click the “Save Field” button to add the new field to the user registration form.
Your new field will now be available for users to fill out during registration, enhancing the information collected for the job portal.
User Register Form
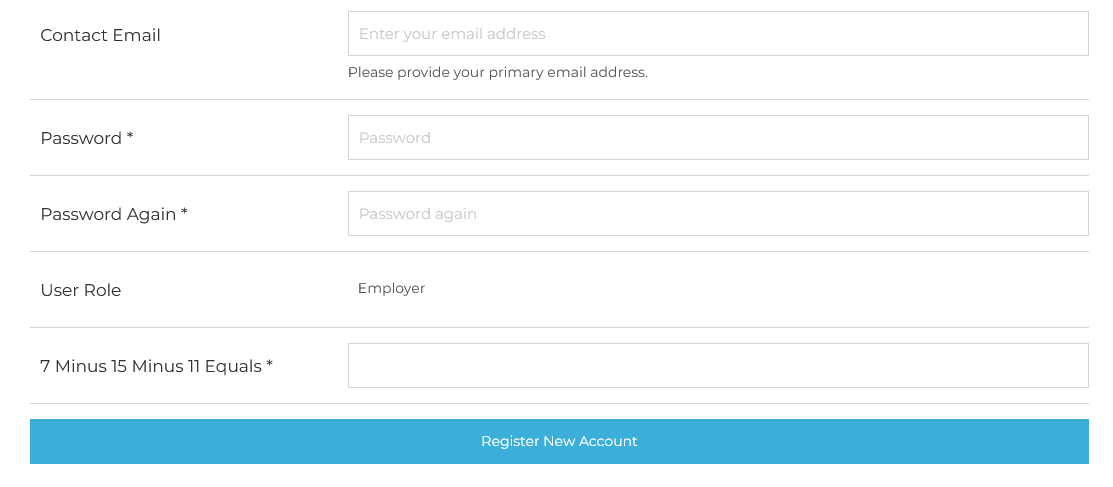
To see the newly added field in action:
- Go to Registration Page: Navigate to the WP Job Portal registration page.
- Locate the Contact Email Field: The newly added Contact Email field will be visible among the other registration fields.
- Test the Field: You can fill in the field along with other required information to ensure it’s functioning correctly during the registration process.
This allows you to confirm that the field has been successfully integrated into the user registration form.