How To Use Credits System Work In The WP Job Portal!
This article will guide you through setting up and using the credit package system for paid submissions in the WP Job Portal plugin. The credit system allows administrators to implement a monetization model where employers and job seekers are charged for specific actions. Administrators can create custom packages with associated credit packs, defining which actions will require credits. In this guide, we will explore how administrators can configure and add packages for paid submissions, and how employers and job seekers can purchase these packages. Let’s get started!
Ensure Required Add-ons Are Activated.
Before getting started, make sure the Credit System and WooCommerce add-ons are installed and activated. To use this feature, the Credit System add-on must be enabled. To check its activation status, navigate to Admin Dashboard → WordPress Menu → Plugins.

Find the Credit System add-on in the list of plugins and verify its activation. Once activated, ensure the WooCommerce plugin is also enabled to process credit payments. With both add-ons active, you’ll be able to easily configure and add packages for paid submissions within the WP Job Portal.
Paid Submission Types
The WP Job Portal provides two types of paid submissions: the Per-Listing System, where employers pay for each job listing, and the Membership Plan, which allows for multiple submissions over a specified period for a flat fee.
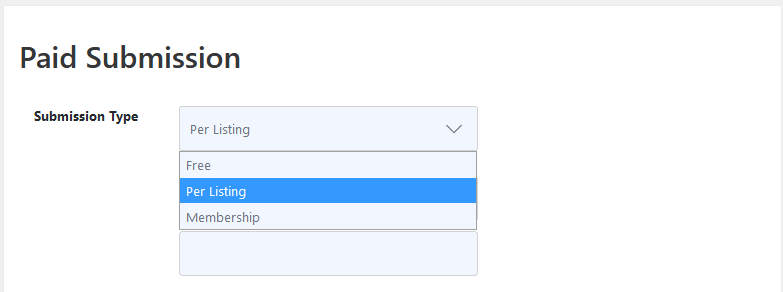
Paid Submissions With Per Listing Mode (Employer Side)
First, we will proceed with the per-listing mode. Navigate to your Admin Dashboard, then go to Dashboard Menu > Configurations > Package Settings > Paid Submission. Here, you’ll see the option to configure paid submissions. Select the per-listing mode.
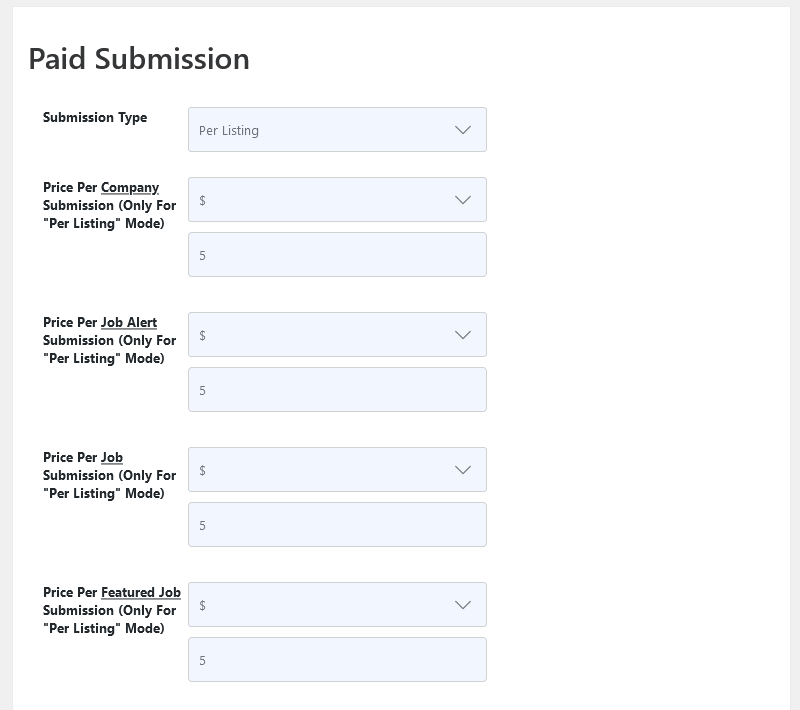
In this mode, payment is charged for each action you define below. Configure the action prices for per-listing submissions according to your needs. Start by selecting the currency type, then enter the price for each company submission. You can also set prices for job submissions, featured job submissions, and more. Remember, actions with a price of zero are considered free and won’t require a purchase. Once you’ve made your configurations, save the changes, and your settings will be stored successfully.
Add Company With Per Listing Mode
Now let’s move on to the employer dashboard to see how employers can perform paid submissions using the per-listing mode. We will start by creating a company.
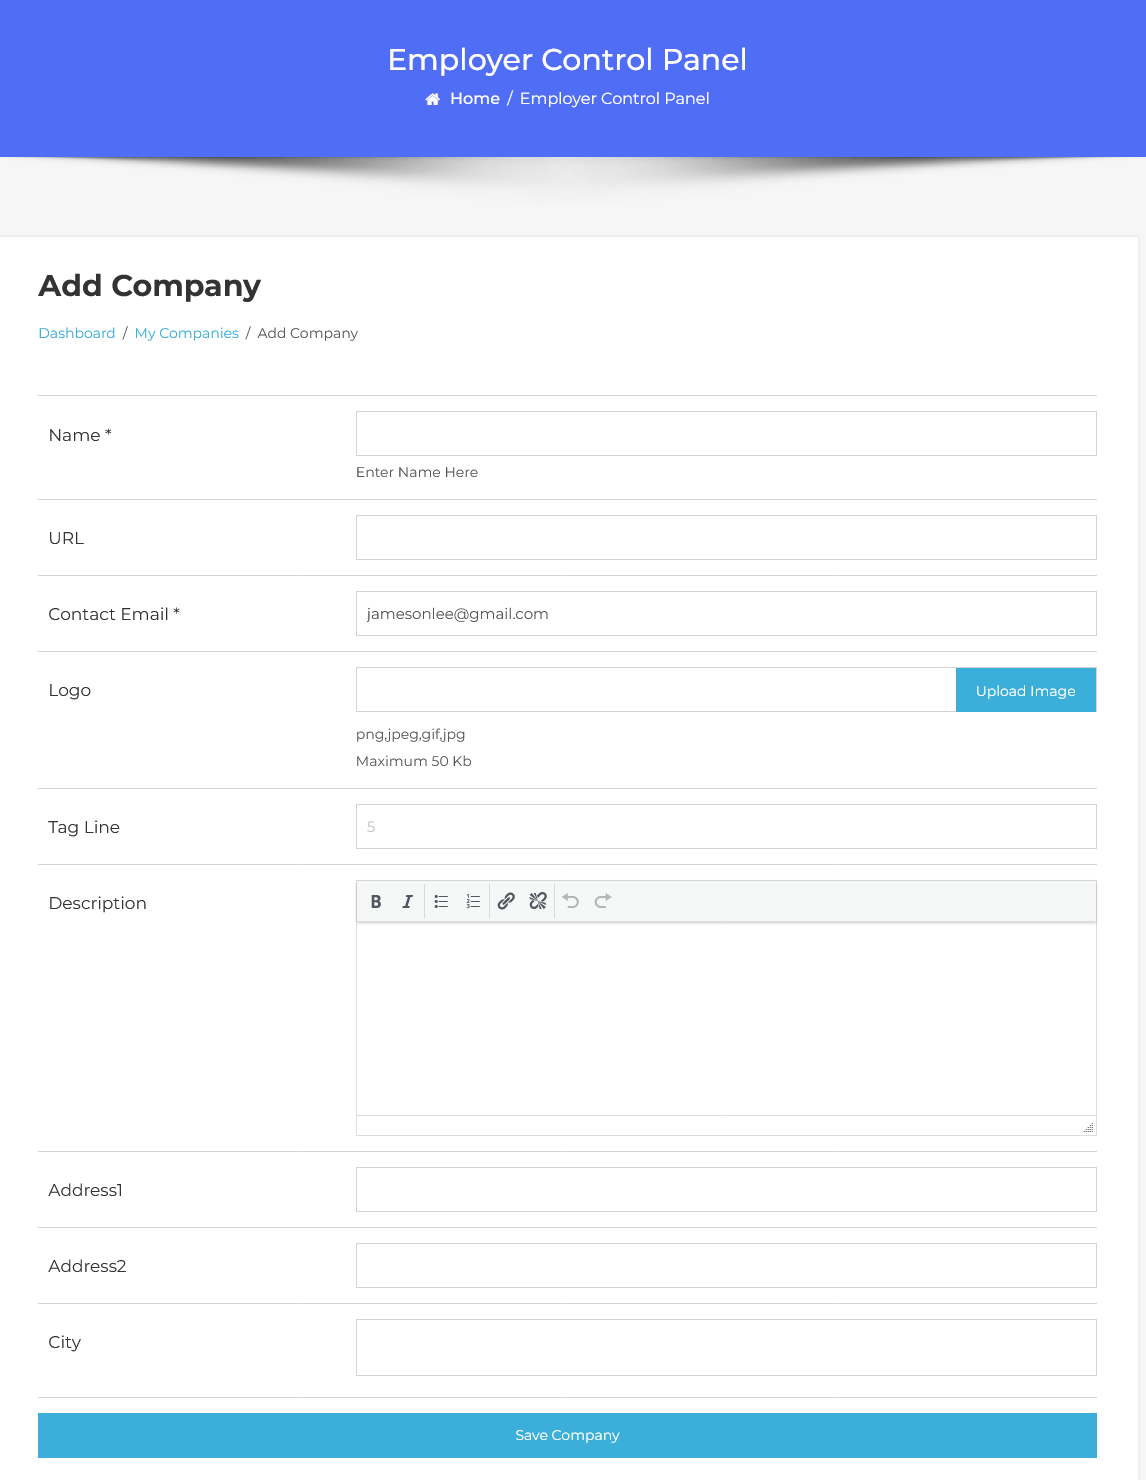
On the “Add Company” form, fill in the required details about the company. Once you have entered all the information, click the “Save Company” button.
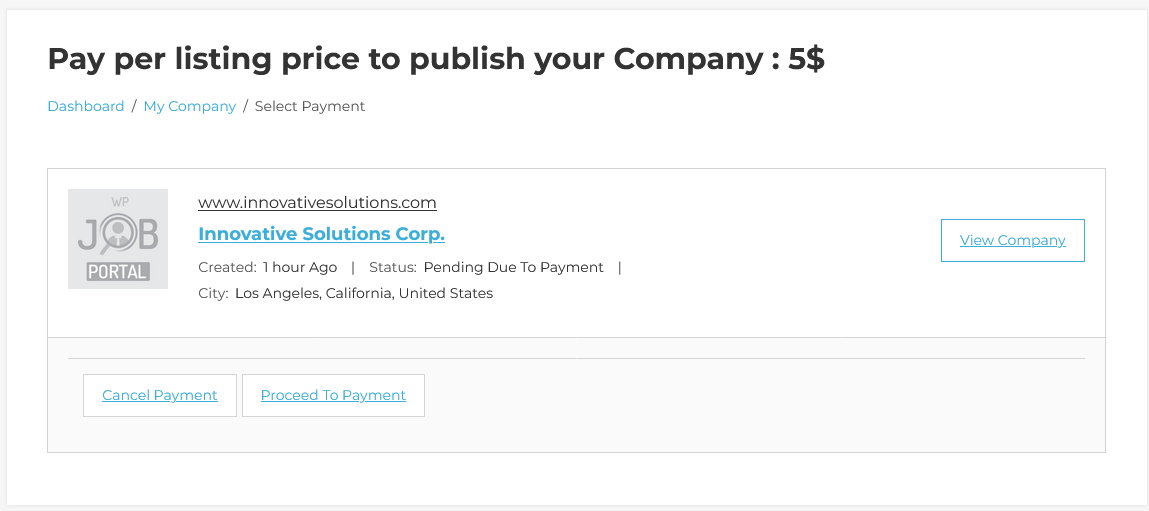
Make Payment
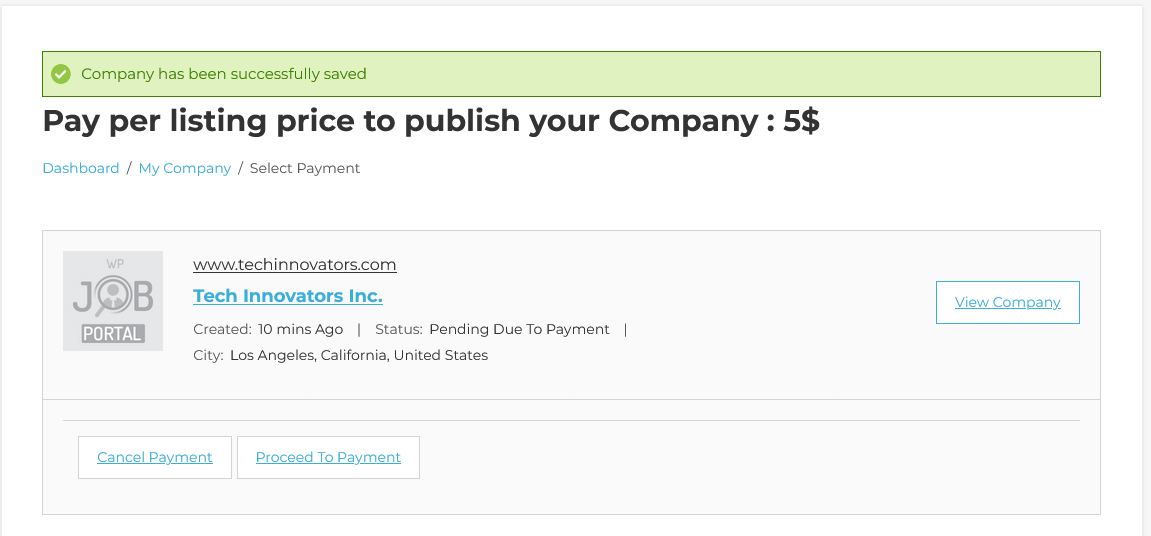
You will notice that the company has been created but is not published due to the requirement for paid submissions. To make your company listing live, we need to complete the payment process.
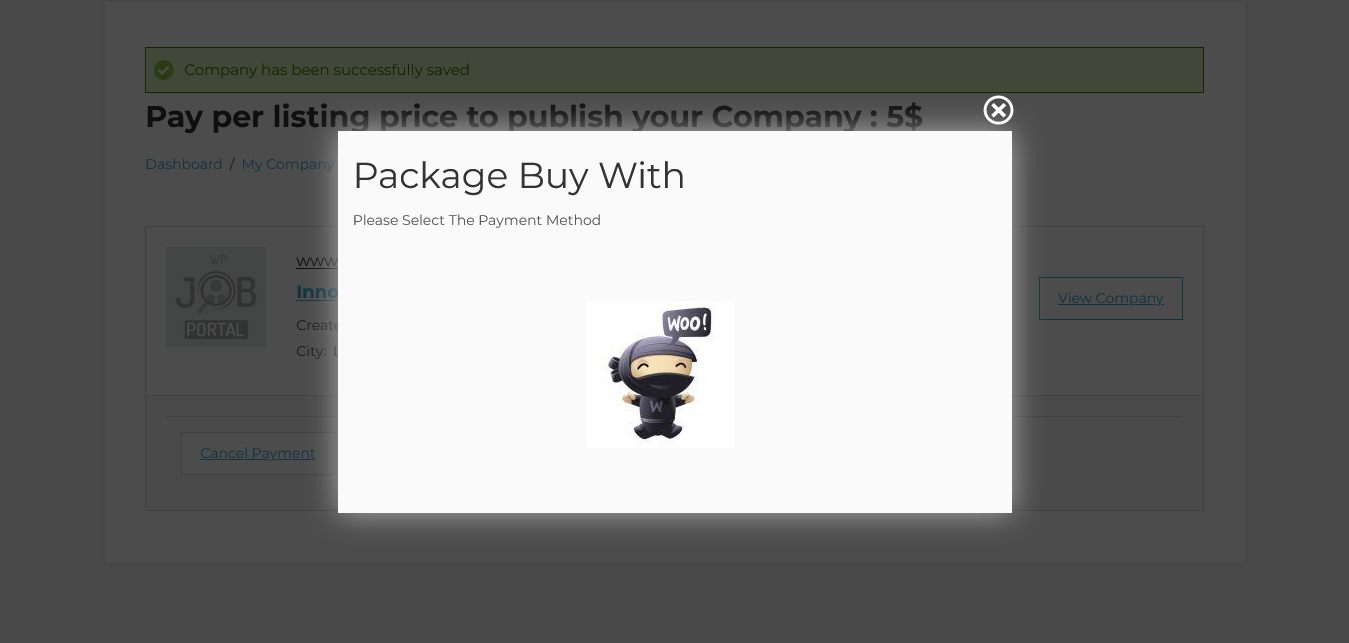
To publish the company, proceed to the payment section. This will open a pop-up window where you can select a payment method. WP Job Portal offers various payment options, but for this demonstration, we will use WooCommerce for payment processing.
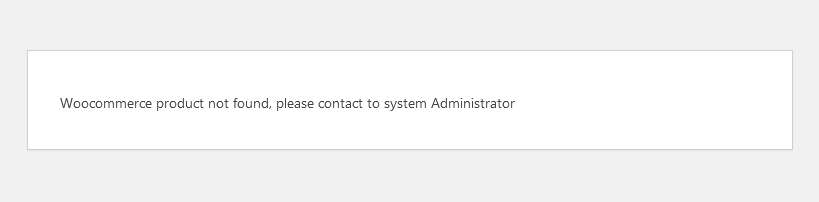
After selecting the payment option, a notification pop-up will appear, indicating that the WooCommerce product is not found and advising you to contact the system administrator. This means the system administrator must first add a product with a specified price to the WooCommerce store. Once that is done, employers can purchase credits by buying that product, enabling them to publish their company listings.
Add Product to Your WooCommerce Store.
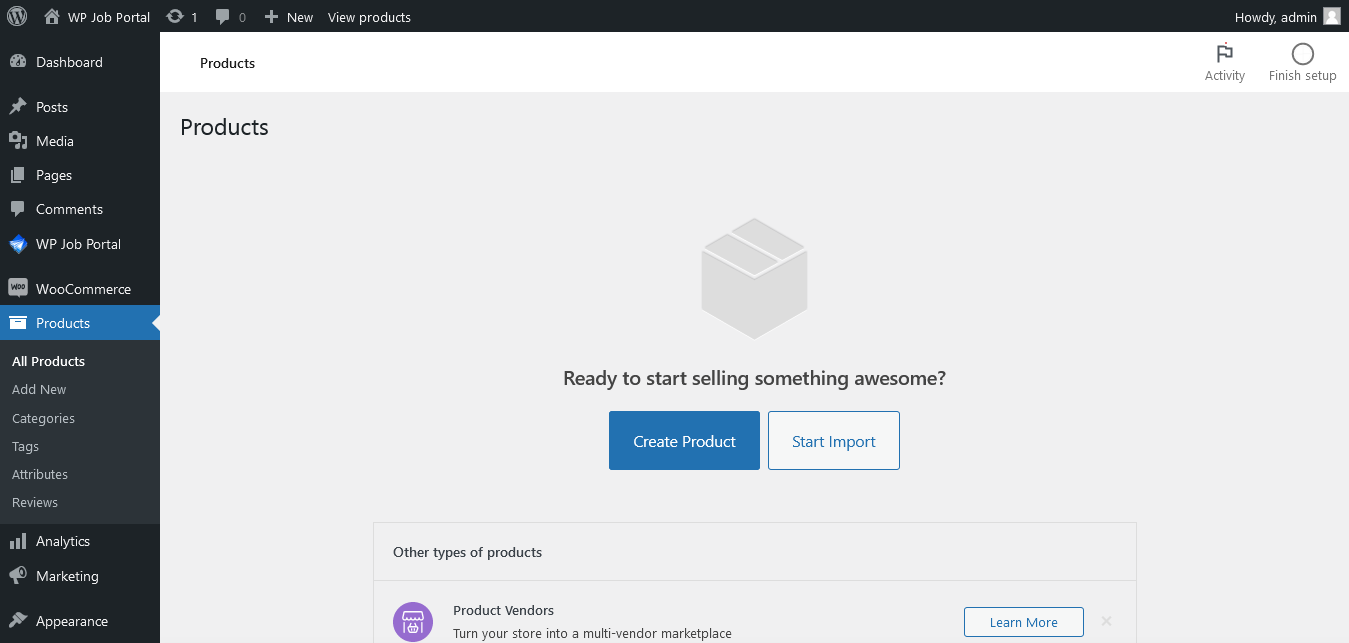
To add a product to your WooCommerce store, access your Admin Dashboard → WooCommerce Menu → Products and select “Add New” to create a new product.
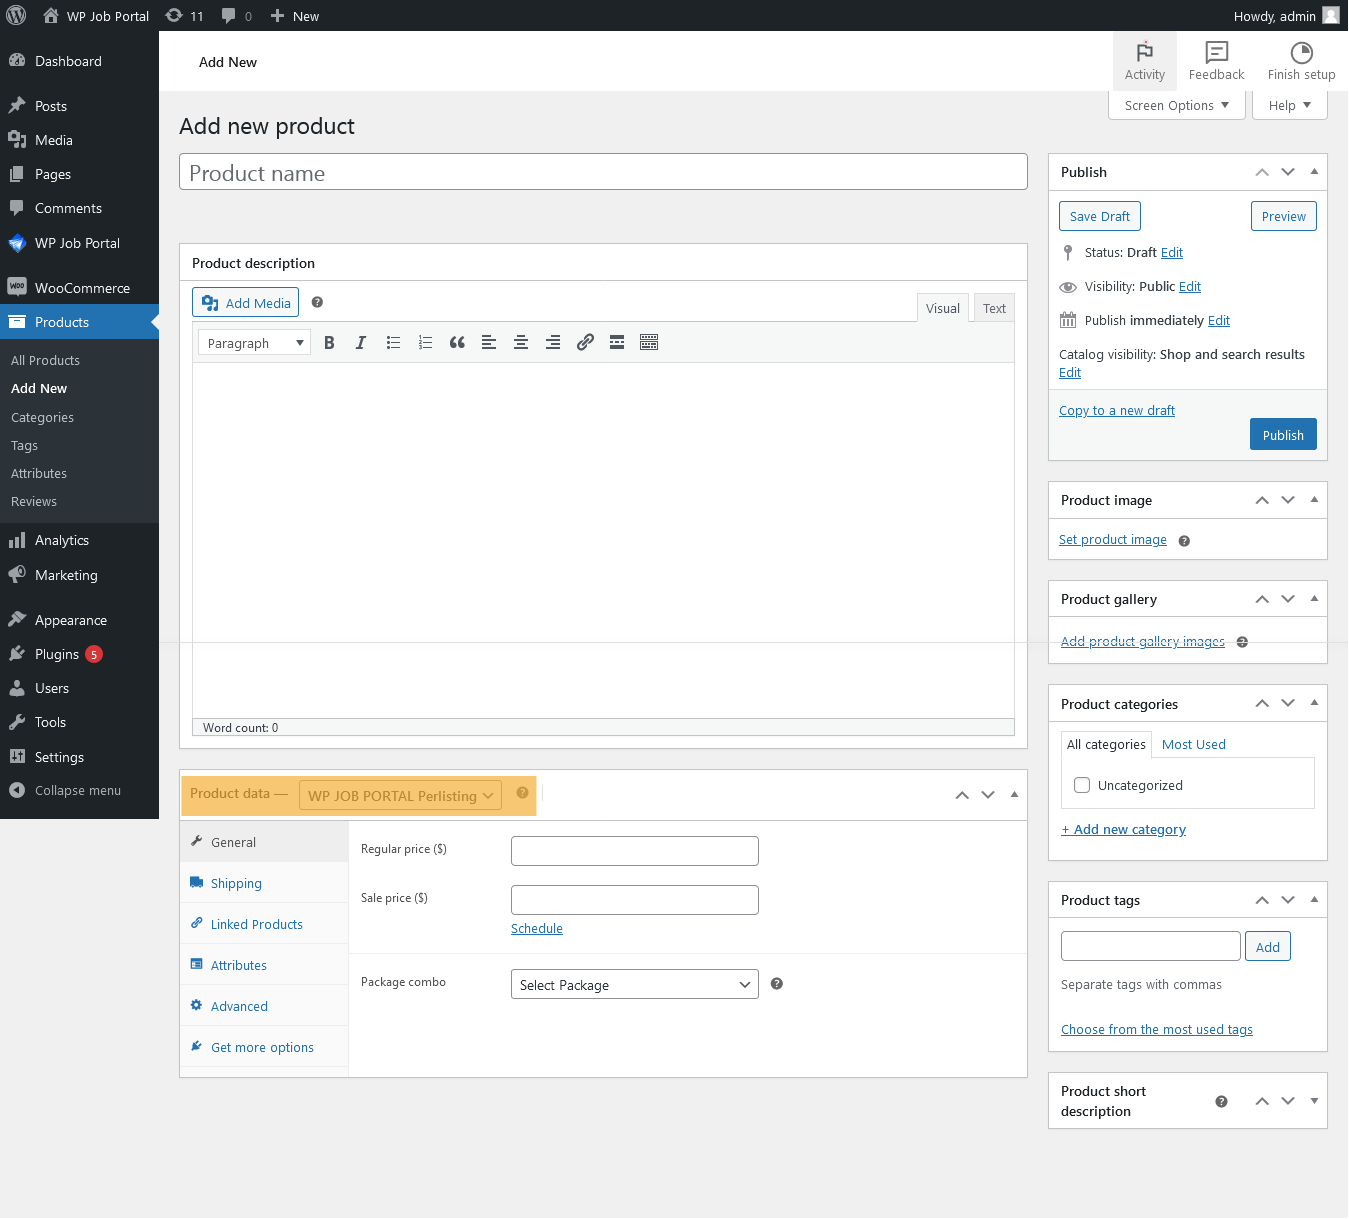
- Fill in the necessary information for your product, including title and description.
- In the ‘Product data’ section, you’ll find two options: WP Job Portal Package and WP Job Portal Per-Listing.
- These are available only with the credit system addon installed, and all WooCommerce products will be added with these two options.
- Under the “Product Data” section, choose the product type WP Job Portal Per-Listing.
- As we are creating this product for per-listing, we will select the corresponding option.
- Enter the regular price for company creation.
- If you want to offer a sale price for the combo package, enter the discounted price in the field.
- Next, define the combo package by selecting the component you want to include, such as the company.
- Once you have filled in all the required details, publish the product within your store.
Make Payment
After successfully adding a product to WooCommerce, the employer can now purchase it to publish the company. To make the purchase, click on the “Proceed to Payment” button and select the “WooCommerce” option for payment. This will direct you to the WooCommerce checkout page, where you can complete the transaction and activate your company listing.
Proceed To Checkout
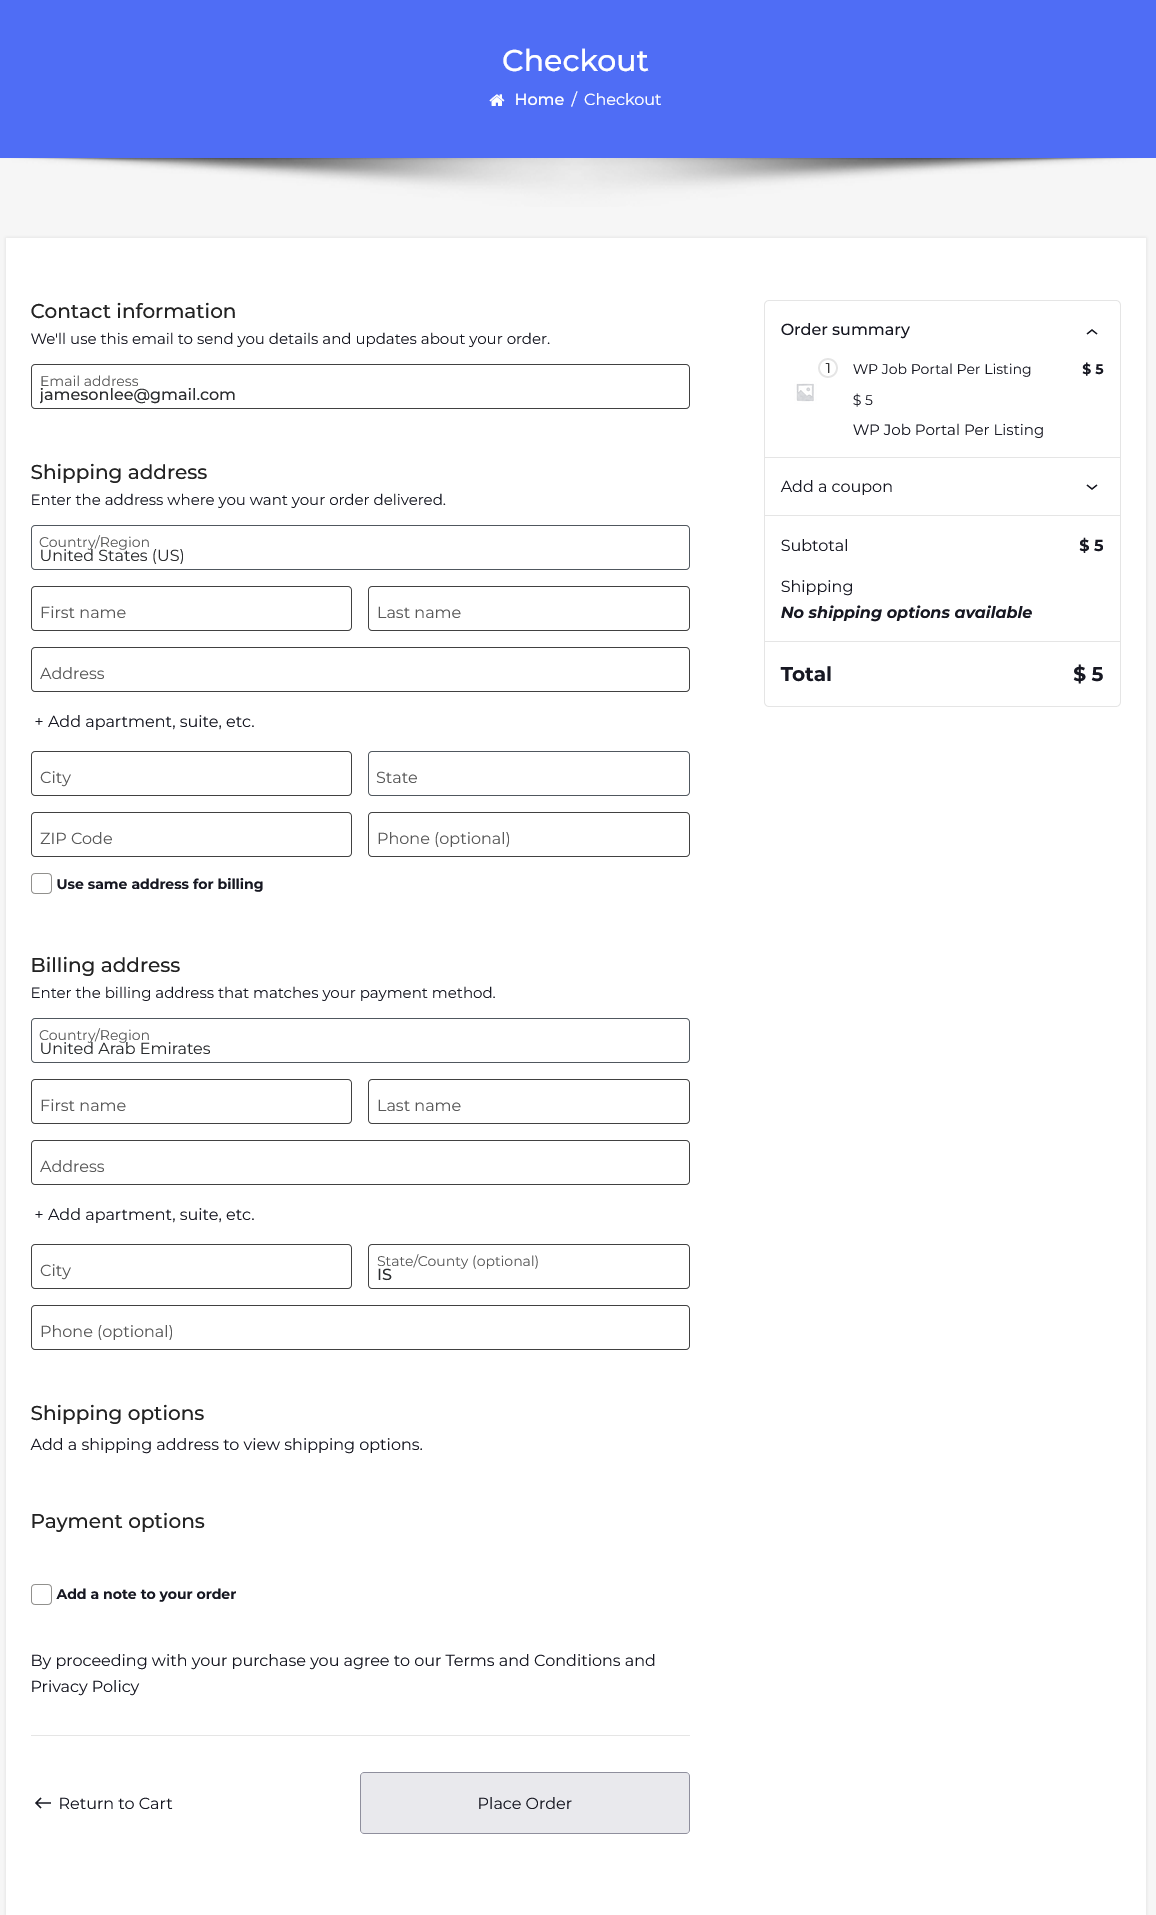
This action will direct you to the checkout page, where you’ll be prompted to provide the necessary billing details to proceed with your order. Once you have filled in all the required information, proceed to place your order. After successfully paying for the product, the company will be published.
With the per-listing pricing model, users can make paid submissions by paying for each action individually. This flexible approach allows users to pay only for the specific actions they require, ensuring a tailored experience that meets their needs.
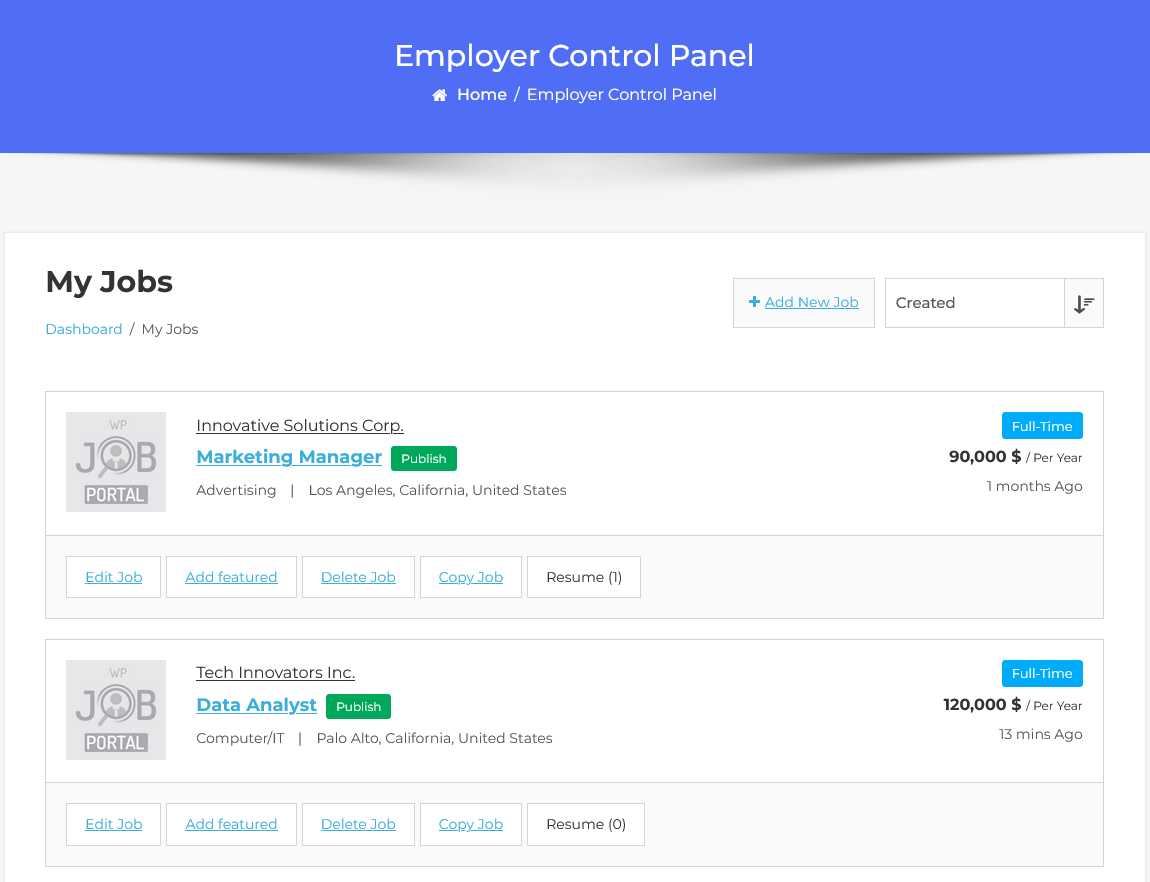
Add Job With Per Listing Mode.
Now, let’s navigate to the employer dashboard to explore how employers can perform paid submissions using the per-listing mode. From the employer dashboard, we will carry out some of the actions configured earlier, demonstrating how the payment process works for various listings.
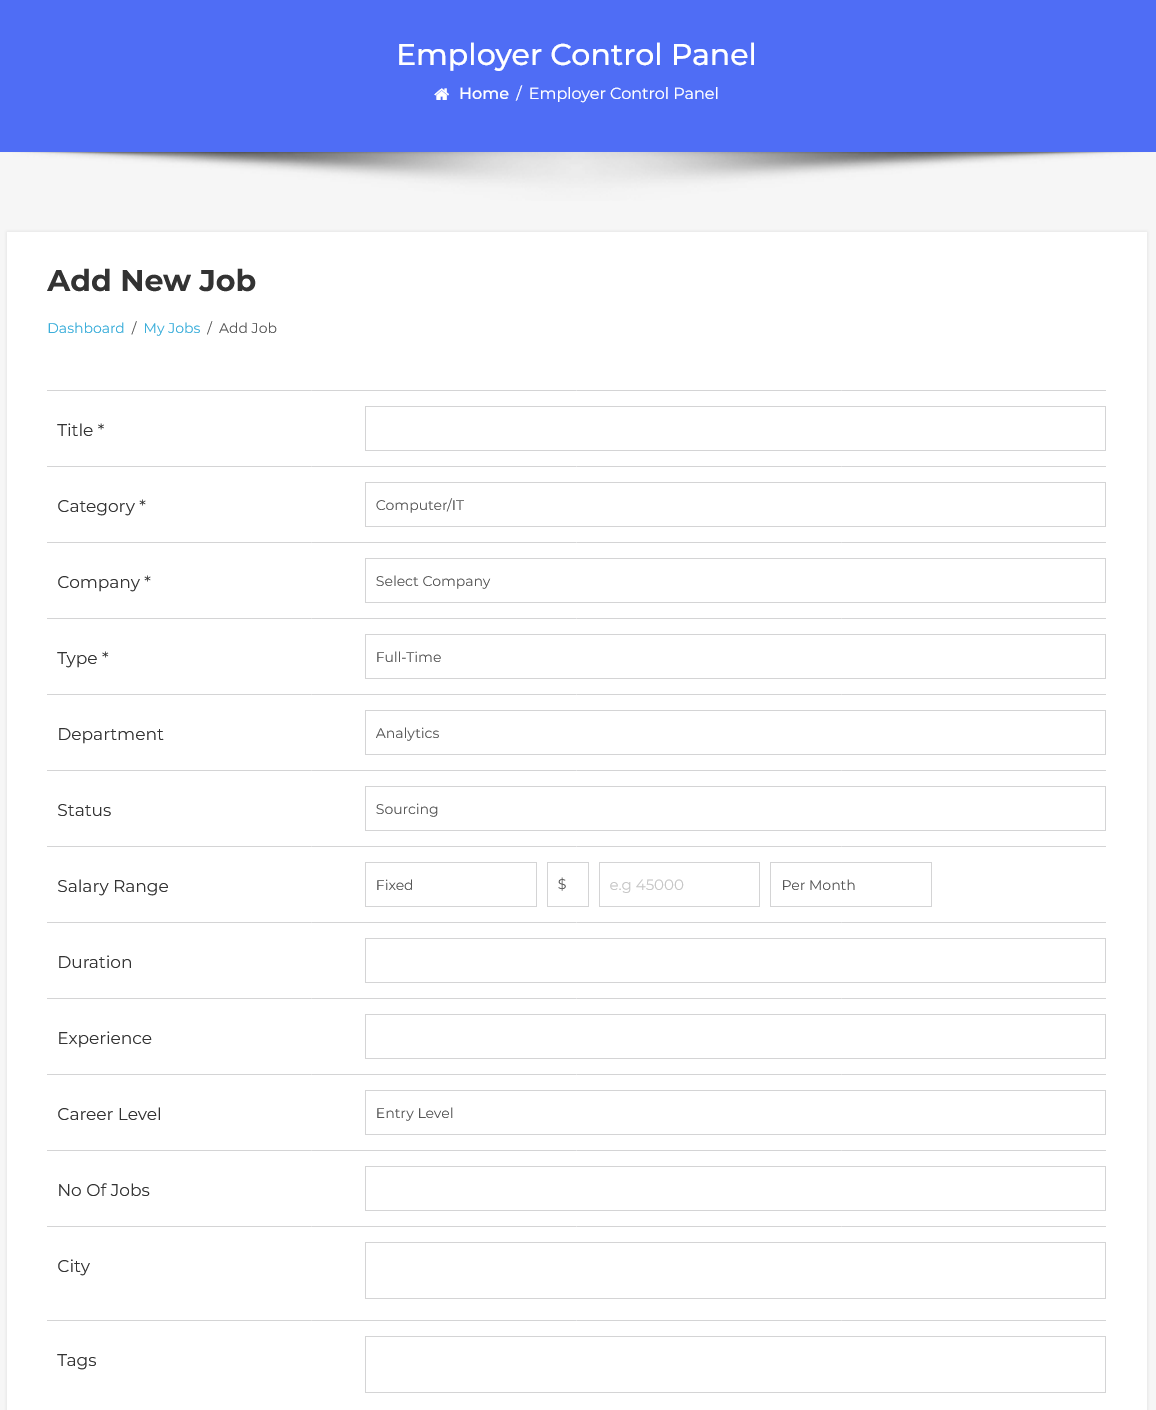
First, let’s begin with job creation. In the add job form, we will input all the necessary details about the job. Once you have filled in the required information, simply click the “Save Job” button to proceed.
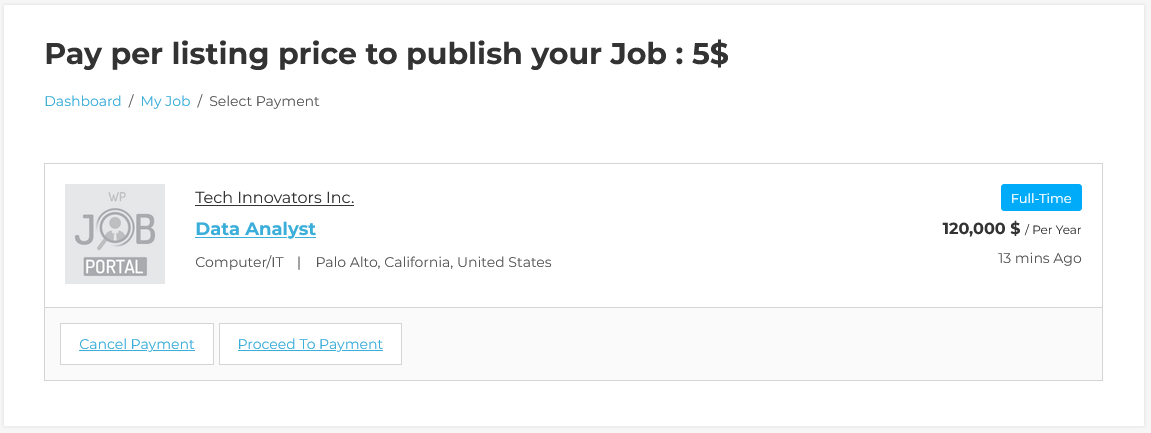
Make Payment

You’ll notice that the job has been created but is currently not published because of the paid submissions requirement. To make your job listing live, we’ll need to complete the payment process.
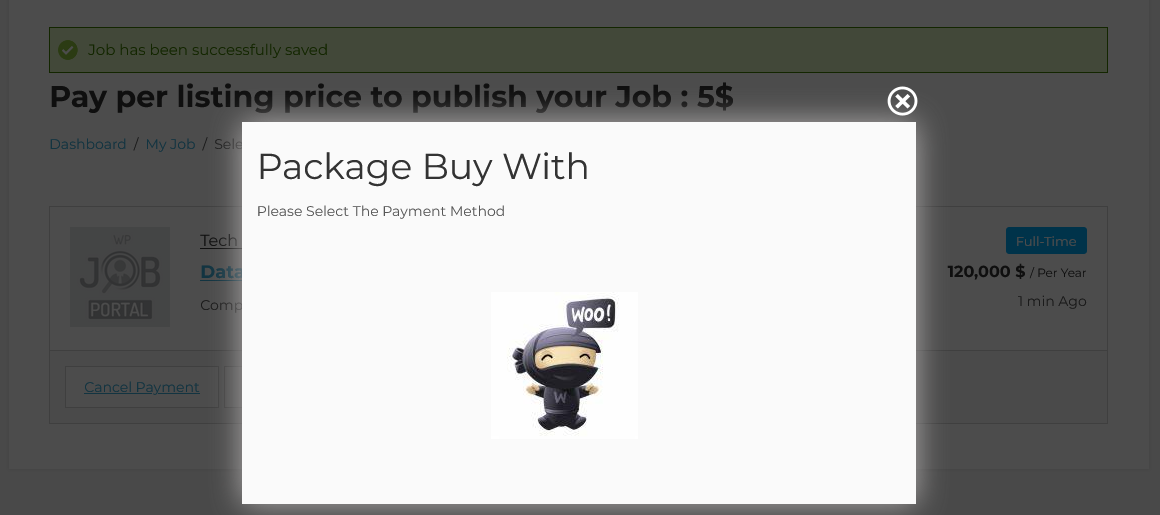
To publish the job, we’ll proceed to payment. A pop-up window will appear, allowing us to choose a payment method. While WP Job Portal provides various payment options, we’ll exclusively use WooCommerce for payment processing. We will select this option to continue.
When we select the payment option, a notification pop-up appears stating that the WooCommerce Product is not found. This means the system administrator needs to first add a product with a set price in their WooCommerce store. Once this is done, the employer can purchase credits by buying that product to proceed with the job listing.
Add Product To Your WooCommerce Store
- Fill in the necessary information for your product, including title and description.
- In the ‘Product data’ section, you’ll find two options: WP Job Portal Package and WP Job Portal Per-Listing.
- These are available only with the credit system addon installed, and all WooCommerce products will be added with these two options.
- Under the “Product Data” section, choose the product type WP Job Portal Per-Listing.
- As we are creating this product for per-listing, we will select the corresponding option.
- Enter the regular price for company creation.
- If you want to offer a sale price for the combo package, enter the discounted price in the field.
- Next, define the combo package by selecting the component you want to include, such as the company.
- Once you have filled in all the required details, publish the product within your store.
Make Payment
After successfully adding a product to WooCommerce, the employer can now purchase it to publish the job. To make the purchase, click the “Proceed to Payment” button and select the “WooCommerce” option for payment.
Proceed To Checkout
This action will direct you to the checkout page, where you’ll be prompted to provide the necessary billing details to complete your order. Once all required details are submitted, proceed to place your order. After successfully paying for the product, the job will be published.
With per-listing pricing, users can easily make paid submissions, paying only for the specific actions they need. This flexible pricing model ensures employers have full control over the costs for each job post.
Featured Job With Per Listing Mode.
Make Payment
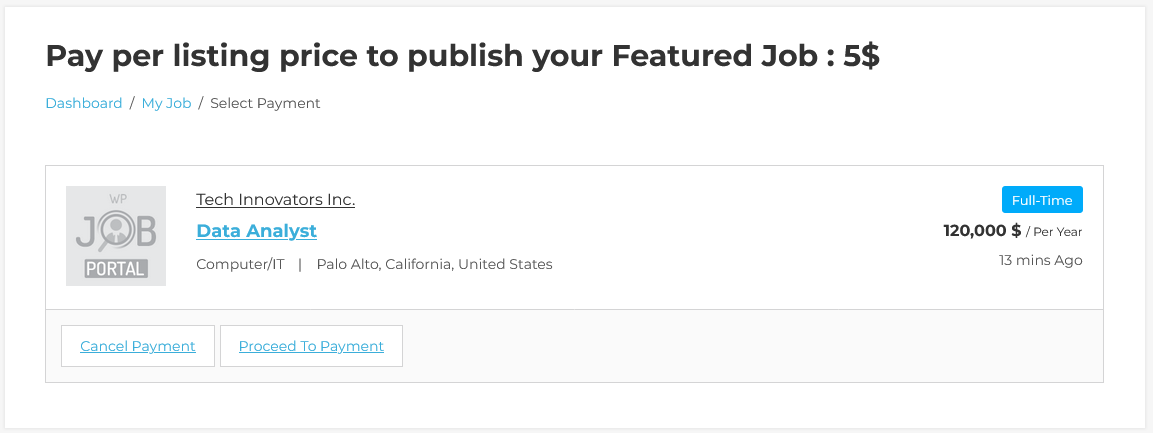
After successfully adding the product to your WooCommerce store, the employer can proceed with purchasing the product to feature the job. Click on ‘Proceed to Payment’ and select the ‘WooCommerce’ option. Complete the payment process, and once the transaction is finished, the job will be featured.
Paid Submission With Per Listing Mode (Jobseeker Side)
Add Resume With Per Listing Mode
Now let’s move on to the jobseeker dashboard and explore how jobseekers perform paid submissions using the per-listing mode. From the job seeker dashboard, we will execute some of the actions that have been configured for paid submissions.
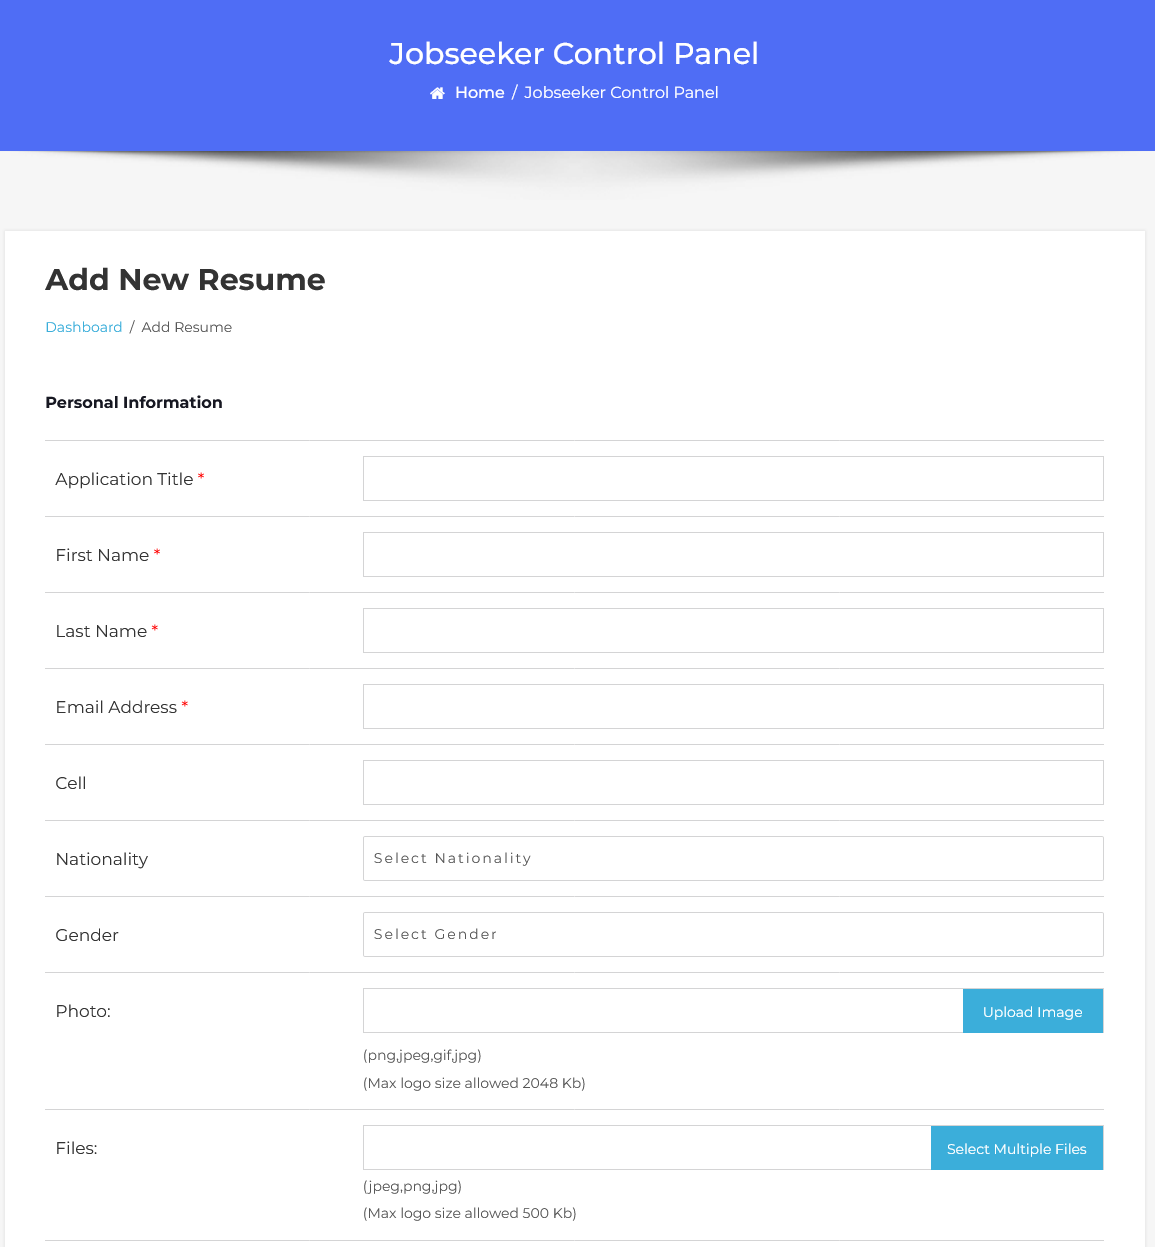
Start with the resume creation. On the “Add Resume” form, we will create the resume by filling in the necessary details. Once all the information is added, hit the “Save Resume” button.
Make Payment
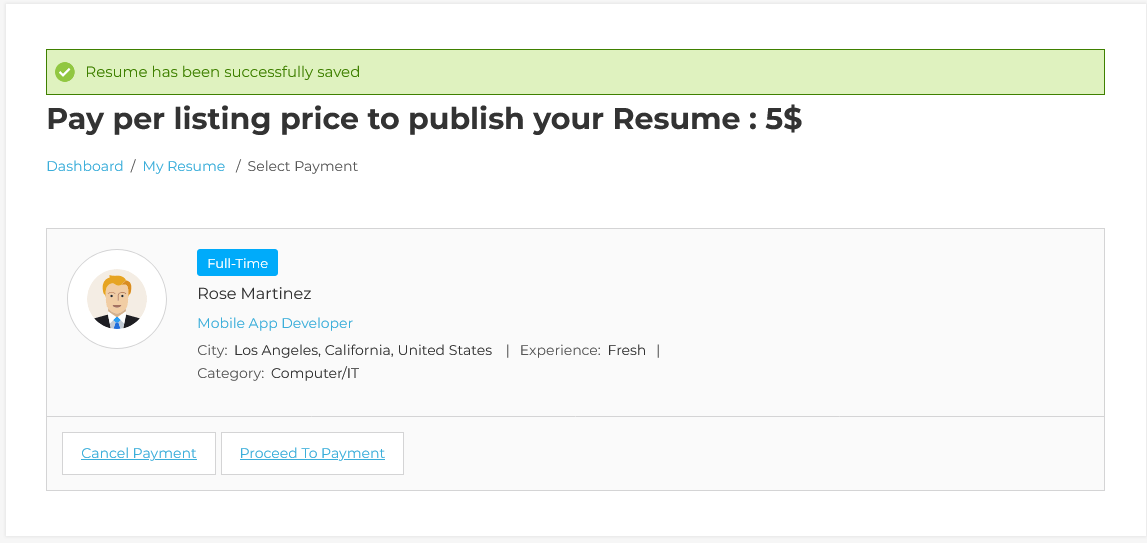
You can see that the resume has been created but is not published due to paid submissions. To publish the resume, we’ll need to complete the payment process. Once the Paid Support add-on is activated, every support ticket will also require payment before being processed.
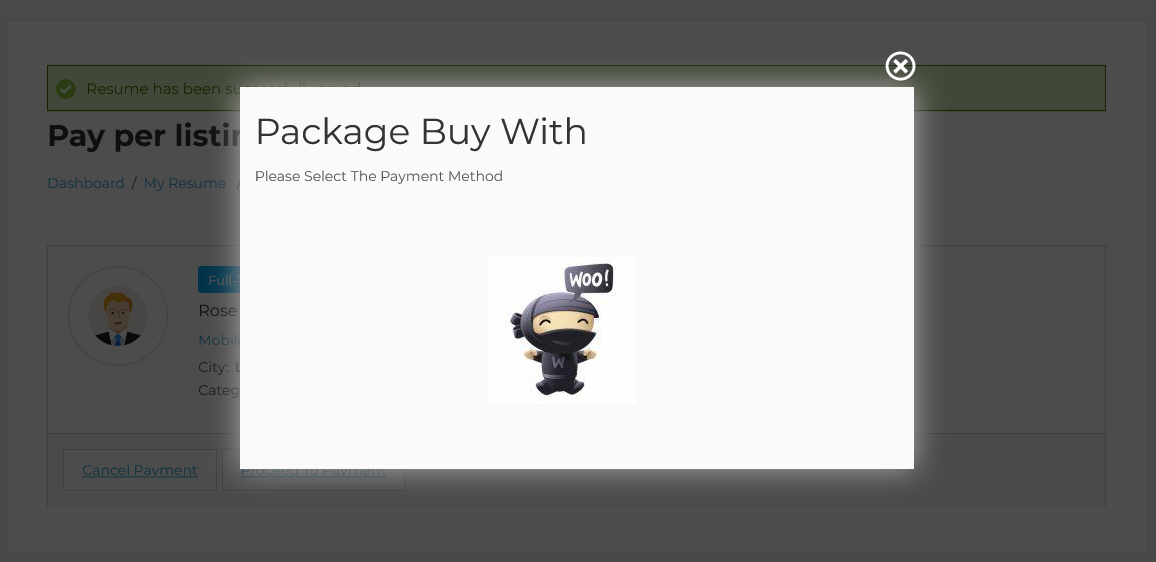
Therefore, if there’s no product in the WooCommerce store, the administrator must first add it. After adding a product to WooCommerce. Proceed to purchase the package, with the same steps.
Make Payment
After successfully adding a product to WooCommerce, Now the jobseeker will purchase it to publish the resume. To make the purchase, click on the “Proceed to Payment” button and select the “WooCommerce” option for payment.
Proceed To Checkout
This action will take you to the checkout page, where you’ll need to enter the necessary billing details to complete your order. Once you’ve filled in all the required information, proceed to place your order.
After completing the payment, your resume will be published.
With per-listing pricing, users can easily make paid submissions by paying for each specific action. This flexible pricing model ensures that users only pay for the services they need.
This video is helpful for better understanding.