Add New Job In The WP Job Portal!
The Add Job form in WP Job Portal allows employers to easily create and publish job listings in a structured and professional way. When a user opens the form, they are guided through different fields where they can enter all the necessary job details. This includes the job title, job description, company name, job type (full-time, part-time, Internship), and location. With clear fields, structured input, and flexible options, it helps ensure that each job listing is professional and easy to understand. As a result, employers can attract the right candidates, while job seekers can easily find and apply for jobs that match their skills and experience.
One of the most important sections of the Add Job form is the job description area. Here, employers can clearly explain what the job involves and what kind of candidate they are looking for. For example, if a company is hiring a “Digital Marketing Specialist,” they can describe responsibilities like managing social media campaigns, running ads, and analyzing performance metrics. They can also list requirements such as “2+ years of experience” or “knowledge of SEO and Google Ads,” helping applicants quickly determine if they are a good fit.
This step-by-step guide will explain the process of posting jobs, making it easy for you to add both free and paid job submissions. So let’s get started!
Add New Job Employer Side

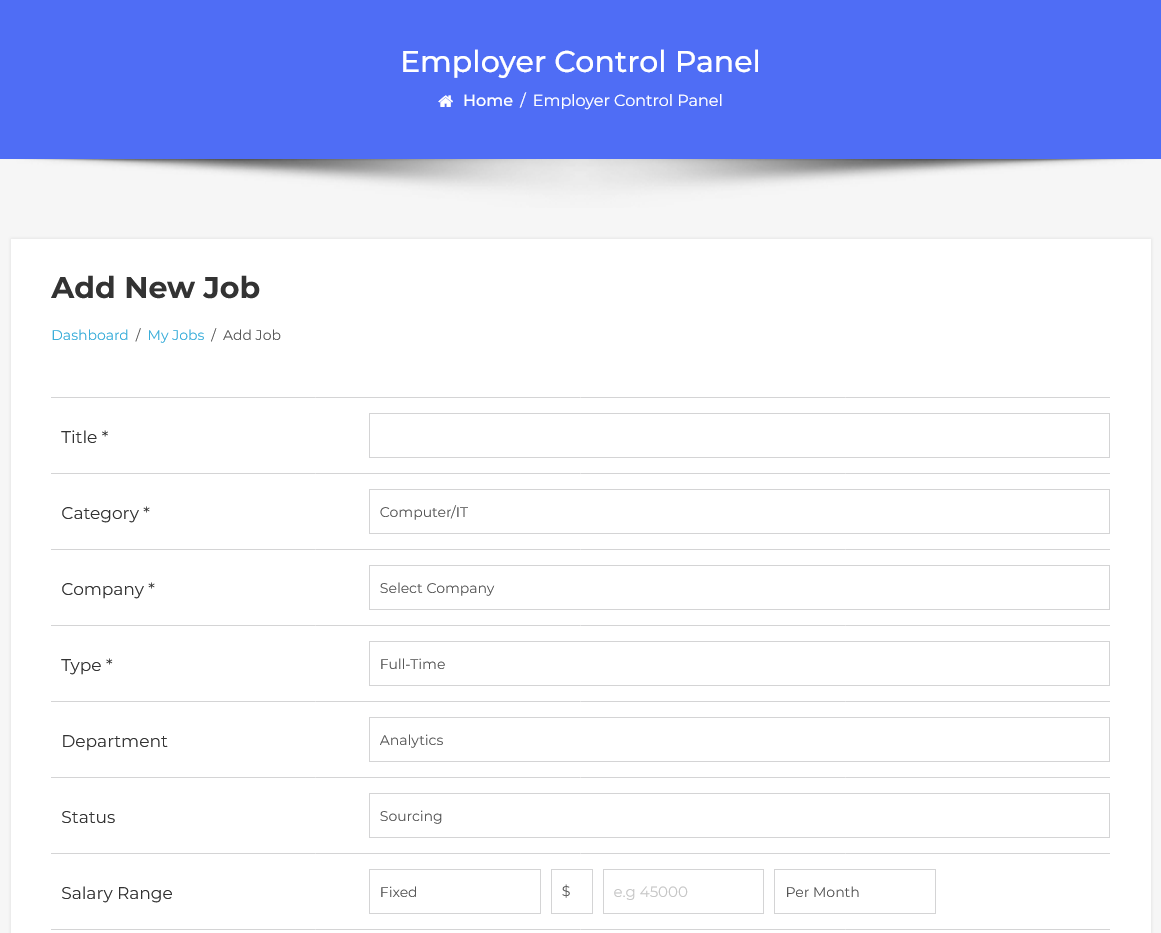
To access the Add New Job page, from your employer dashboard, navigate to the Employer Dashboard > Dashboard Menu > Add Job to start creating jobs effectively. On the ‘Add Job’ form, we will provide all the necessary details for posting a job. The Add New Job form in WP Job Portal is designed to help employers create detailed and professional job listings step by step. As shown in the form, the process starts with basic information such as the Job Title, Category, Company, and Job Type. These fields are essential because they define the core identity of the job.
Job Title:
The Job Title is the main name of the position you are offering. It should be clear, specific, and commonly used in the industry so that candidates can immediately understand the role. A well-written job title helps your listing appear in search results when users type relevant keywords, increasing visibility and attracting the right applicants.
Category:
The Category helps organize your job into a specific industry or field. In the form, you can select a category such as “Computer/IT,” “Marketing,” “Accounting,” or “Customer Service.” This allows job seekers to filter jobs based on their expertise. For instance, if a candidate is only interested in IT jobs, they will browse the “Computer/IT” category, and your job will appear there if you selected it correctly.
Company:
The Company field allows you to select which company is offering the job, which is important if you manage multiple companies. All available companies are listed in the drop-down menu.
Types:
In WP Job Portal, Job Types define the nature of employment you are offering. Selecting the correct job type helps job seekers quickly understand the work arrangement and filter jobs based on their preferences. It also ensures that your job listing reaches the most relevant candidates. The most common job type is Full-Time, which is used for permanent positions where employees work standard working hours, usually 8–9 hours per day. Another important type is Part-Time, which is suitable for roles that require fewer working hours. This is ideal for students, freelancers, or individuals looking for flexible schedules. Similarly, Internship positions are used for fresh graduates or students who want to gain experience, such as a “Marketing Intern” for 3 months.
Department:
In WP Job Portal, the Job Department field is used to categorize a job within a specific functional area of a company. It helps organize job listings internally and allows job seekers to better understand which part of the organization the role belongs to. By selecting the correct department, employers can make their job postings more structured and easier to navigate. The Job Department typically represents divisions such as Accounts, Human Resources (HR), IT, Sales, Marketing, Customer Support, and more.
Job Status:
In WP Job Portal, the Job Status field is used to define the current stage of a job listing. It helps employers manage their hiring process and lets job seekers know whether a position is open, in progress, or no longer accepting applications. This field is important for keeping job listings accurate and up to date.
Salary Range:
In WP Job Portal, the Salary Range field is used to specify how much you are offering for a particular job. It gives job seekers a clear idea of the expected compensation before they apply, which helps attract the right candidates. The salary can be fixed or a range.
Duration:
In the WP Job Portal, Duration is useful for contract or temporary jobs, such as “6 Months” or “1 Year.
Exprience:
In the WP Job Portal, the Experience field defines the required experience level, such as “2–3 Years,” ensuring only qualified candidates apply. For instance, a senior developer role may require 5+ years of experience with a higher salary range.
Career Level:
Career Level can be Entry Level, Mid Level, or Senior Level, helping candidates quickly assess suitability.
Number of Jobs:
The Number of Jobs indicates how many positions are available, such as 5 vacancies.
City:
In WP Job Portal, the Job City field is used to specify the exact location where the job is based. This helps job seekers quickly identify opportunities in their preferred area. When posting a job, employers can select or enter a city.
Tags:
Job Tags are keywords that describe the job in more detail and improve searchability within the portal. Tags can include skills, job features, or special conditions such as “Remote,” “JavaScript,” “Night Shift,” “Sales,” or “Office-Based.” Job Tags also enhance the user experience by allowing job seekers to discover jobs through related keywords. Even if a candidate does not search by exact job title, they might find your listing through tags.
Meta Keywords:
Meta Keywords are used for SEO, helping your job appear in search engine results.
Map:
The Map feature allows you to pinpoint the exact job location using latitude and longitude, giving applicants a clear idea of where the job is based.
Stop Publishing:
Stop Publishing lets you set a deadline (e.g., 30 April 2026), after which the job will automatically be unpublished.
Description:
The Description field is where you provide complete job details, including responsibilities, requirements, and benefits.
Email Settings
In the Email Settings section, employers can choose how they want to receive notifications about new job applicants. There are three options available:
-
- First, do not email me. With this option, no job application notifications will be emailed to you.
- The second option, selecting this option, will ensure that you receive a job application notification via email, including the applicant’s resume of the applicant.
- The third option provides the most comprehensive notifications. You’ll receive an email notification with both the resume and any additional attachments submitted by the applicant.
Meta Description:
Lastly, add a meta description that summarizes the job and is optimized for search engines.
Once all these details are filled in, you can save the job, and it will be posted on your job portal.
Setting Up Paid Submissions-Membership (Admin Side)
Now let’s walk through the process of posting jobs with paid submissions.
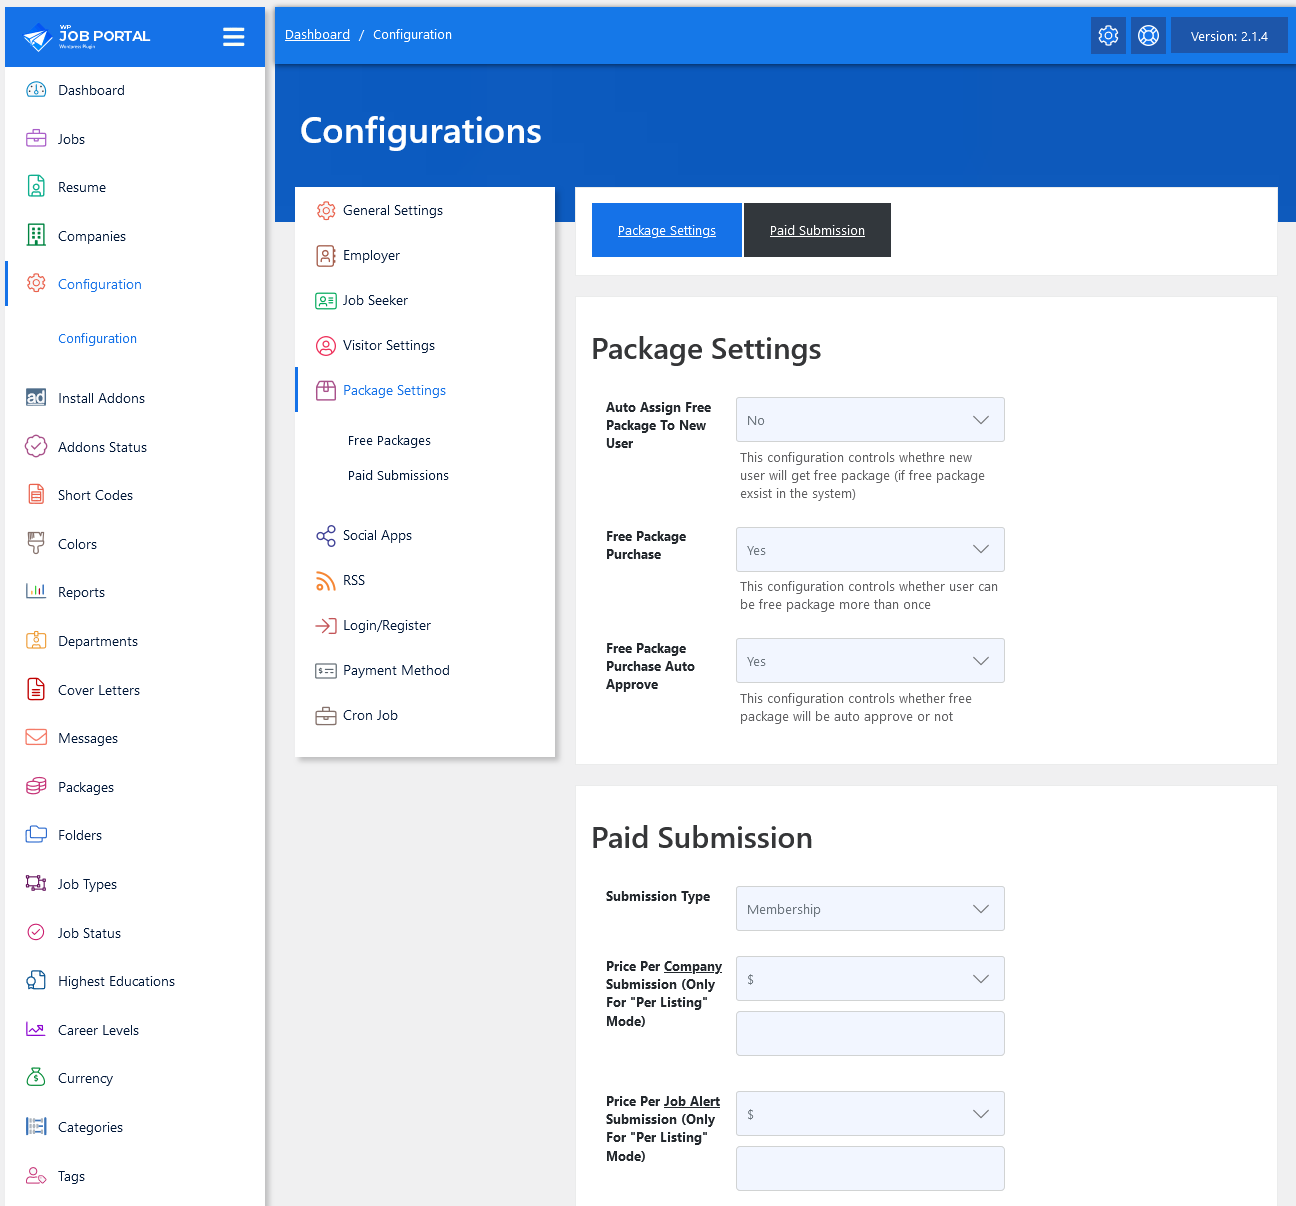
Start by navigating to the Admin Dashboard–> Dashboard Menu–> Configurations–> Package Settings–> Paid Submission.
In the paid submission section, we’ll start by selecting the submission type. WP Job Portal offers two types: paid submissions Per Listing and Membership. Let’s proceed with the membership plan first. After selecting the membership plan, let’s proceed to set up a package for this plan. Save your configurations.
Add Package (Admin Side)
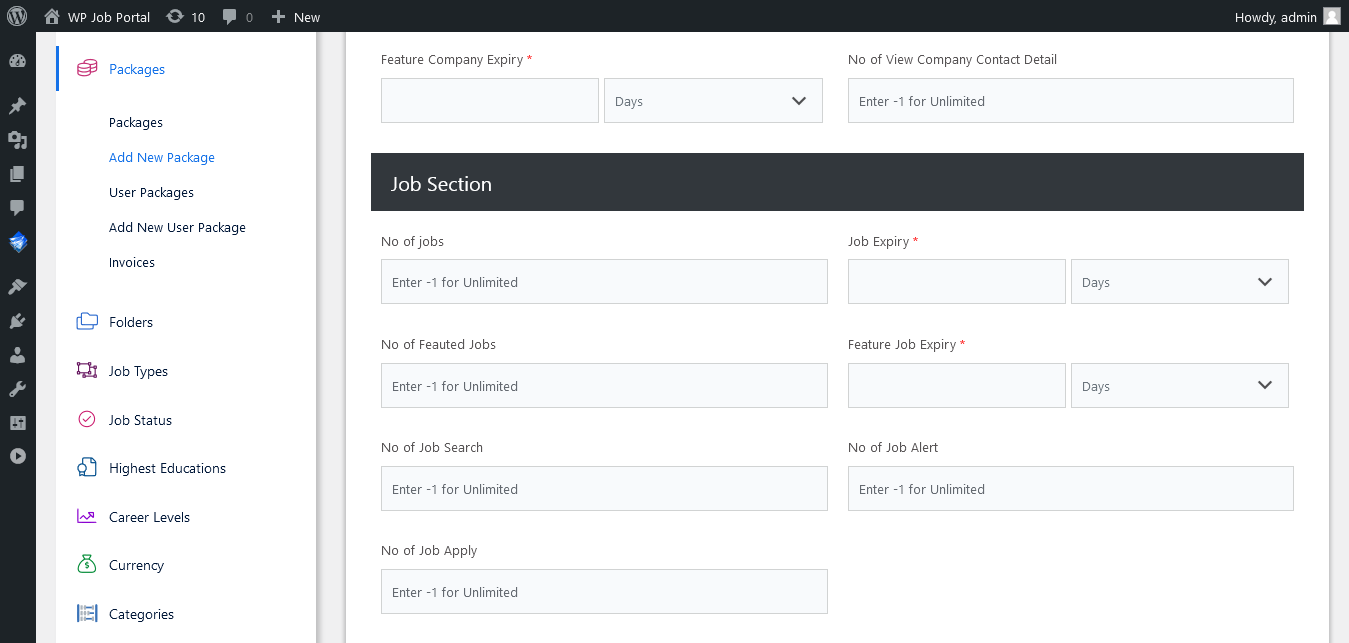
Now navigate to the Admin Dashboard–> Dashboard Menu–> Packages–> Add New Package.
On this page, create your package. Since we are creating this package specifically for job postings, we will detail the relevant information. After explaining the basic details of the package, move to the job section and specify the number of job postings. Be sure to fill in all required fields marked with an asterisk. Once completed, set the package status to “publish” and save the package. The job-specific package has been created.
Add Job With Paid Submission-Membership
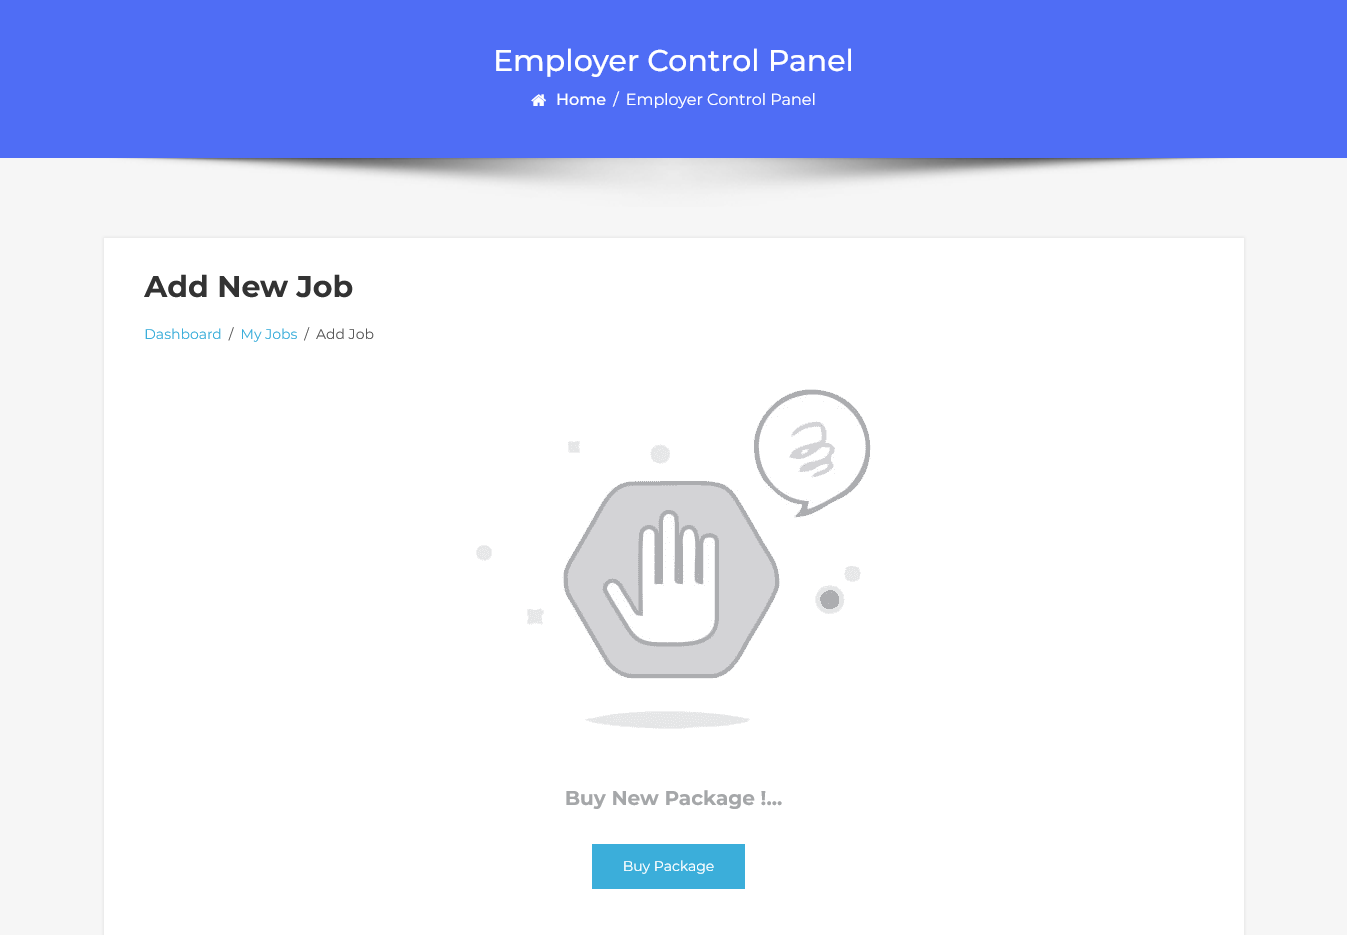
Now, let’s head to the employer dashboard to proceed with a paid job submission by purchasing a package. Simply click on “Add Job” in the menu. Once the membership plan is enabled, you will see the requirement to buy a package for job posting. Click on the “Buy Package” button to continue.
Packages List Page
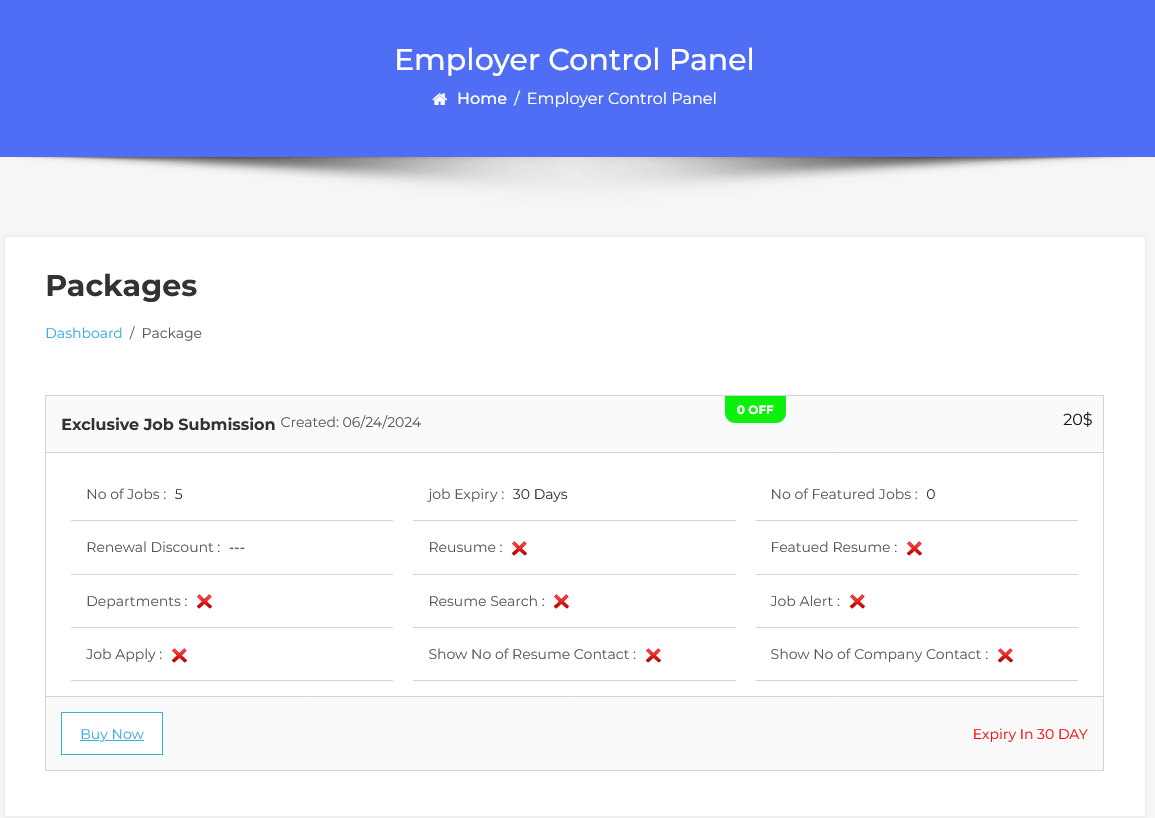
This action will direct you to the packages list page. Simply click the “Buy Now” button and a popup window will appear with the payment method options you have enabled on your site. Choose your preferred payment method and click “Buy Now.”
Select Payment Method

After completing the payment with PayPal, the package has been purchased.
Add New Job
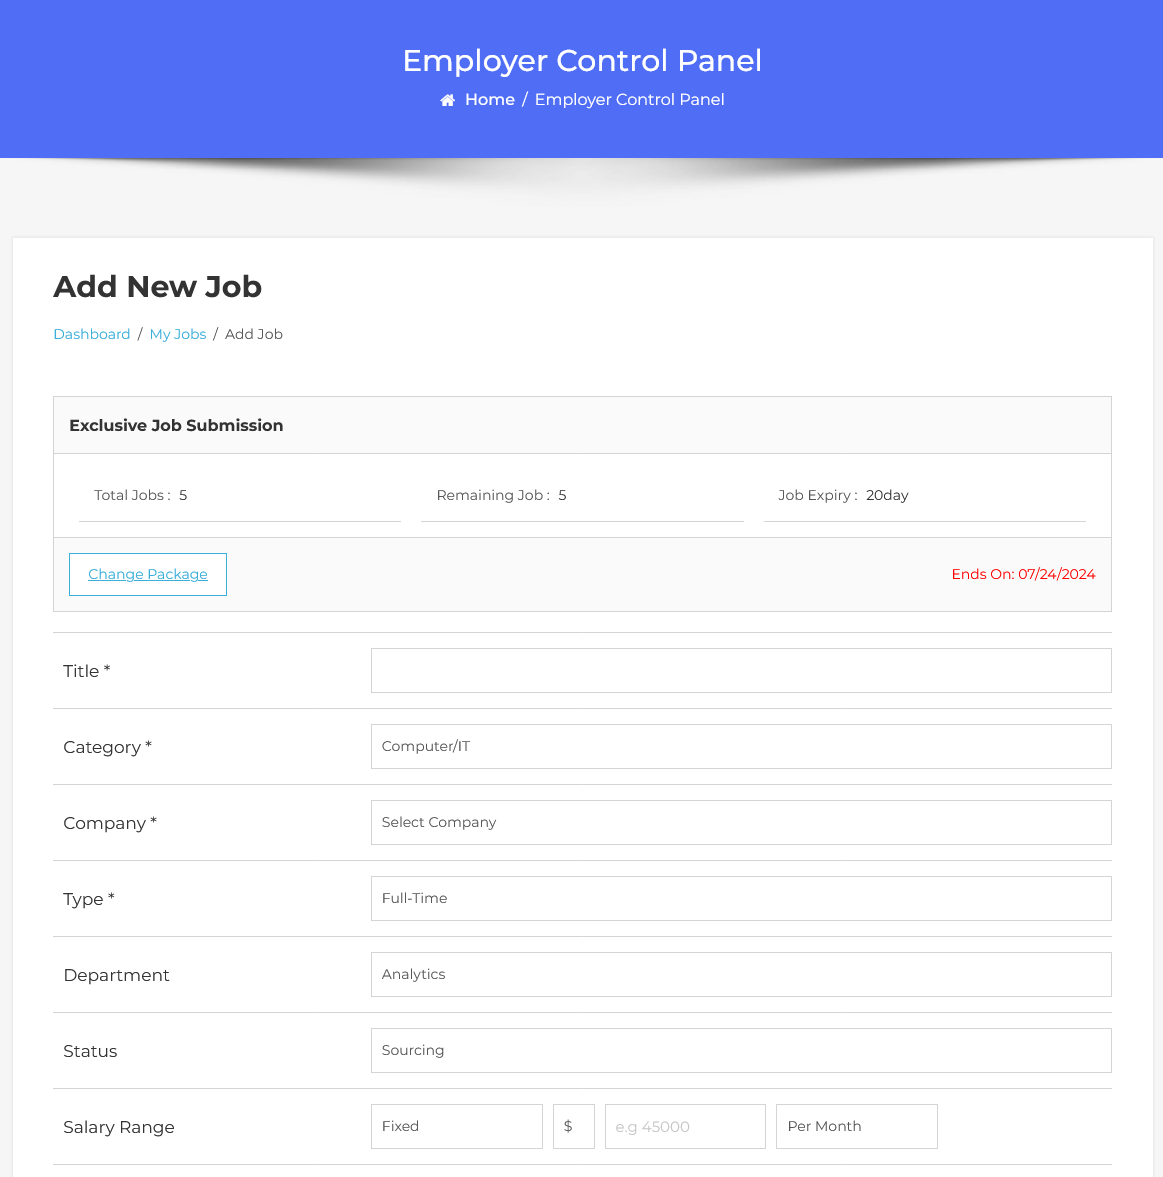
The “Add New Job” form will open. The package details about jobs are displayed on the form, showing the total number of jobs available to add, the remaining jobs, and the job expiration time. Now, proceed to fill in the details about the job. Once you’re done with the information, click ‘Save Job’ to create and publish the job.
The job has been created with paid submission.
Setting Up Paid Submissions-Per Listing Mode (Admin Side)
Now let’s walk through the process of posting jobs with paid submissions.
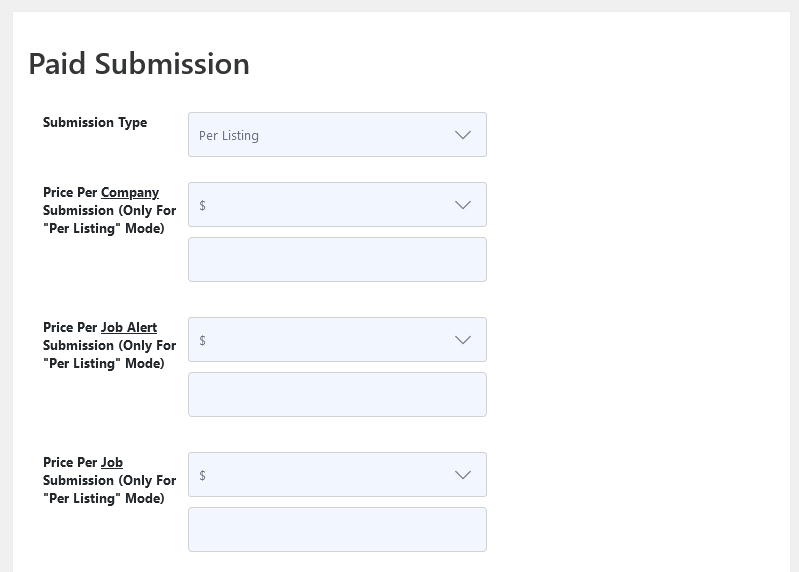
Starting by navigating to the Admin Dashboard–> Dashboard Menu–> Configurations–> Package Settings–> Paid Submission–>Submission Type choose the “Per-Listing”.
Now, let’s walk through the process of paid job submissions using the per-listing mode. Let’s proceed with the per-listing mode. After selecting the per-listing mode. When using the per-listing mode, payment will be charged for each job submission. Next, we will set the currency and price for the per-job submission. Once you’ve set the price per job submission, save your configuration settings.
Add Job With Per Listing Mode
Now we proceed with the steps involved in adding new paid job submissions with the per-listing mode.
Start by filling out the job creation form with all the essential details about the position.
Once you’re done, hit the ‘Save Job’ button.

You’ll notice that the job has been created but is not published due to paid submissions. To get your job listing live, we’ll need to go through the payment process.
Select Payment Method

Click on ‘Proceed to Payment’, triggering a pop-up allowing you to select a payment method to pay for this job submission. After selecting your preferred payment method and completing the payment, the job will be published. By following these steps, you’ll be able to effectively manage paid job submissions using the per-listing mode.