Add Resume In The WP Job Portal!
The Add Resume feature in WP Job Portal allows job seekers to create and manage their professional resumes directly from their dashboard. Instead of sending resumes via email, users can build a complete online resume profile that employers can easily view when applying for jobs. This feature helps candidates present their skills, qualifications, education, and work experience in a professional format, making the job application process faster and more organized.
When a user clicks on Add Resume, they are taken to a form where they can enter personal and professional details step by step. The form usually includes information such as full name, contact details, career objective, skills, education history, work experience, certifications, languages, and references. For example, a candidate applying for a Graphic Designer position can include skills such as Adobe Photoshop, Illustrator, and UI/UX Design, along with portfolio links to showcase their expertise. Once completed, the resume is saved to the user’s account and can be edited at any time.
The resume system also supports multiple resumes, allowing users to create different resumes for different job categories. For instance, a user who works in both Web Development and Digital Marketing can create two separate resumes tailored for each profession. This increases the chances of getting shortlisted because the resume can be customized according to the job requirements. Users can select the most suitable resume while applying for a specific job posting.
Another important benefit of the Add Resume feature is that it simplifies the application process. After creating a resume, job seekers can apply to multiple jobs with just a few clicks, without having to repeatedly enter the same information. Employers can quickly review applicant profiles directly from the job portal, download resumes if enabled, and shortlist suitable candidates more efficiently. This creates a smoother experience for both job seekers and employers.
To create a resume from your Jobseeker dashboard, follow these steps:
- Access Jobseeker Dashboard:
- Navigate to the Jobseeker Dashboard.
- Select Add Resume:
- Click on Add Resume to open the resume creation form.
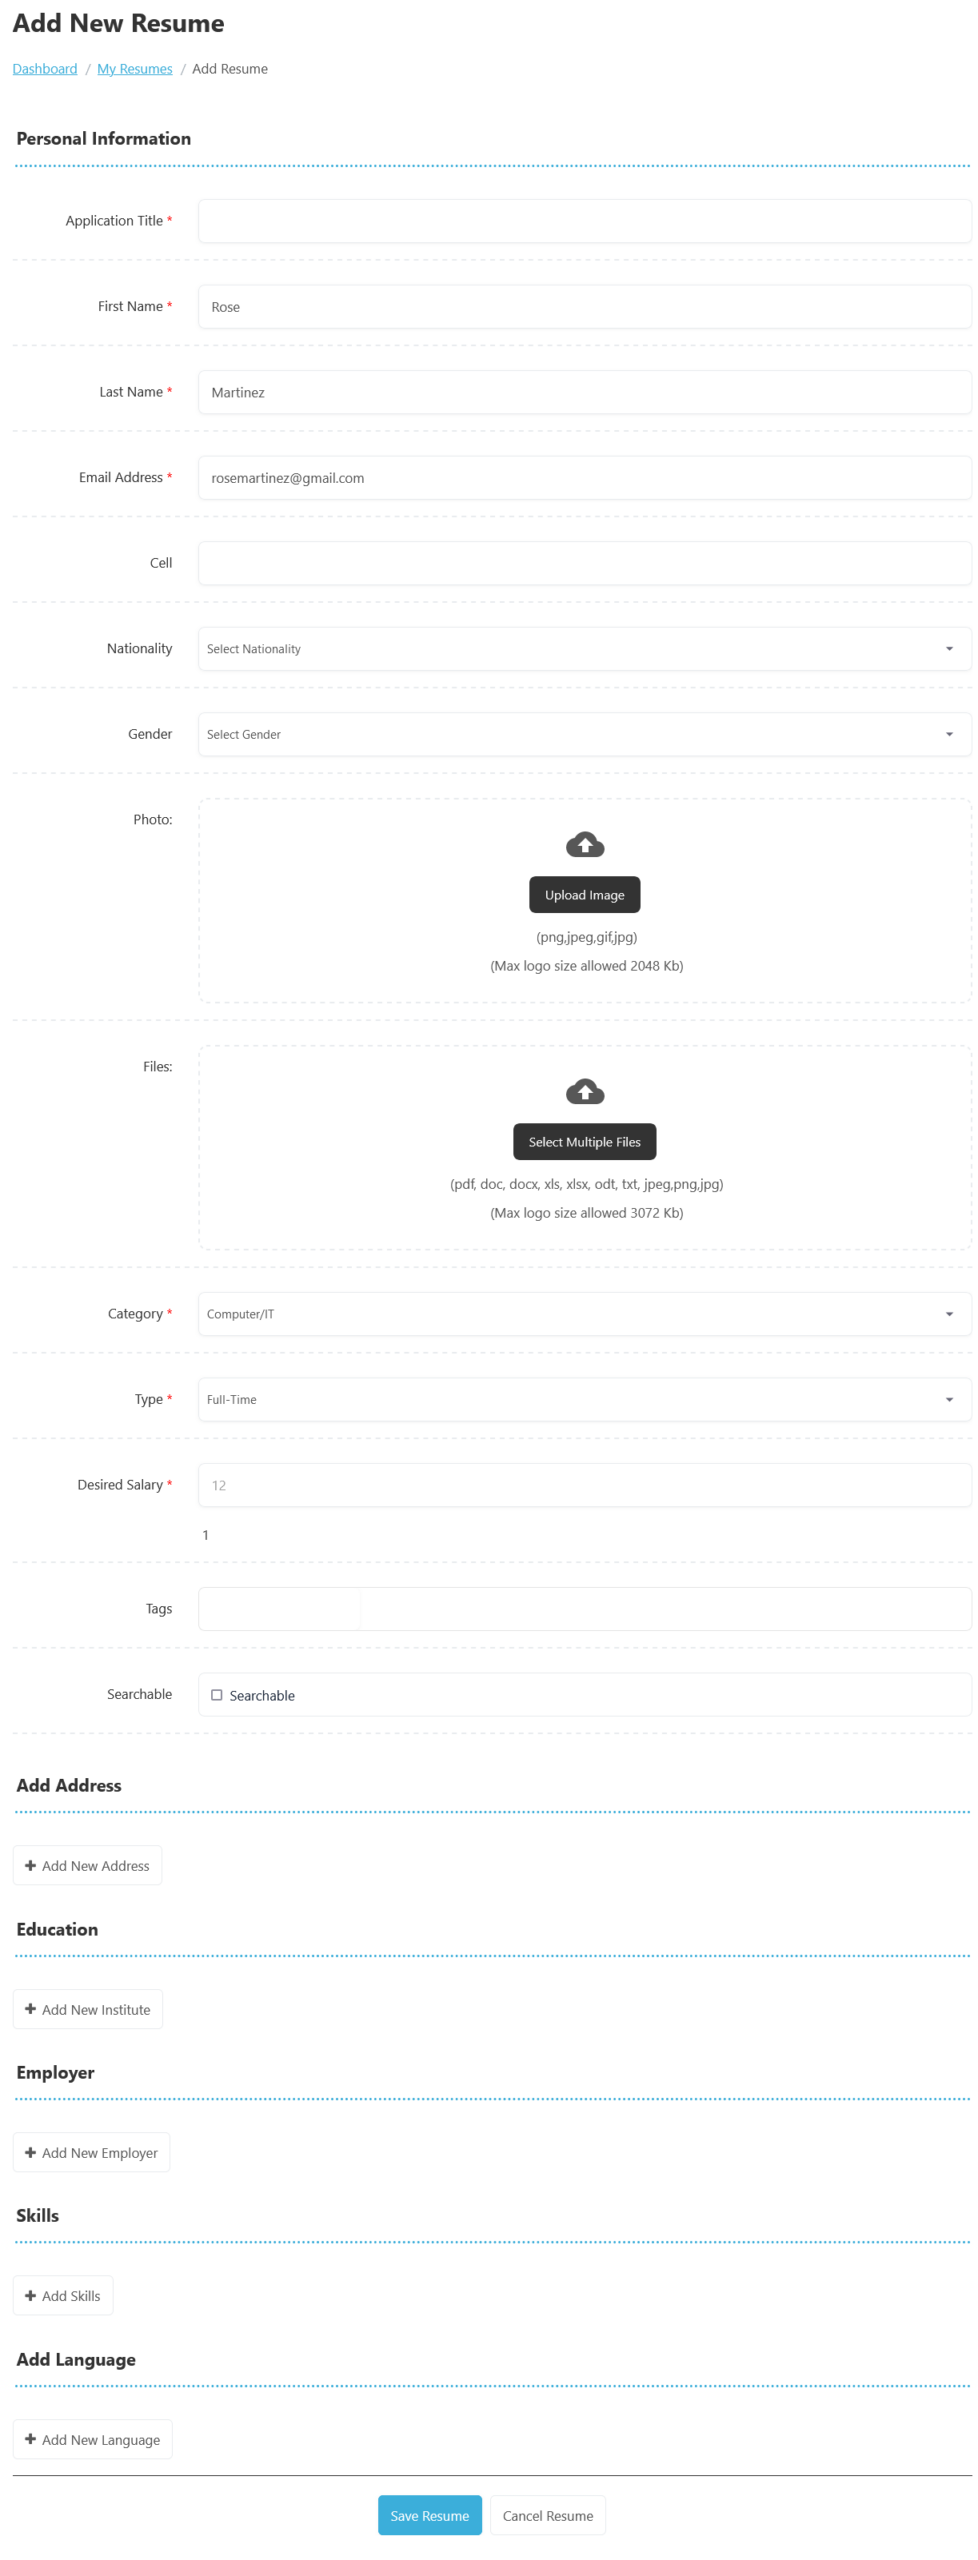
- Fill in Resume Details:
- Application Title: The Application Title field in WP Job Portal is used to define the main heading or professional title of a job seeker’s resume. This title helps employers quickly understand the candidate’s profession, specialization, or career objective when viewing resumes in the portal.
- First Name and Last Name: Fill in your first and last name.
- Email Address: Enter your email address.
- Nationality: The Nationality field in WP Job Portal allows job seekers to specify their country or nationality when creating a resume or profile. This information helps employers better understand the candidate’s background and can be useful for jobs that have country-specific hiring requirements or visa preferences.
- Gender: Job seekers can select their gender from the available options in the resume form.
- Resume Category: Select the appropriate category for your resume.
- Resume Type: Specify the type of employment you are seeking (e.g., Full-Time, Part-Time, Internship).
- Desired Salary: Enter your desired salary and specify if it is monthly or yearly.
- Searchable Checkbox: Check this box to make your resume searchable.
- Tags: Include relevant tags to enhance the visibility of your resume in search engines.
- Address and City: Add your address and the city where you are located.
- Geographical Coordinates: Provide your geographical coordinates to display your location on a map.
- Education Section:
- Enter your educational background, including the
- Institute Name
- Certificate Name (e.g., Diploma, Bachelor’s Degree).
- Study Area
- Employer Section:
- The Employer section stores previous work experience, such as
- Employer Name
- Position
- Phone
- Address
- City
- Skills Section:
- The Skills section in WP Job Portal allows job seekers to add their professional and technical abilities while creating a resume. This feature helps candidates highlight their expertise so employers can quickly understand their strengths and qualifications. The Skills section is important because many employers search resumes based on specific abilities or technologies.
- Language Section:
- The Language section allows users to specify languages they can speak or write fluently.
- Save Your Resume:
- Once all the details are filled in, click the Save button.
- Your resume has been successfully saved.
This process ensures that you create a comprehensive resume tailored to your job applications.
Setting Up Paid Submissions-Membership (Admin Side)
To set up paid submissions for resumes using the Membership plan on the admin side, follow these steps:
To set up paid submissions using the Membership plan in the WP Job Portal, follow these steps:
- Access Admin Dashboard:
- Go to the Admin Dashboard.
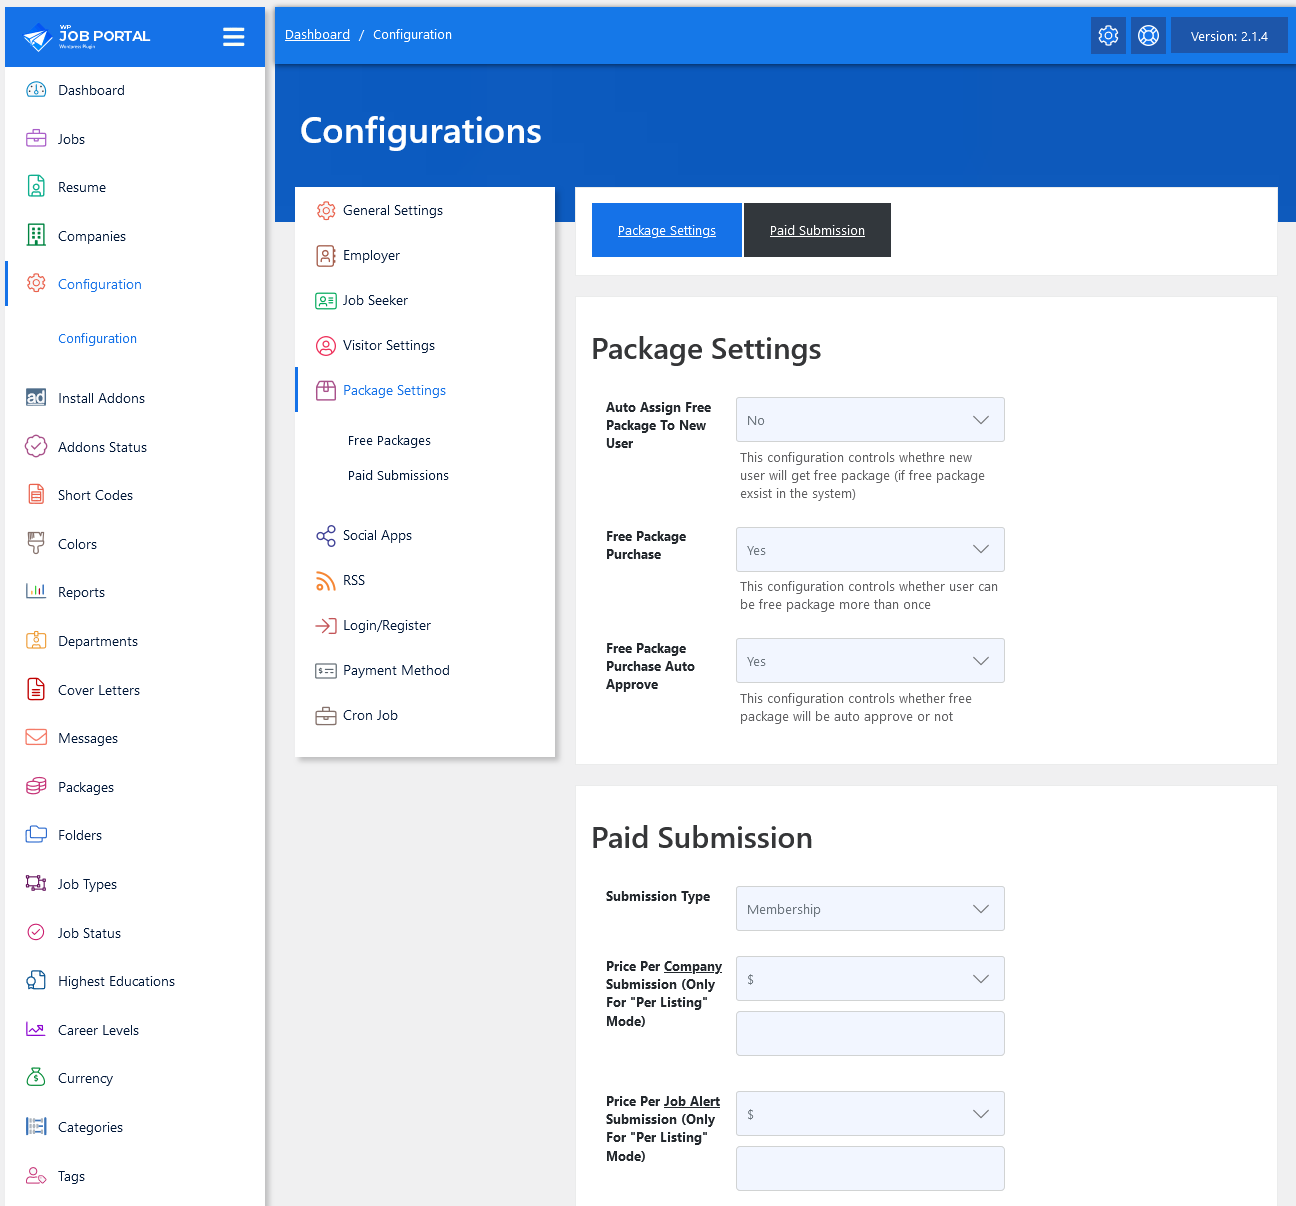
- Navigate to Package Settings:
- Select Configurations.
- Click on Package Settings.
- Choose Paid Submission.
- Select Submission Type:
- In the Paid Submission section, select the submission type:
- Choose Membership.
- In the Paid Submission section, select the submission type:
- Set Up Membership Package:
- After selecting the membership plan, define the details for the package:
- Package Name: Enter a descriptive name for the membership package.
- Duration: Specify the membership duration (e.g., 1 month, 6 months, 1 year).
- Price: Set the price for this membership package.
- Features: List any benefits or features included in the package (e.g., number of submissions, additional job visibility).
- After selecting the membership plan, define the details for the package:
- Save Configurations:
- Once all necessary details are filled in, click on the Save button to apply your configurations.
By following these steps, you will have successfully set up paid submissions through a membership plan for the WP Job Portal.
Add Package (Admin Side)
To create a new package for resume creation in the WP Job Portal, follow these steps:
- Access Admin Dashboard:
- Navigate to the Admin Dashboard.
- Go to Packages:
- Select Packages.
- Click on Add New Package.
- Create Package Details:
- On the Add New Package page, provide the necessary details for the package:
- Package Name: Enter a descriptive title for the resume package (e.g., “Resume Creation Package”).
- Description: Include a brief overview of what the package offers.
- On the Add New Package page, provide the necessary details for the package:
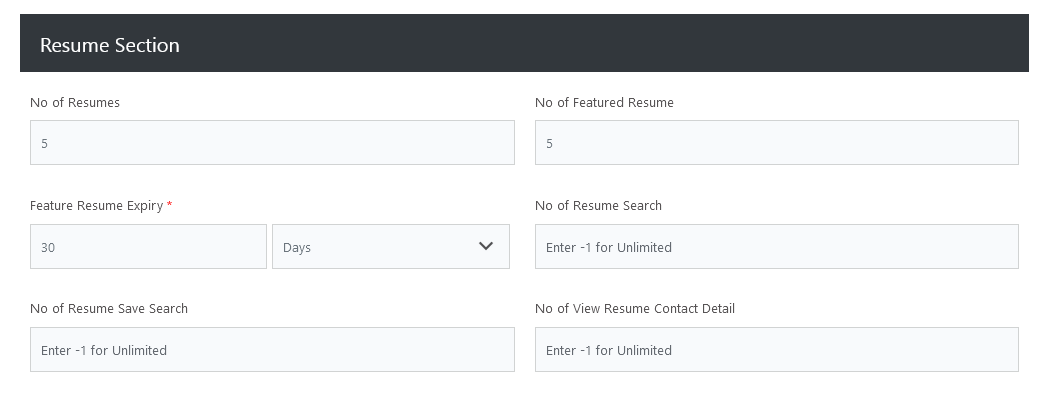
- Specify Resume Creation Details:
- Locate the Resume Section within the package settings:
- Number of Resume Creations: Indicate how many resumes can be created under this package.
- Locate the Resume Section within the package settings:
- Complete Required Fields:
- Ensure all required fields marked with an asterisk (*) are filled out completely.
- Set Package Status:
- Change the package status to Publish to make it available to users.
- Save the Package:
- Click the Save button to finalize the creation of the resume-specific package.
You have now successfully created a package for resume creation within the WP Job Portal.
Add Resume with Paid Submission-Membership

To add a resume with a paid submission through a membership package in the WP Job Portal, follow these steps:
- Access Jobseeker Dashboard:
- Navigate to the Jobseeker Dashboard.
- Select Add Resume:
- Click on Add Resume in the menu.
- View Package Requirement:
- If the membership plan is enabled, you will see a notification indicating the need to purchase a package for resume creation.
- Buy Package:
- Click on the Buy Package button to proceed with the purchase.
- Choose a Package:
- Browse the available packages and select the one that suits your needs for resume creation.
- Complete Purchase:
- Follow the prompts to complete the purchase of the package.
- Create Resume:
- Once the package is purchased, you can continue to fill out the resume details and submit your resume.
By following these steps, you will successfully add a resume with a paid submission through the membership package in the WP Job Portal.
Packages List Page
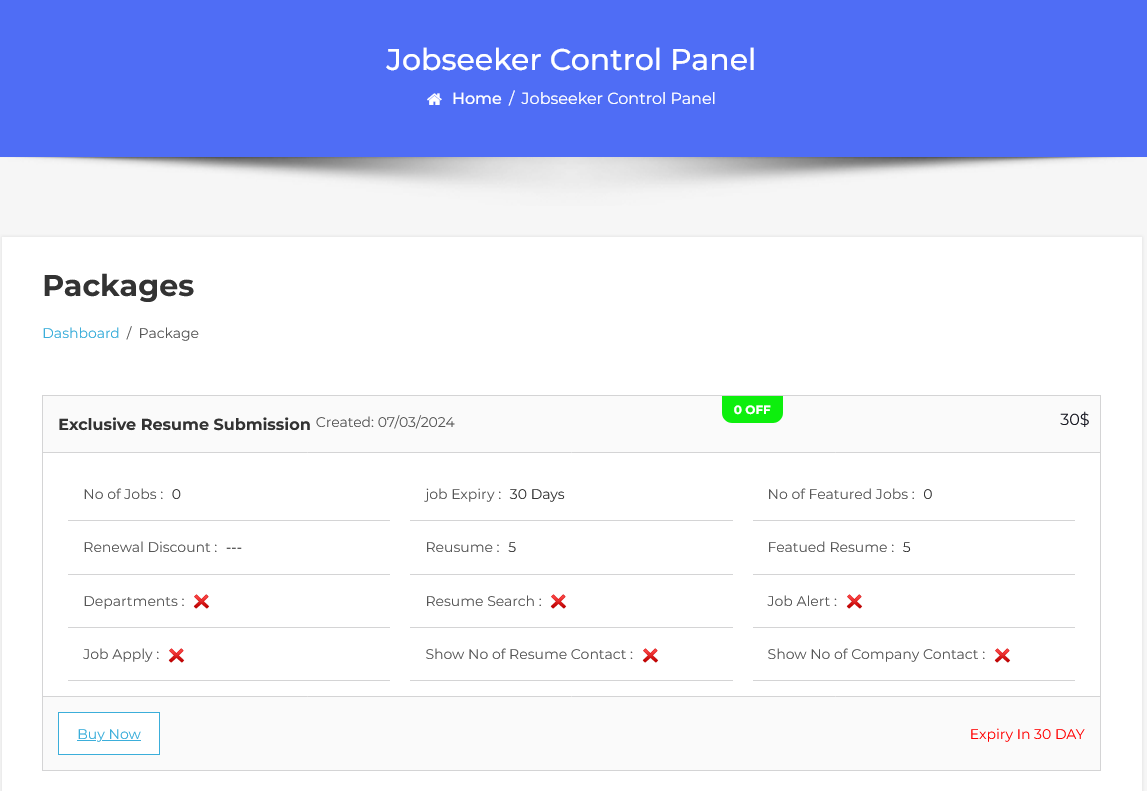
To finalize your package purchase for resume creation in the WP Job Portal, follow these steps:
- Packages List Page:
- After clicking on the Buy Package button, you will be redirected to the packages list page.
- Select Package:
- Locate the desired package for resume creation and click the Buy Now button associated with it.
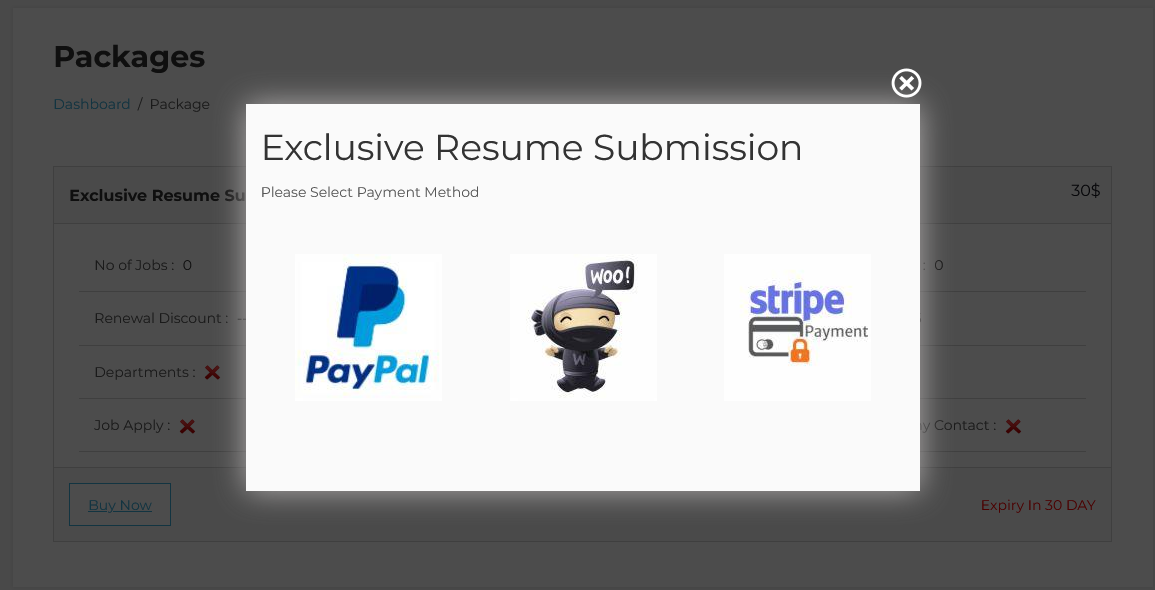
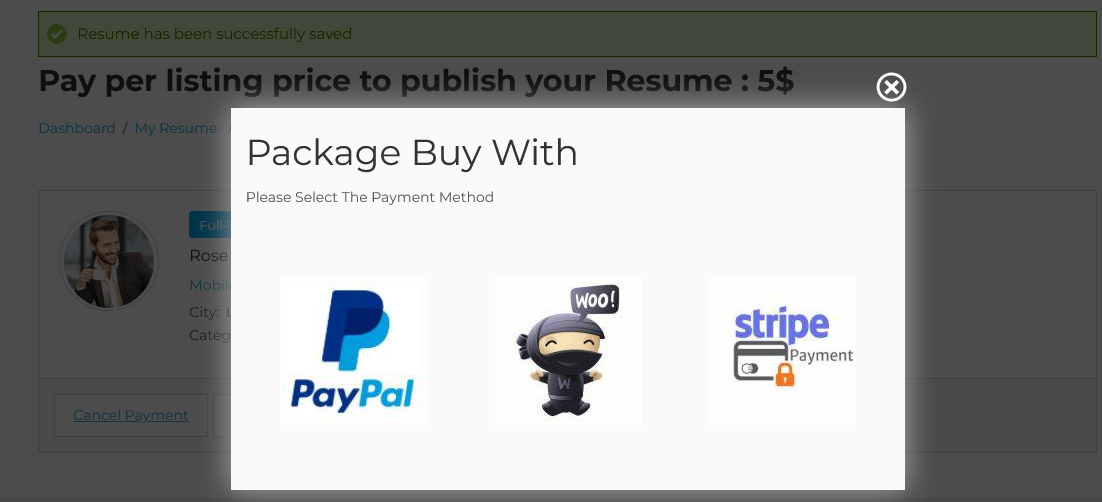
- Payment Method Popup:
- A popup window will appear, displaying the payment method options you have enabled on your site.
- Choose Payment Method:
- Select your preferred payment method from the available options.
- Confirm Purchase:
- After selecting your payment method, click on Buy Now to complete the transaction.
By following these steps, you will successfully purchase the package and be ready to create your resume.
Select Payment Method
Add New Resume
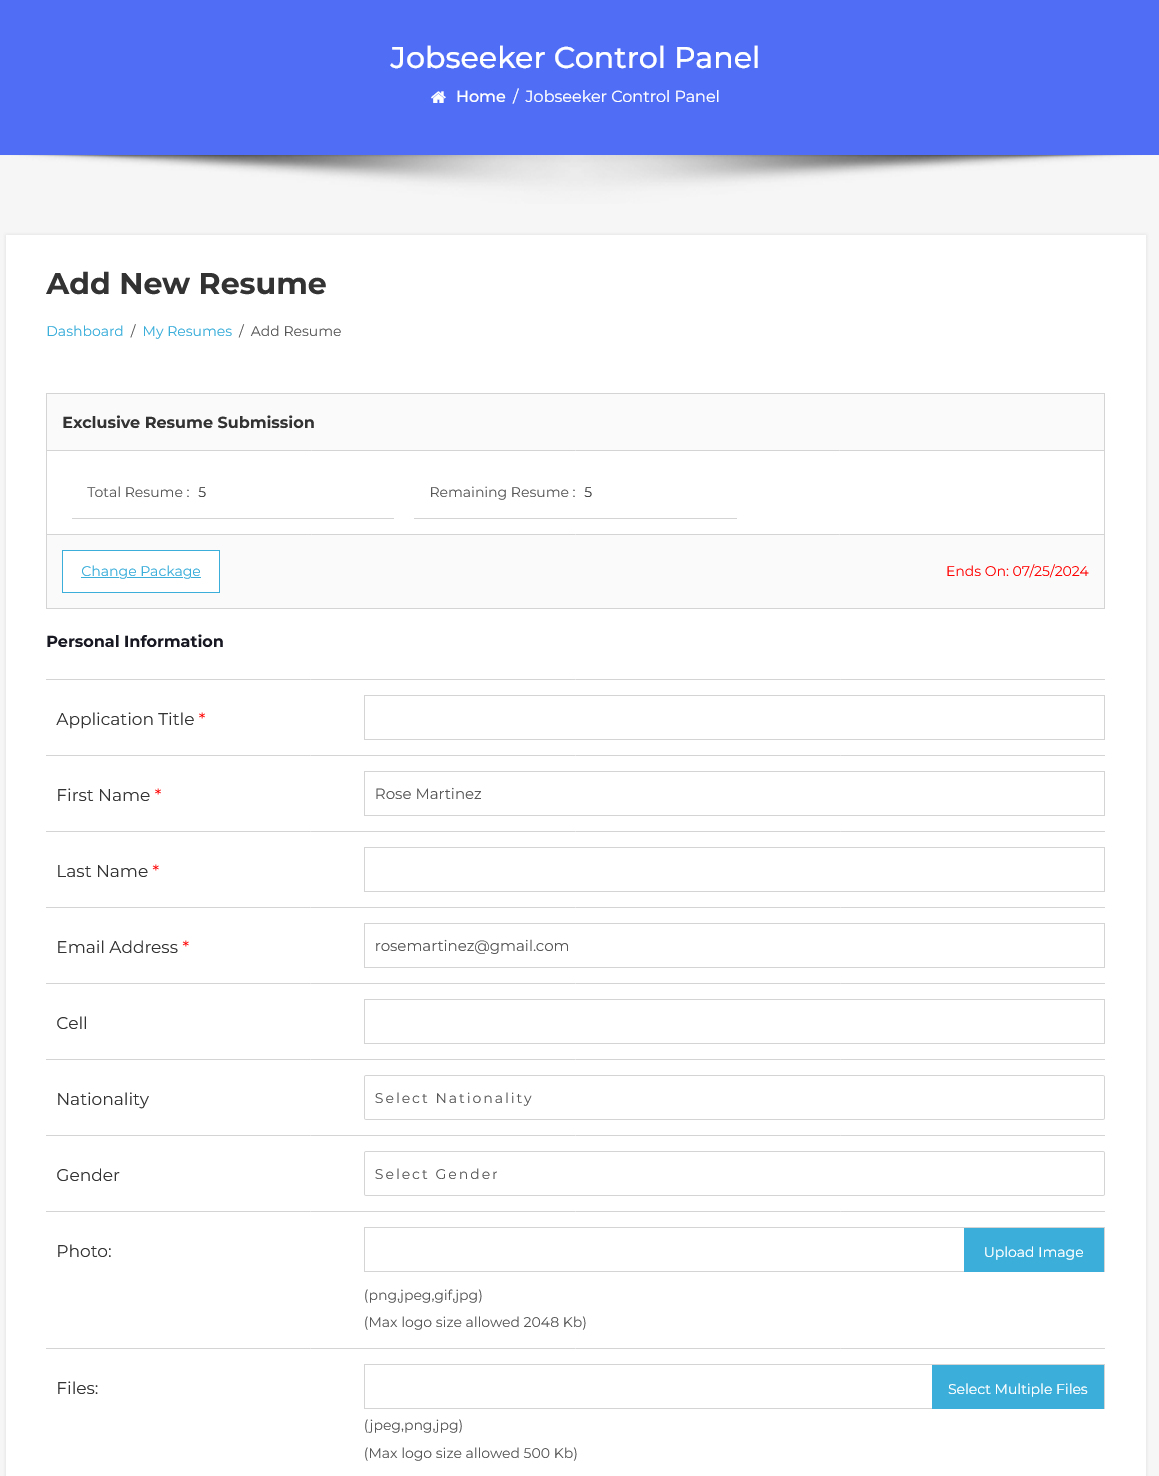
Once the “Add New Resume” form opens, you will see the package details, including:
- Total Number of Resumes Available: Displays how many resumes you can create under the purchased package.
- Remaining Resumes: This shows how many resumes you have left to create.
- Resume Expiration Time: Indicates when the remaining resumes will expire.
Now, proceed to fill in the required details for your resume:
- Application Title: Enter a descriptive title for your resume.
- Personal Information: Provide your first name, last name, email address, and other relevant personal details.
- Resume Category and Type: Select the appropriate category and type for your resume.
- Salary Expectations: Specify your desired salary, indicating whether it’s monthly or yearly.
- Tags and Keywords: Add any relevant tags to enhance visibility.
- Education and Work Experience: Fill in your educational background and previous employment details.
- Skills and Languages: Describe your skills and any languages you can communicate in.
Once you’ve filled in all the necessary information, click on ‘Save Resume’. Your resume will be created and published successfully with the paid submission!
Setting Up Paid Submissions-Per Listing Mode (Admin Side)
To set up paid submissions using the Per Listing mode for resume submissions, follow these steps:
- Navigate to the Admin Dashboard:
- Go to the Dashboard Menu.
- Access Package Settings:
- Click on Configurations.
- Select Package Settings.
- Click on Paid Submission.
- Choose Submission Type:
- In the Submission Type section, select Per-Listing.
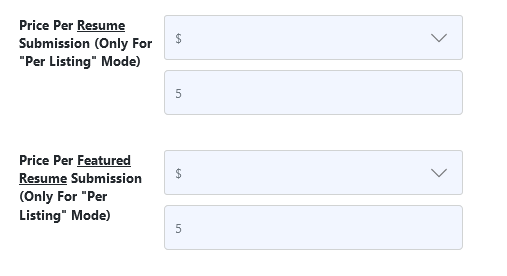
- Configure Per-Listing Mode:
- After selecting the per-listing mode, note that payment will be charged for each resume submission.
- Proceed to set the Currency for the payment.
- Specify the Price for each resume submission.
- Save Configuration Settings:
- Once you have set the currency and price, click on Save Settings to apply the changes.
With these steps completed, you have successfully set up the paid submissions in Per Listing mode for resumes.
Add Resume with Per Listing Mode
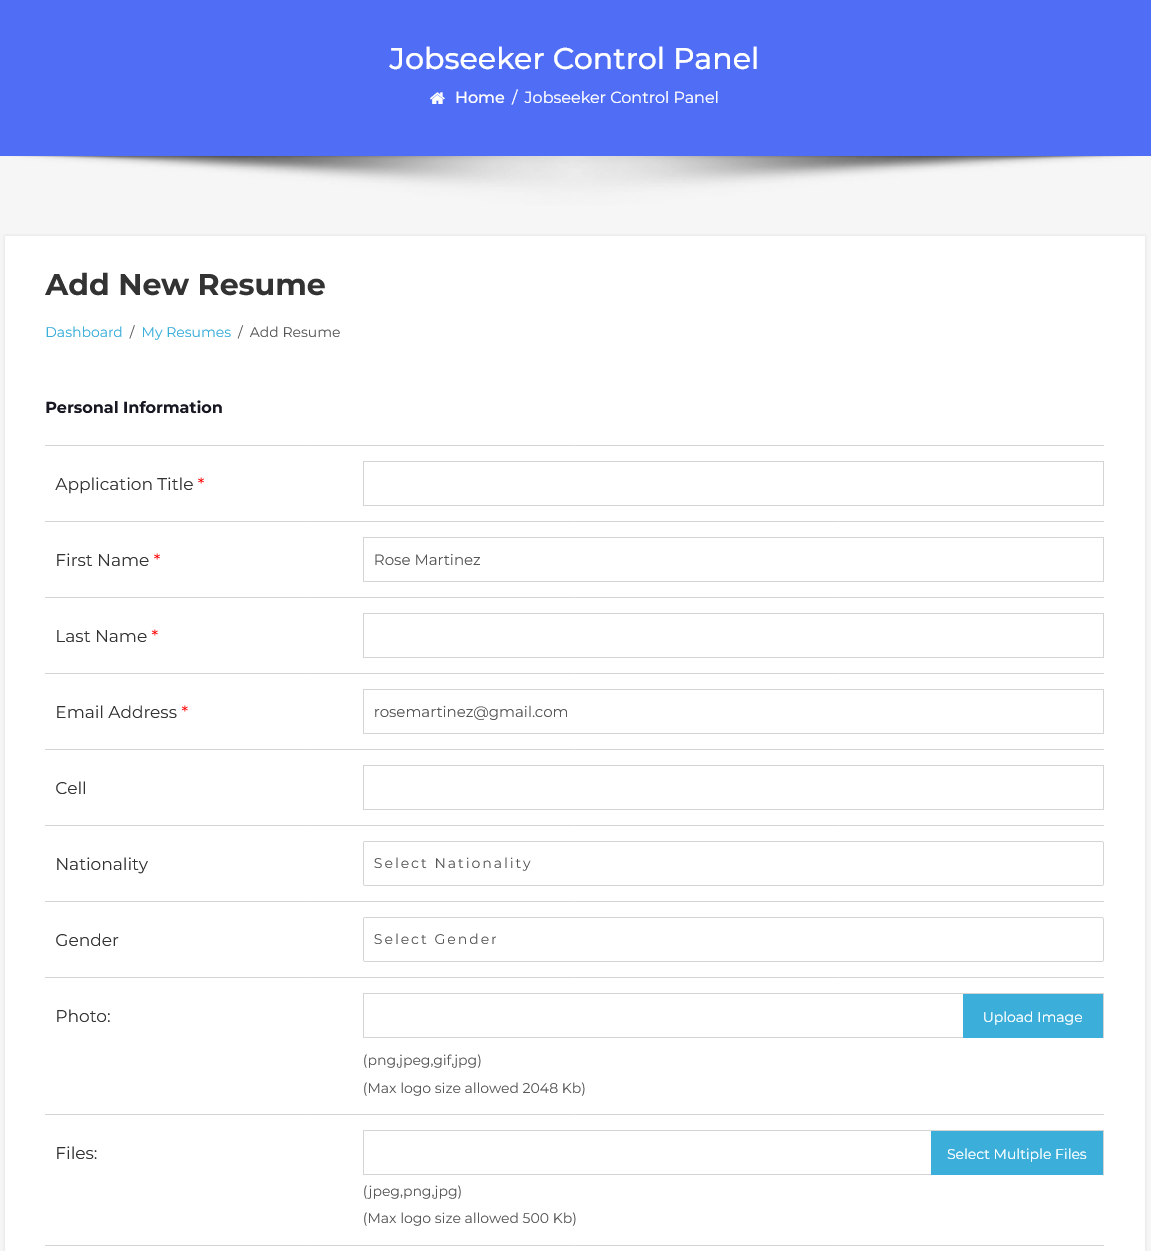
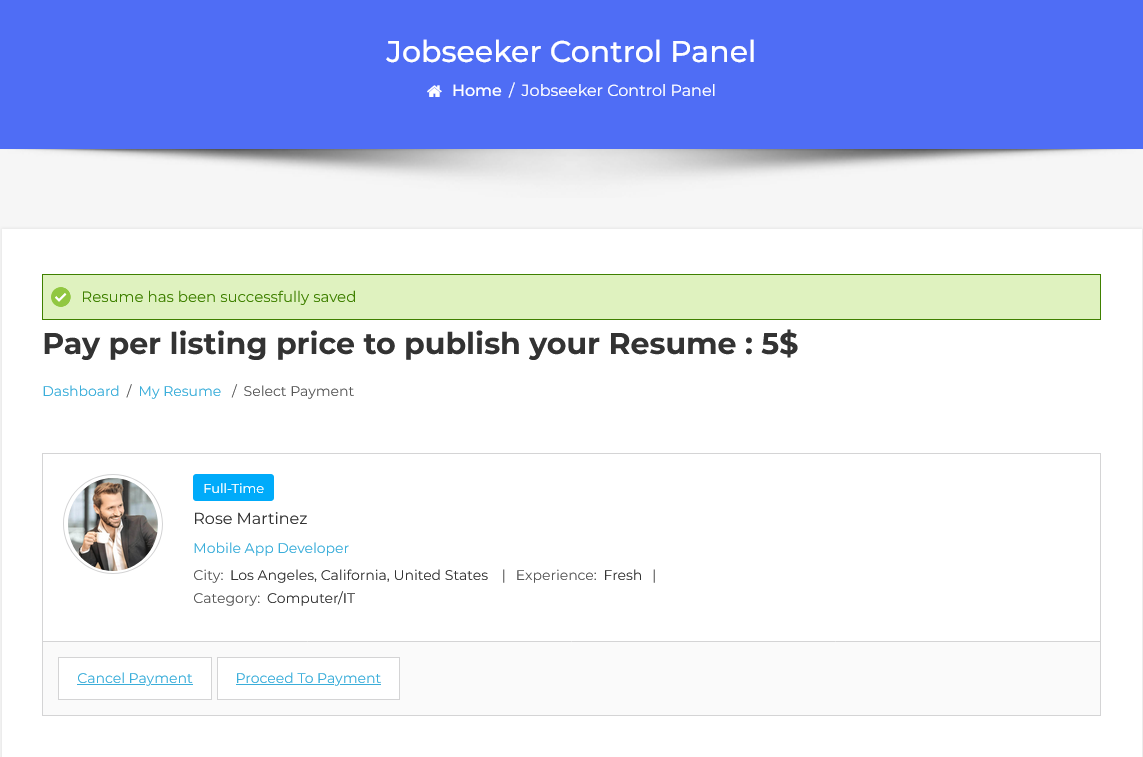
After creating your resume, you will notice that it is not published due to the requirement for paid submissions. To make your resume listing live, follow these steps:
Select Payment Method
To effectively manage paid resume submissions using the per-listing mode, follow these steps:
- Proceed to Payment:
- Click on ‘Proceed to Payment’. This action will trigger a pop-up window.
- Select Payment Method:
- In the pop-up, select your preferred payment method from the available options.
- Complete the Payment:
- Follow the on-screen instructions to complete your payment.
- Resume Publication:
- Once the payment is processed, your resume will be published and become visible to employers.
By following these steps, you will have successfully created and published your resume using the paid submission model.